 I’ve got a big fat glove sewing tutorial up at the McCall blog this week, with all kinds of good stuff on fitting glove patterns and embellishment and working with those tiny dang seam allowances. The angle over there is holiday gift sewing, but of course gloves come up time and again in cosplay too. Since I’d already done a lot of the work altering the pattern and nailing down the technique, I decided to make a second pair while everything was still fresh. This is the result!
For green gloves I’d used view G of the pattern (V7949), but for Sailor Mars gloves I needed view B, the above-elbow version (which works out to be more or less opera length on me, at least in this super stretchy cotton jersey). So I needed to transfer my alterations to the new pattern pieces, and make a few more tweaks to get a really smooth fit.
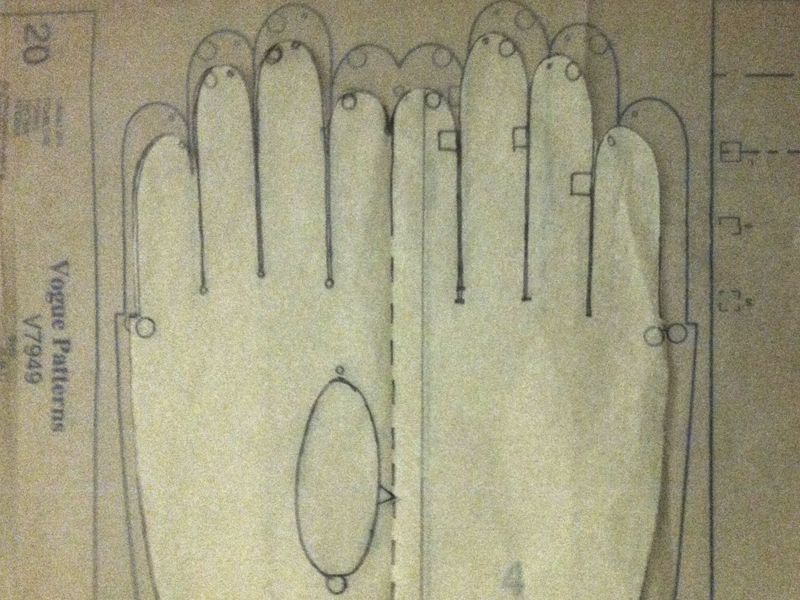 I started by tracing the finger section onto a new sheet of pattern paper. As I did, I took 1/8″ of width out of each side the middle and ring fingers, for a total 1/2″ reduction in the width of the palm. Then I placed the redrafted hand over the pattern for the long gloves and traced off the rest of the arm, blending the patterns together at the wrist.
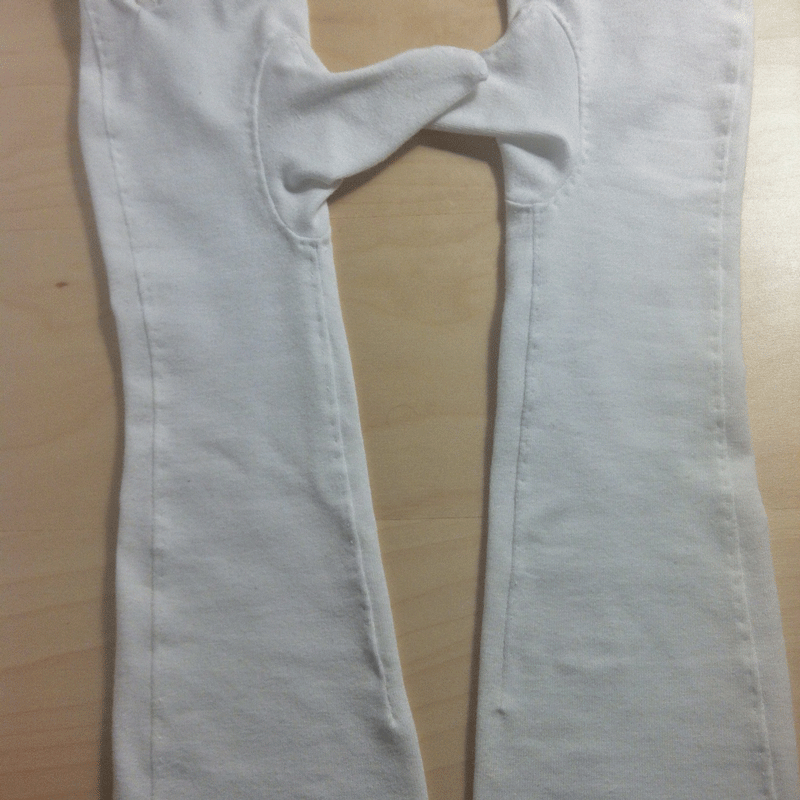
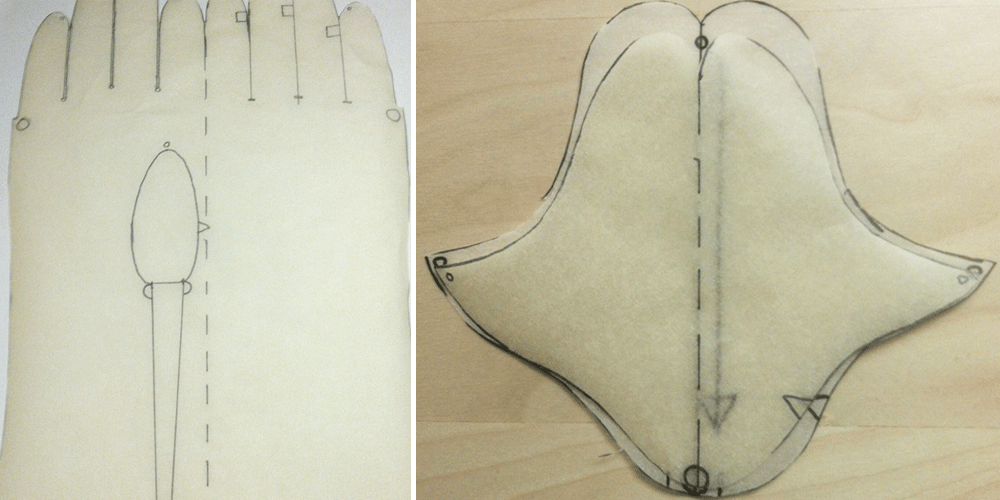 Since my fabric was so stretchy, I decided I wanted to narrow the actual piece instead of using elastic to snug it in at the wrist. I tried on the green gloves and pinched out the excess on both sides of the wrist, and determined I needed to take out about 1/2″ on each side. Because only the outside of the wrist had a seam, this meant adding a dart from the thumb opening about halfway down the forearm. I redrew the thumb hole slightly to give it a nicer shape, but it’s still narrower than it was previously, so I also had to narrow the thumb piece to match. If I didn’t want to make the thumb smaller, I could have split the piece along the center fold line and added a seam all the way down.
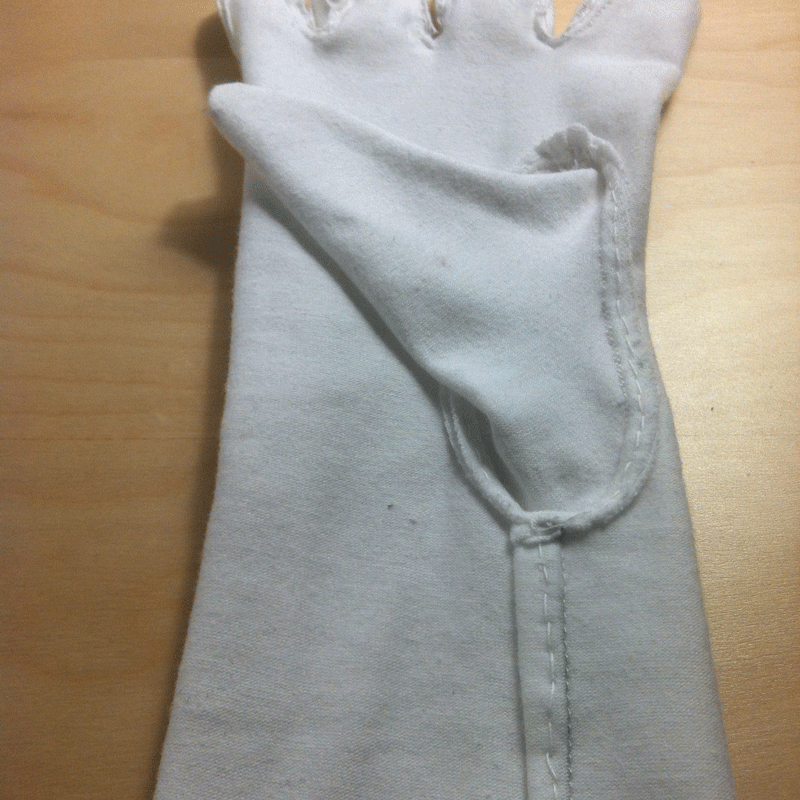
 When assembling the gloves I sewed the dart first, before inserting the thumbs. Then I proceeded more or less as with the previous pair, though without the elaborate embellishment. Because the jersey isn’t 100% opaque and I didn’t really feel like attempting to line these, I trimmed all the seam allowances to an even 1/8″ before topstitching so they’d look nice and tidy.
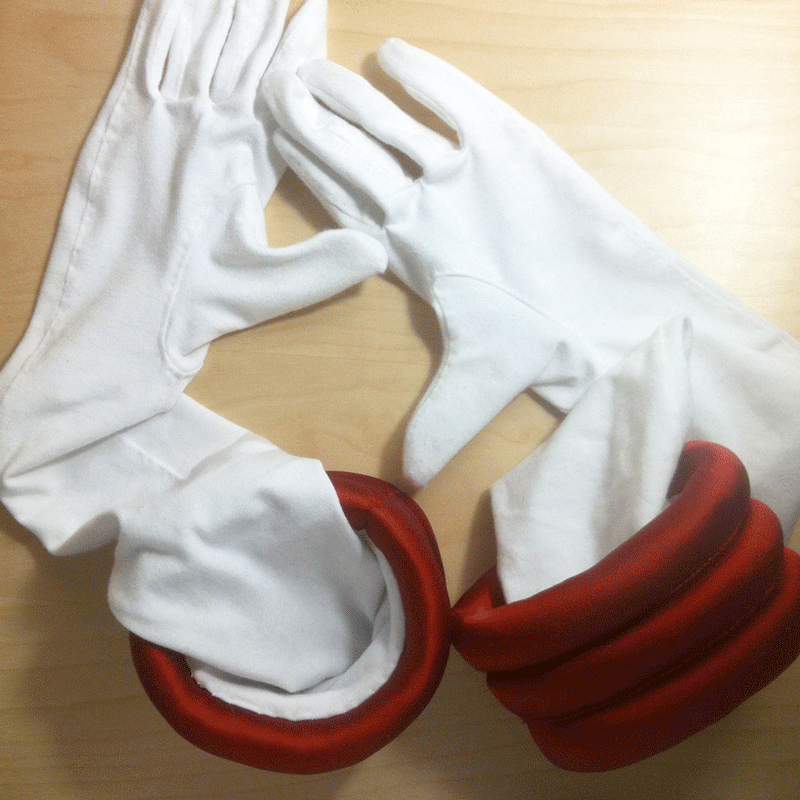
 Of course, I needed a few additional steps to make white opera-length gloves into Sailor Mars gloves. I had some heavy red stretch satin left over from another project, which I knew was gorgeous and perfect for the costume but also a bear to work with because it contains both spandex and acetate. The spandex makes it prone to springing back when pressed, especially when the fabric is this thick, and the acetate melts if you so much as wave the iron at it, so I had to make do with steam and pounding on it with my fists. Oh well!
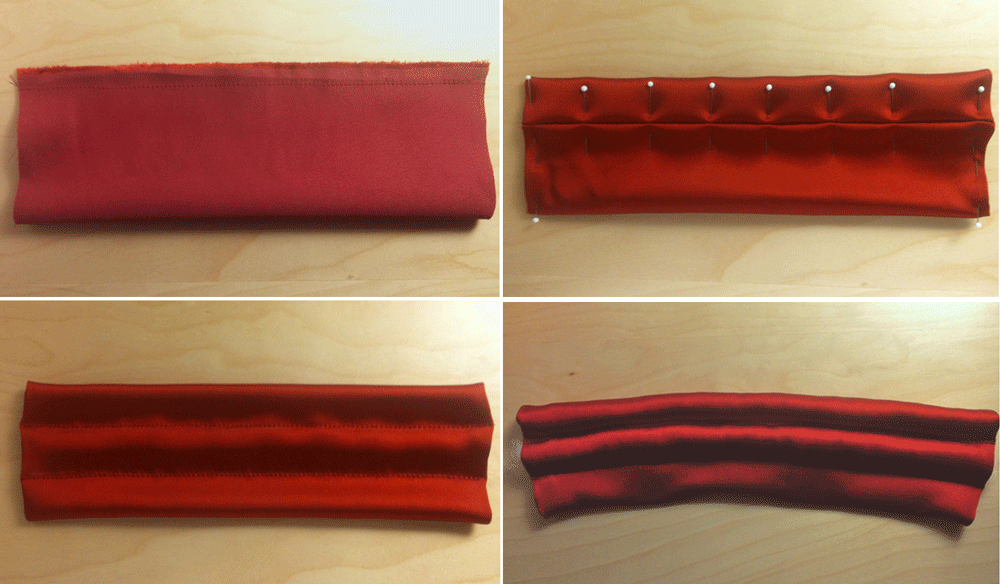 I cut two 7″ by 10″ strips of the satin, and sewed the long edges together with a half-inch seam. I pressed the seam allowances open as best I could, turned it inside out, and rolled the seam to the underside so it wouldn’t show at the outer edge. I tucked the raw edges in at the ends, then pressed and pinned it all flat. From the right side, I marked and topstitched the piece in thirds, using all-purpose and metallic threads twisted together in the needle for extra emphasis. Then I stuffed the channels with polyester fiberfill. To avoid lumpiness it worked best to separate the fiberfill into smallish tufts and stuff from both ends, using a pencil to push it through.
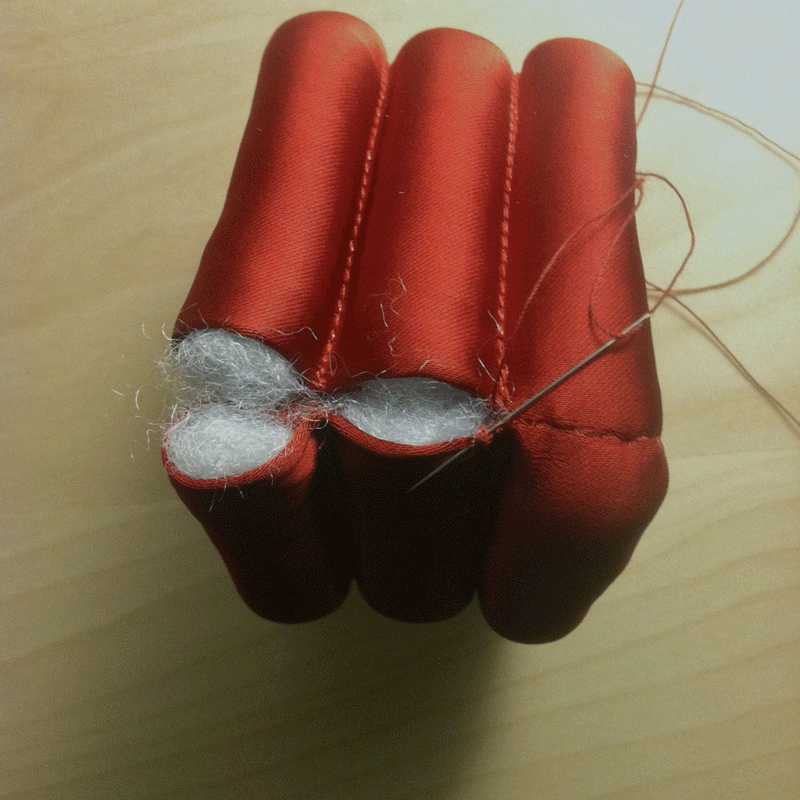 I joined the ends of the channels by hand, using sturdy thread and a ladder stitch. It’s probably not as pretty as it could have been, but it was the easiest way to get a clean finish without flattening the rolls. Once I’d closed up both rolls, it was time to join them to the gloves.
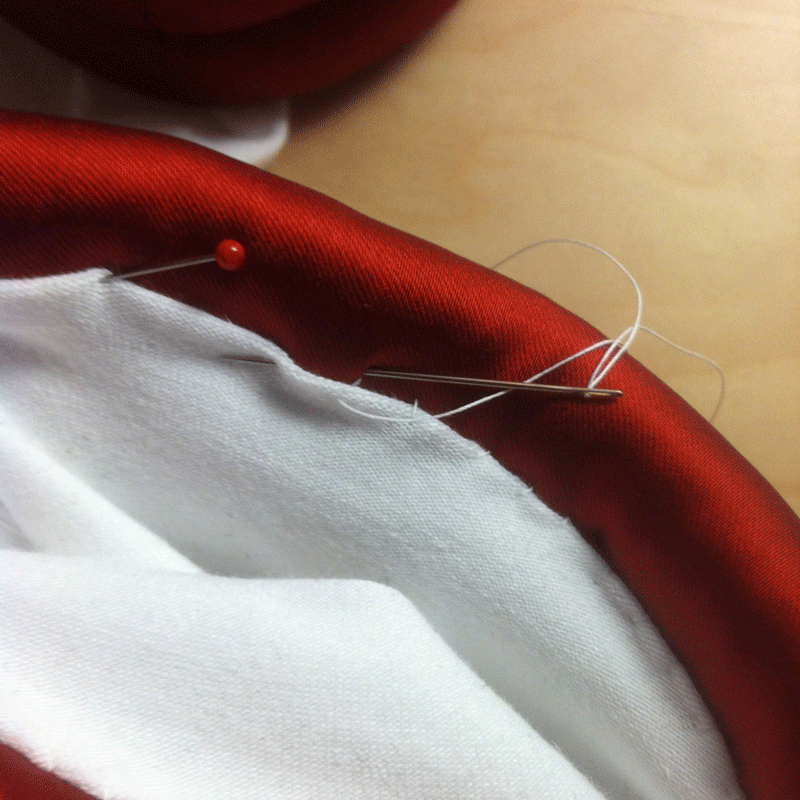
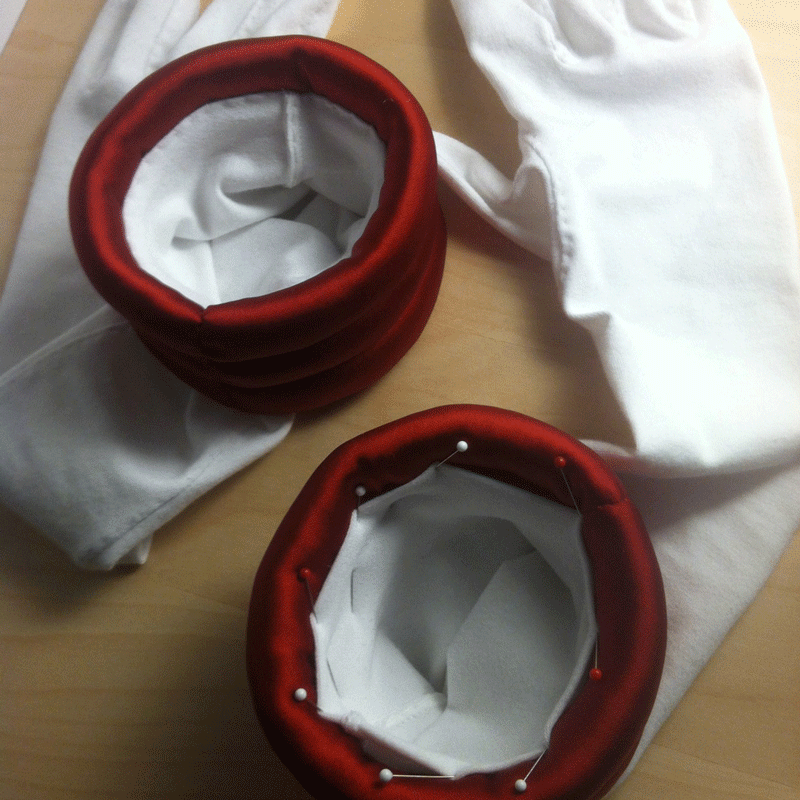 The gloves were about two inches longer than I needed, so I folded the excess to the outside so it would be hidden by the cuff roll. Then I pinned the glove into the roll, about 1/2″ down from the upper edge, and secured it with a fell stitch all the way around, tugging on the opening every so often to make sure it had enough room to stretch. I did the same thing at the bottom end of the roll to secure the free edge so it wouldn’t creep out while I was wearing them. And that’s one piece of Sailor Mars down!