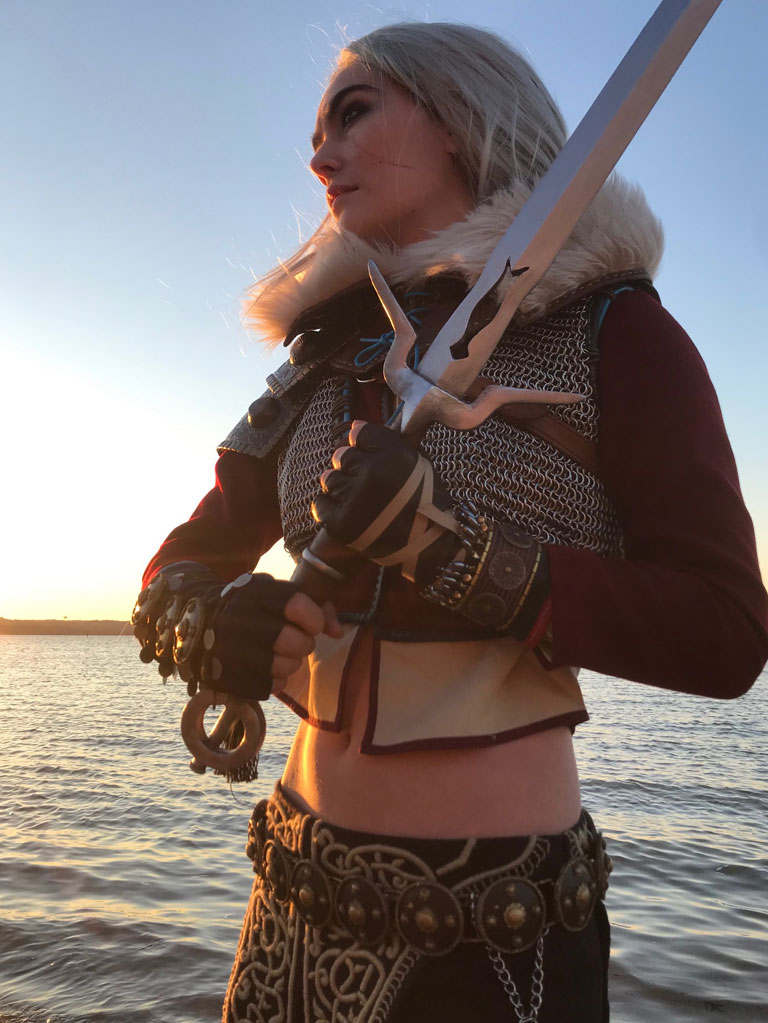
I’m a bit of a contrarian when it comes to props. I live in a small, badly ventilated NYC apartment, and although this hasn’t been a major obstacle on the sewing side of things it effectively rules out a wide range of common propbuilding techniques. But I’m sometimes not very sensible, and I was determined to come up with a way to make Ciri’s sword, so I cobbled something together using about eight different building materials.
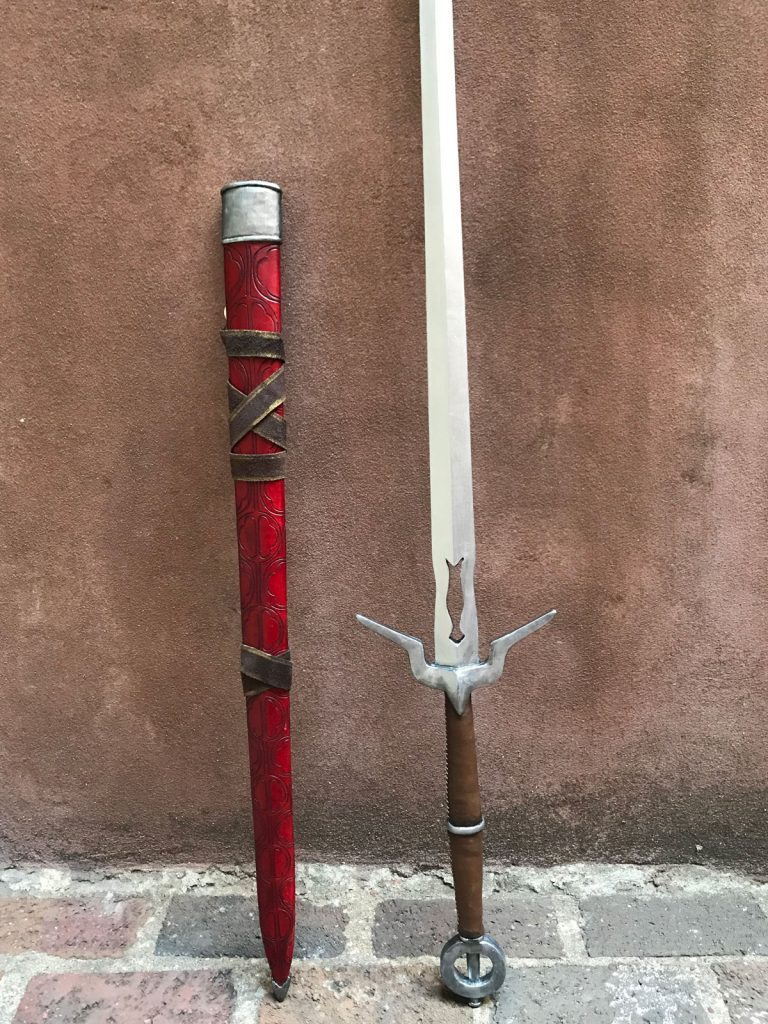
The most distinctive feature of Ciri’s sword is also why I went a bit overboard on the engineering: that stupid cutout in the blade. Even in metal that’s an obvious weak spot; in convention-safe materials it seems preposterous. So my first step was to find a material that would support that cutout while remaining thin, clean-lined, lightweight, and flexible. I didn’t want the sword to end up too heavy, or hard enough to spook convention security, so I consulted with Becka Noel at MWS and she suggested I use Kobracast as my main structural material. That proved to be exactly the right balance of lightweight, springy, and crush-resistant. The other main part of the solution was 1/8″ carbon kite spars, which I ran up the inside of the blade on each side of the cutout to add some rigid support.
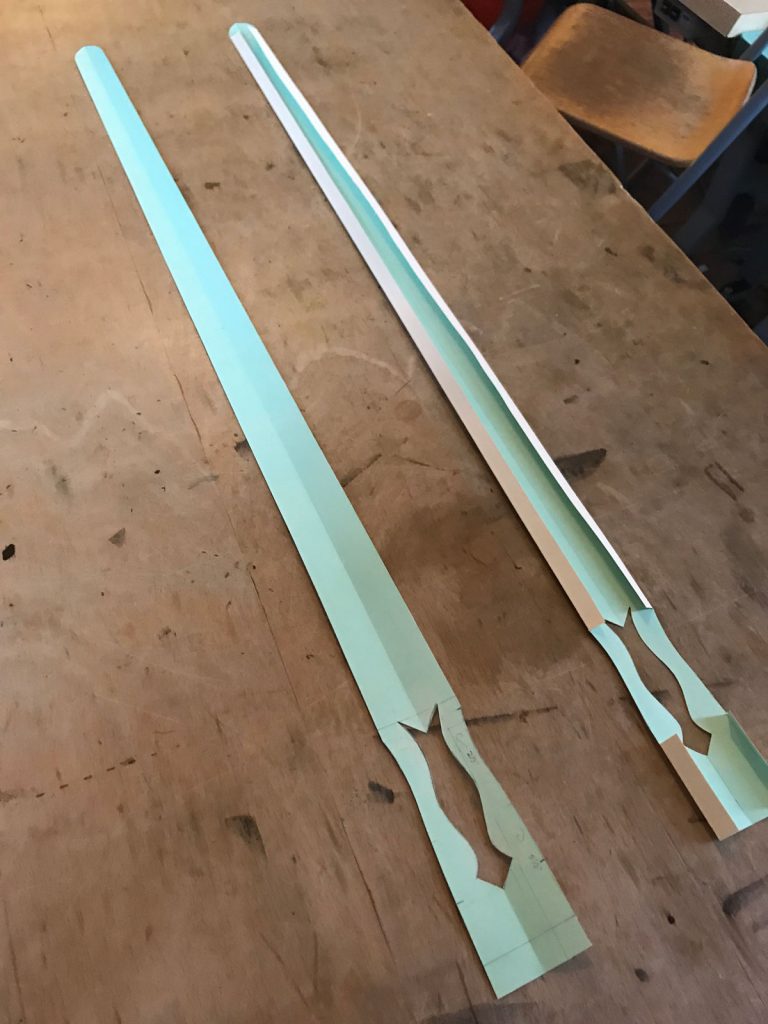
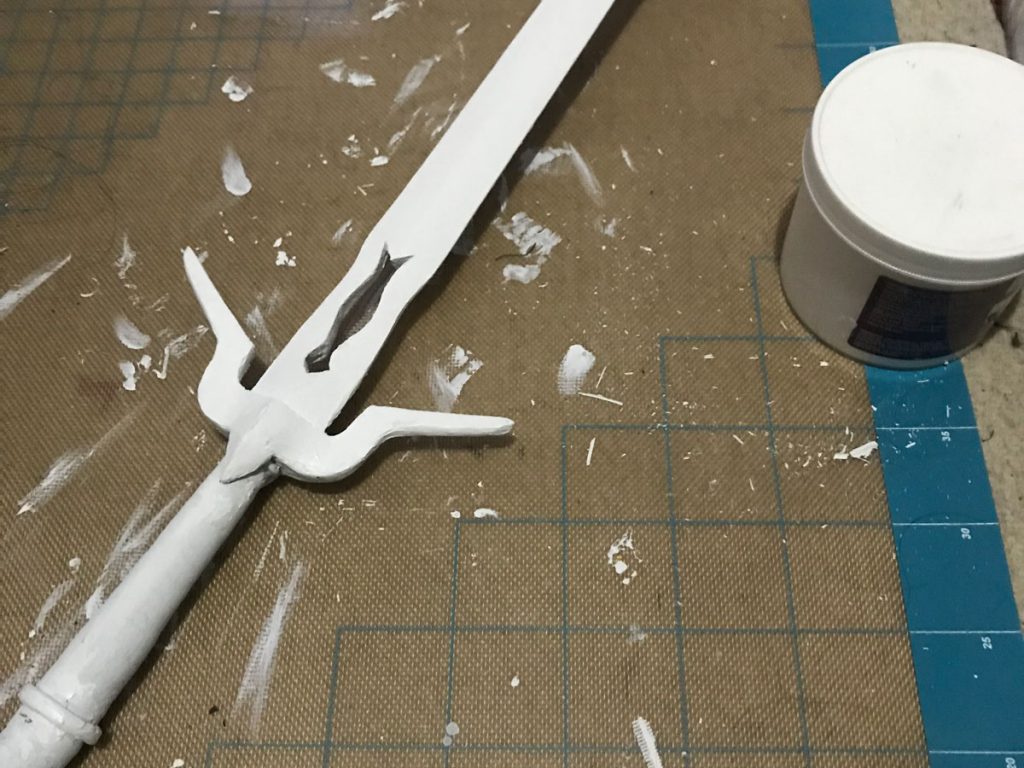
For the outside shell of the blade I used oaktag, which is easy to work with, stiff enough to hold its shape when creased, and thick enough to smooth over the texture of the kobracast. I really like the idea of papercraft for making prop blades, since a creased edge can be perfectly straight and add a lot of rigidity without much weight. The one big drawback to this scheme is that you can’t un-crumple paper once it’s bent, so the backing material needs to be sturdy enough to prevent any buckling.
After a bit of experimenting, I ended up using a single layer of thermoplastic for most of the blade, and doubled up around the cutout and the tip for extra support. The blade was cut out in two halves, each lined with thermoplastic. The kobracast is self-adhesive, so I just nestled the kite spars into one half of the blade and then stuck the other half down on top of it and it held together beautifully. Once it was all cool, I lightly sanded the edges of the blade in order to clean up the lines and reduce the risk of papercuts.
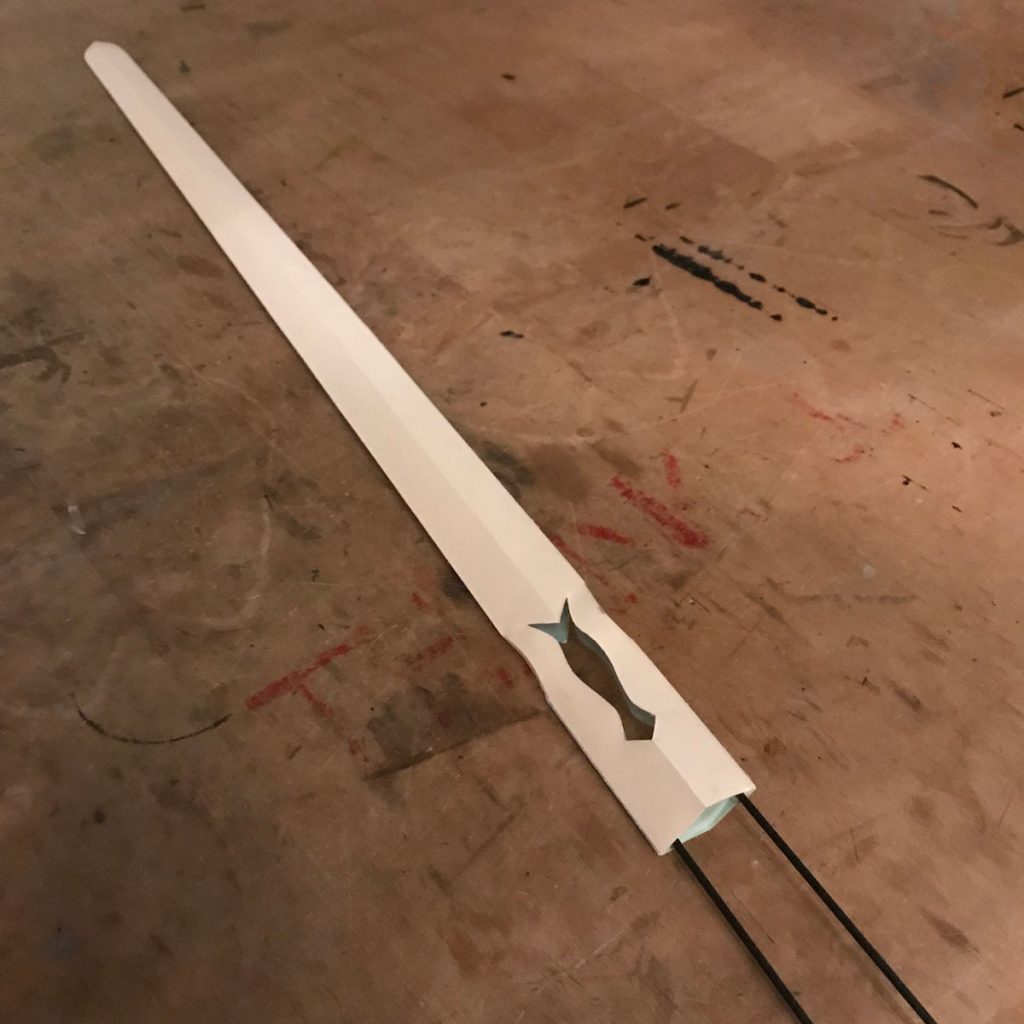
Kobracast does have one significant drawback, which is that it tends to contract slightly as it cools. This can cause it to peel away from surfaces it’s applied to, or force the paper to curl (though the creased edges do a pretty good job of counteracting that.) I had one or two areas of the blade where the kobracast bubbled away from the paper a little bit, and those ended up giving me some trouble when I got to the finishing stage because the unsupported paper warped when I tried to prime it. You kind of have to keep a close eye on it, and avoid reheating the blade once it’s assembled because it’s very hard to repair any internal bubbles at that point.
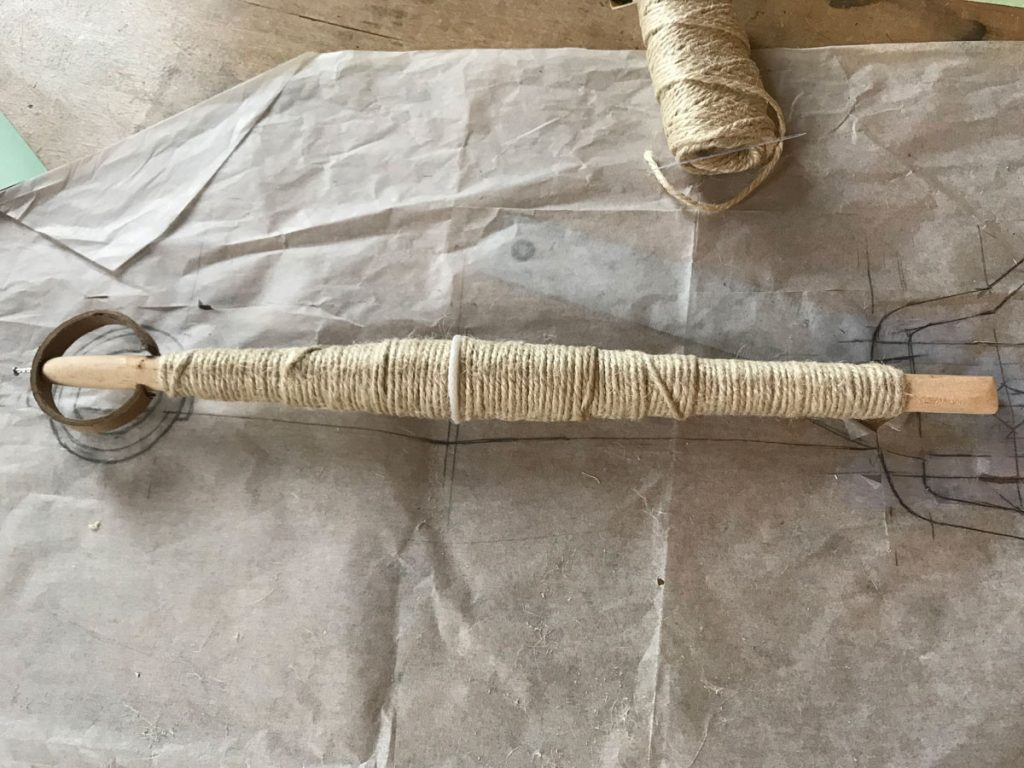
To make the hilt of the sword, I used a wooden dowel cut so that it extended into the blade as far as the base of the cutout. I built up the handle shape by wrapping twine around the dowel, so that I would only need a thin shell of worbla to smooth it out in the end.
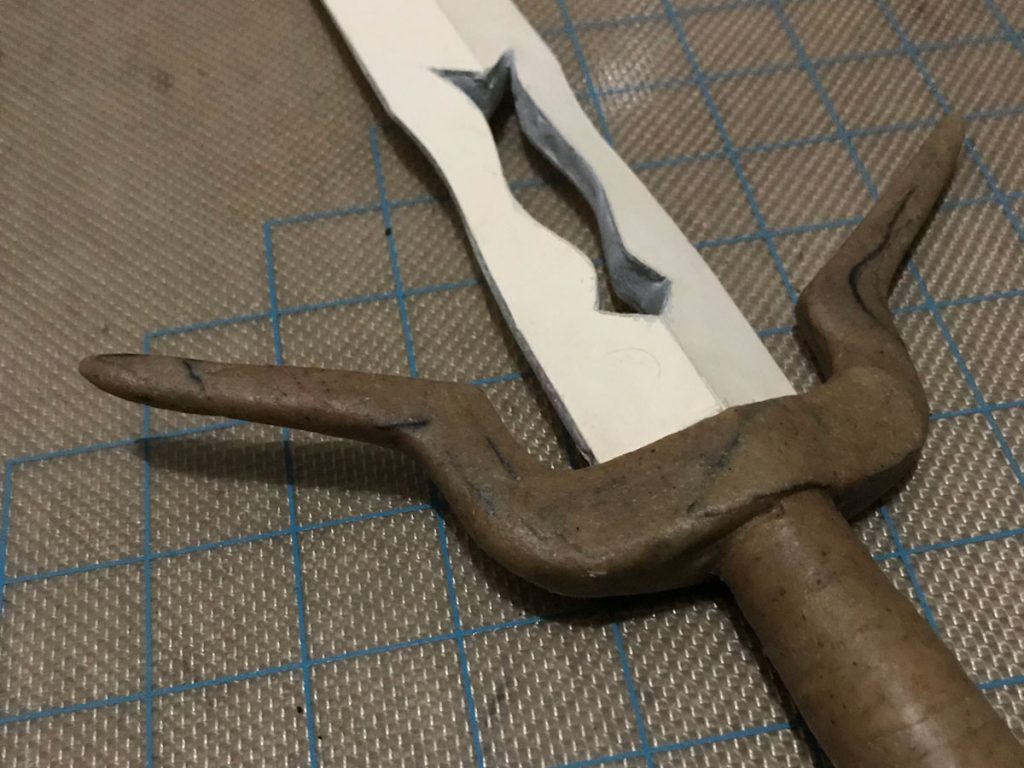
There isn’t a ton of overlap between the cutout and the base of the blade, so I wanted something really solid to reinforce the joint between the blade and the hilt. For that I used Apoxie Sculpt, which is a two-part sculpting compound that sticks like crazy to most materials (at least in the early stages of the curing process) and dries rock hard and pretty darn sturdy. I mixed the Apoxie by hand (with gloves,) packed it into the base of the blade around the dowel to give it a nice solid connection point, and used the extra to fill in around the cutout to give it a nice smooth face. Then I sculpted the pommel and cross-guard by hand from wads of worbla scraps, which requires very little explanation but lots of time and burnt fingers (farewell, fingerprints.)
Finishing the blade posed another puzzle. I knew that any wet primers would risk warping the paper, but spray primers were out due to the aforementioned ventilation issue. I ended up settling on gesso, which is more paste than liquid and sets up semi-flexible and sandable. It still caused some slight ripples in the areas where the kobracast had given way, but I was able to mostly smooth this back out with a few extra coats and some sanding. I might experiment with a metallic vinyl wrap or something on future projects.
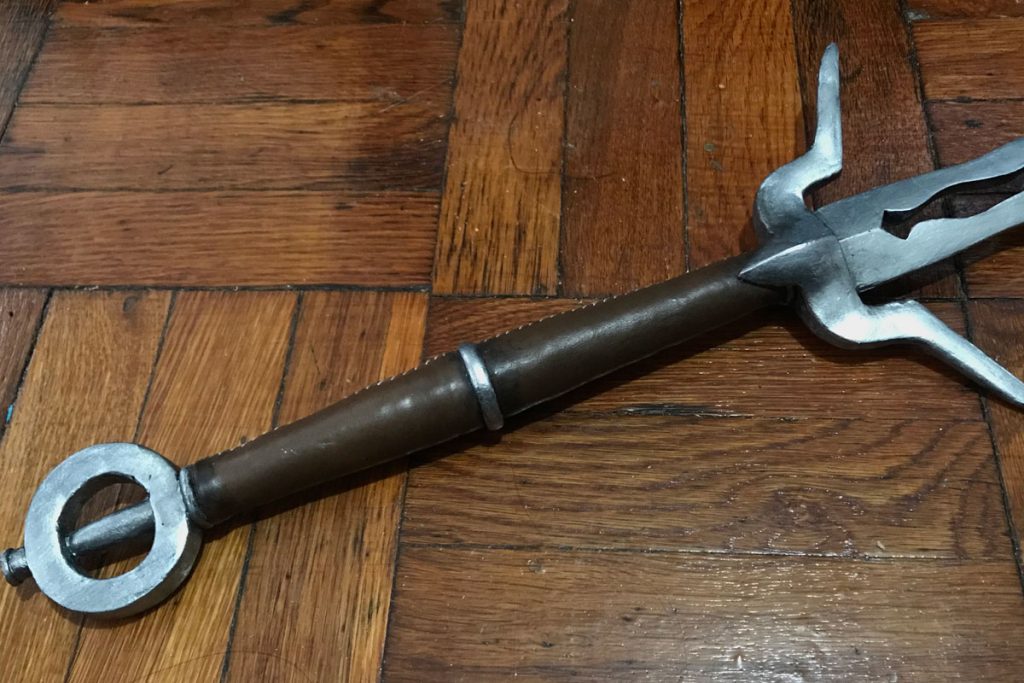
Once the painting was complete, I finished the hilt off with a leather wrap. This needed just a little bit of water-based glue to secure the edges, and was hand stitched to snug it up nice and smooth. I used acrylic paint to give it a little grimy depth around the joints and the sword was done.

My first attempt at the scabbard was a one-night crunch build, and I was never very happy with it. For the competition at C2E2 I upgraded to a tooled leather scabbard, which was more or less my first attempt at tooling but was pretty successful considering!
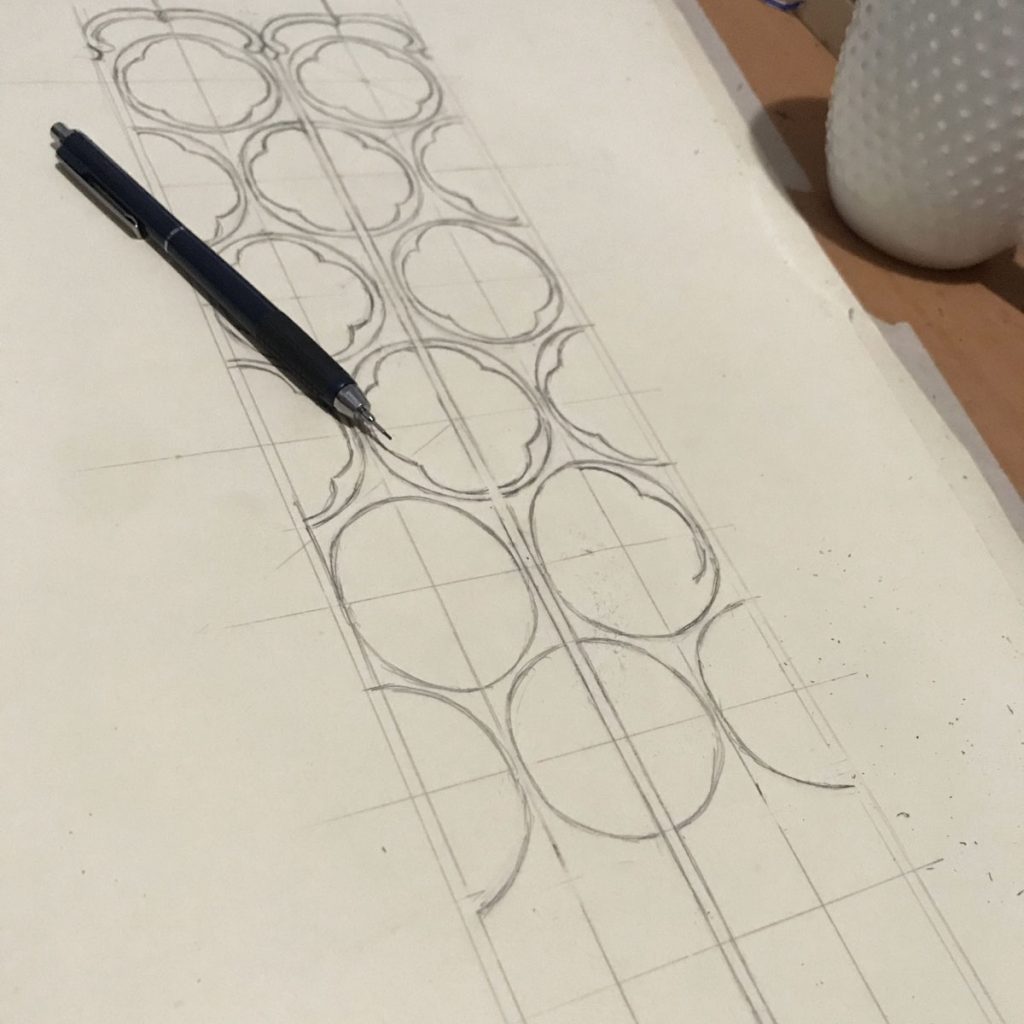
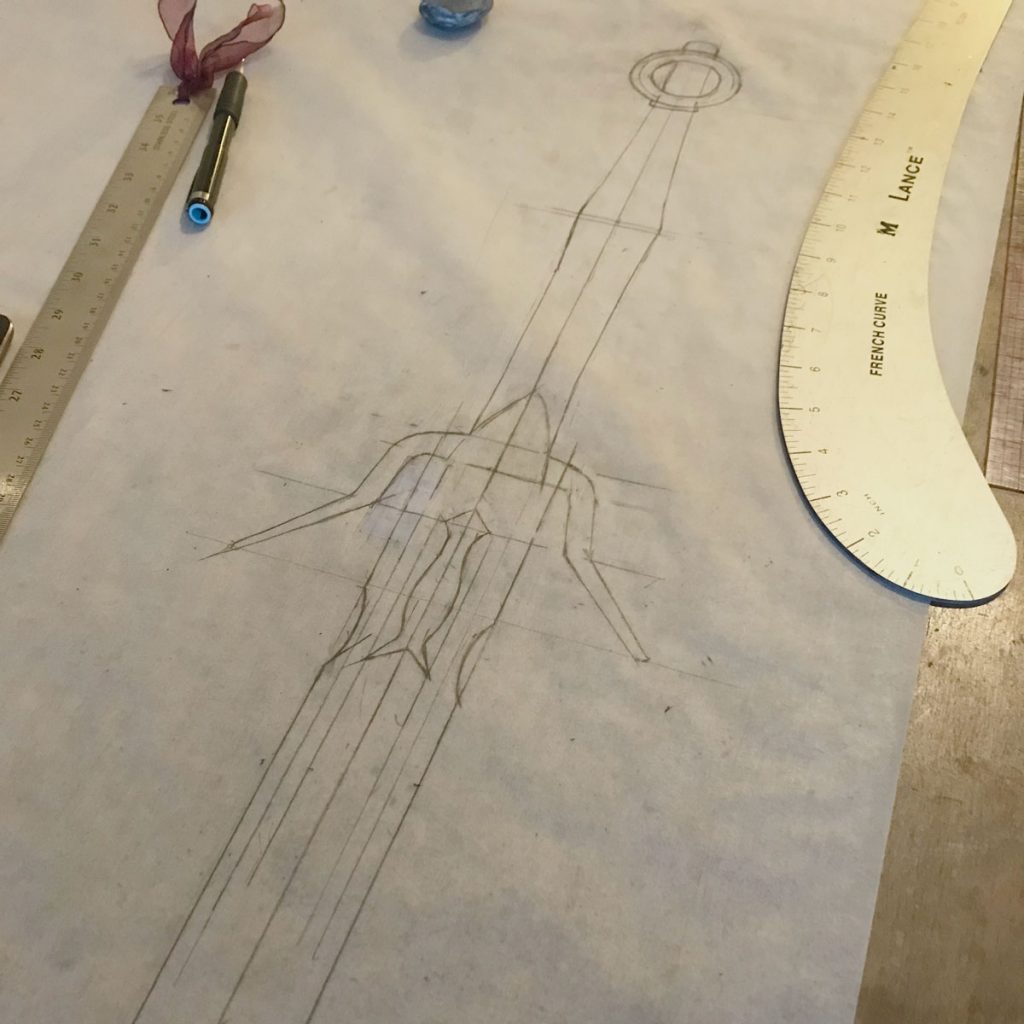
I created the pattern by wrapping the sword in foil and masking tape, then opened it down the back and transferred it to oaktag. I drew out the tooling pattern by hand, using a rough grid to guide the scaling of the design from top to bottom and then freehanding the actual shapes. I copied this to the veg tan tooling leather by rubbing a soft pencil on the back of the pattern, then taping it down and drawing over the design with a ballpoint pen.
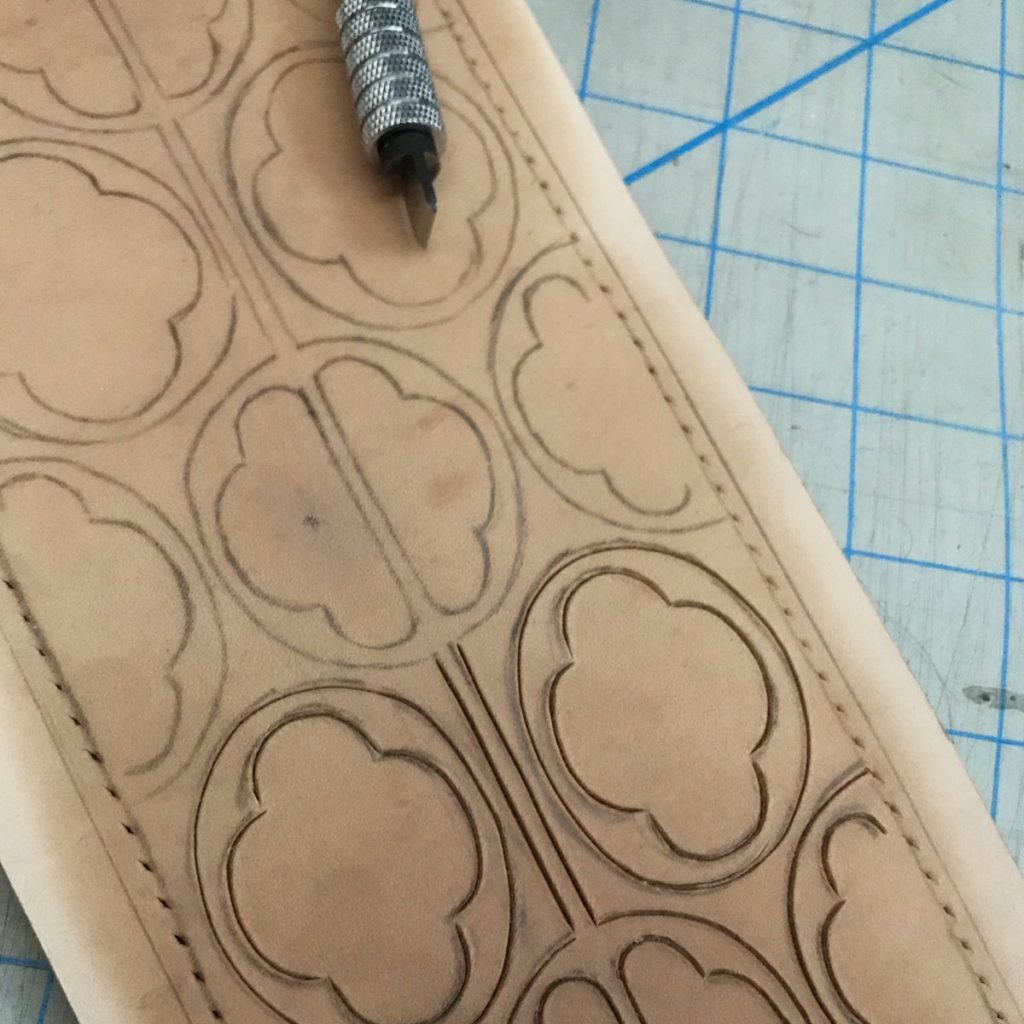
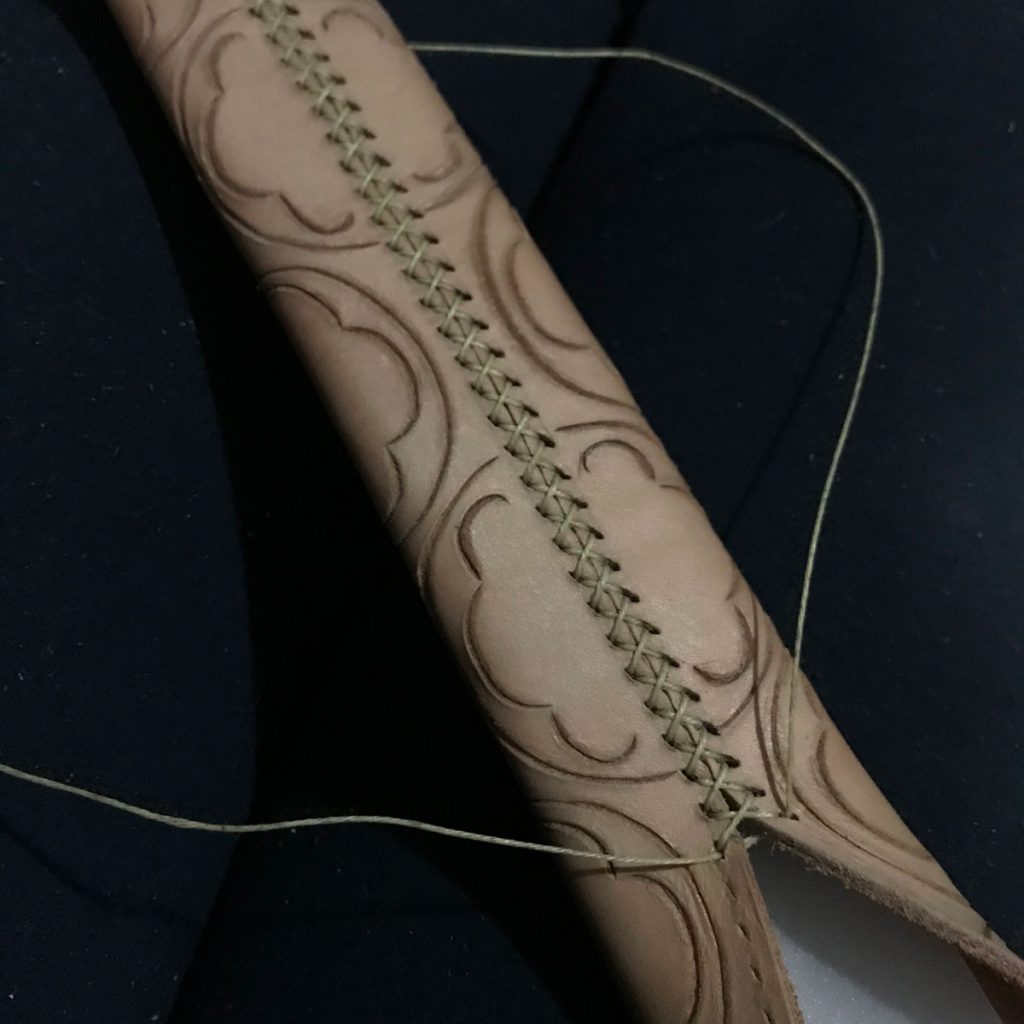
Next I wet down the leather and carved the whole design using a swivel knife. The hardest part was keeping the blade vertical throughout all the rounded cuts, and my first full attempt was a no-go but the second one seemed workable.

The pattern in the art is basically just linework, but I wanted to define the cuts a little more and make them look more polished so I went over each one with a modeling tool to give it a bit of a bevel. I’m still getting a feel for how much moisture to keep in the leather for this sort of thing, but it seemed to work out okay.
To wet-form the leather, I cut two templates for the finished shape from a sheet of flexible plastic and stitched the center back seam closed over them. Once this was finished, I wedged a dowel between the plastic layers to open up the shape (I’d shaved the end of the dowel down into a flattened point to get a nice smooth taper down to the end.) I also added a couple scraps of cardboard to ensure the finished shape would be open enough to fit the sword smoothly.
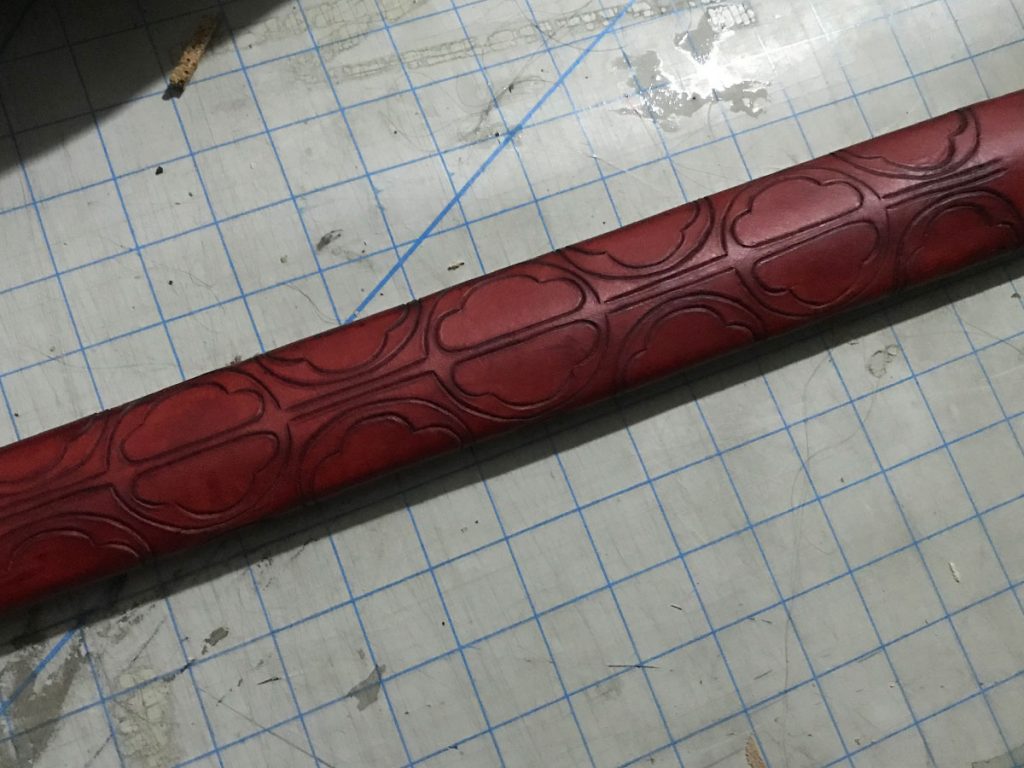
After the scabbard was completely dry, I re-wet the surface lightly and brushed the whole thing with water-based leather dye ordered from Lisa Sorrell. I’m kind of an impatient dumbass so I dove right in without even testing on a scrap, but I’m happy to report that these dyes RULE and I got a super rich deep color with one and a half coats and pretty economical dye usage. I let the dye dry then finished it with a light coat of wax.
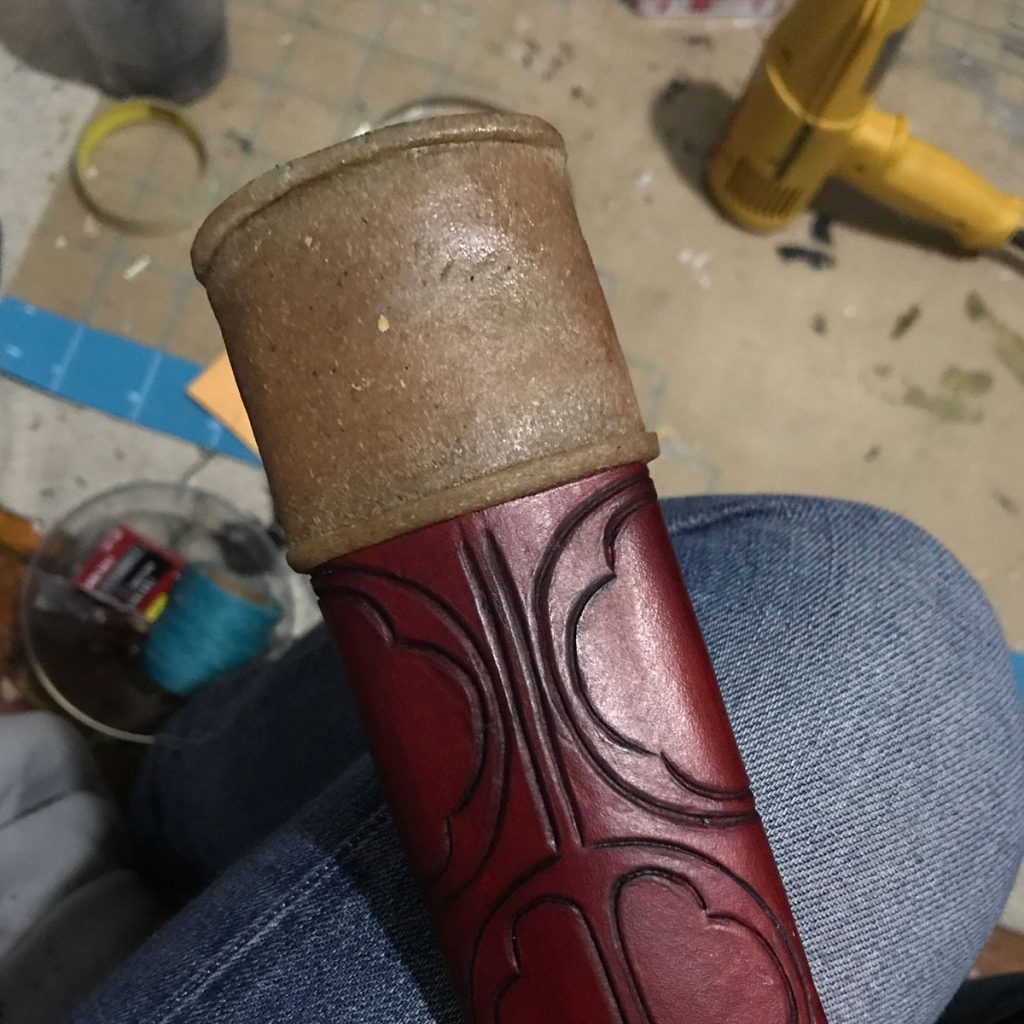
Interestingly, the shape of the scabbard end caps seems to differ slightly between the basic and dlc versions of Ciri’s outfit, although it’s clearly the same scabbard otherwise. I went with a not-very-successful hybrid for the first version, but this time I went with the look shown in-game for the DLC outfit. I roughed up the ends of the scabbard to help the worbla stick, sculpted the details by hand, then painted with flexbond and metallic acrylics.
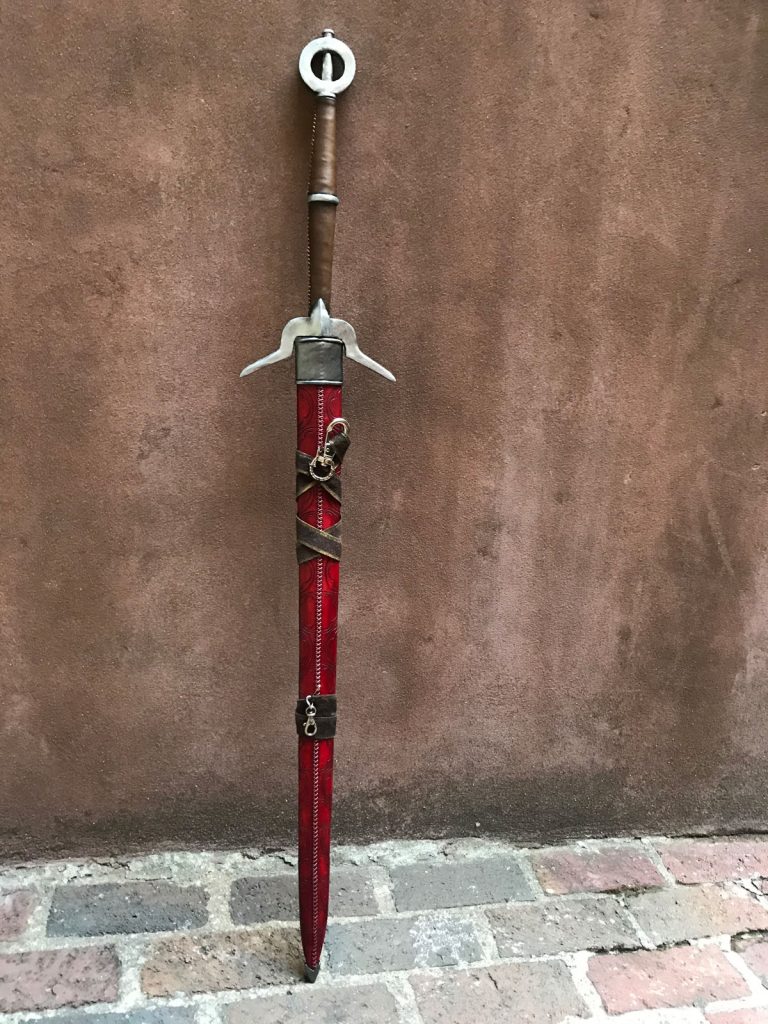
The attachment straps I created from leather scraps, highlighted at the edges with brass-colored metallic acrylic. I wrapped them and stitched the ends to themselves to secure the shape, then added clips to attach to the armor strapping and belt. This way the scabbard doesn’t swing when I’m wearing it, and it can be removed when the asymmetrical weight gets too uncomfortable (which it does, even though the sword is very lightweight overall.)