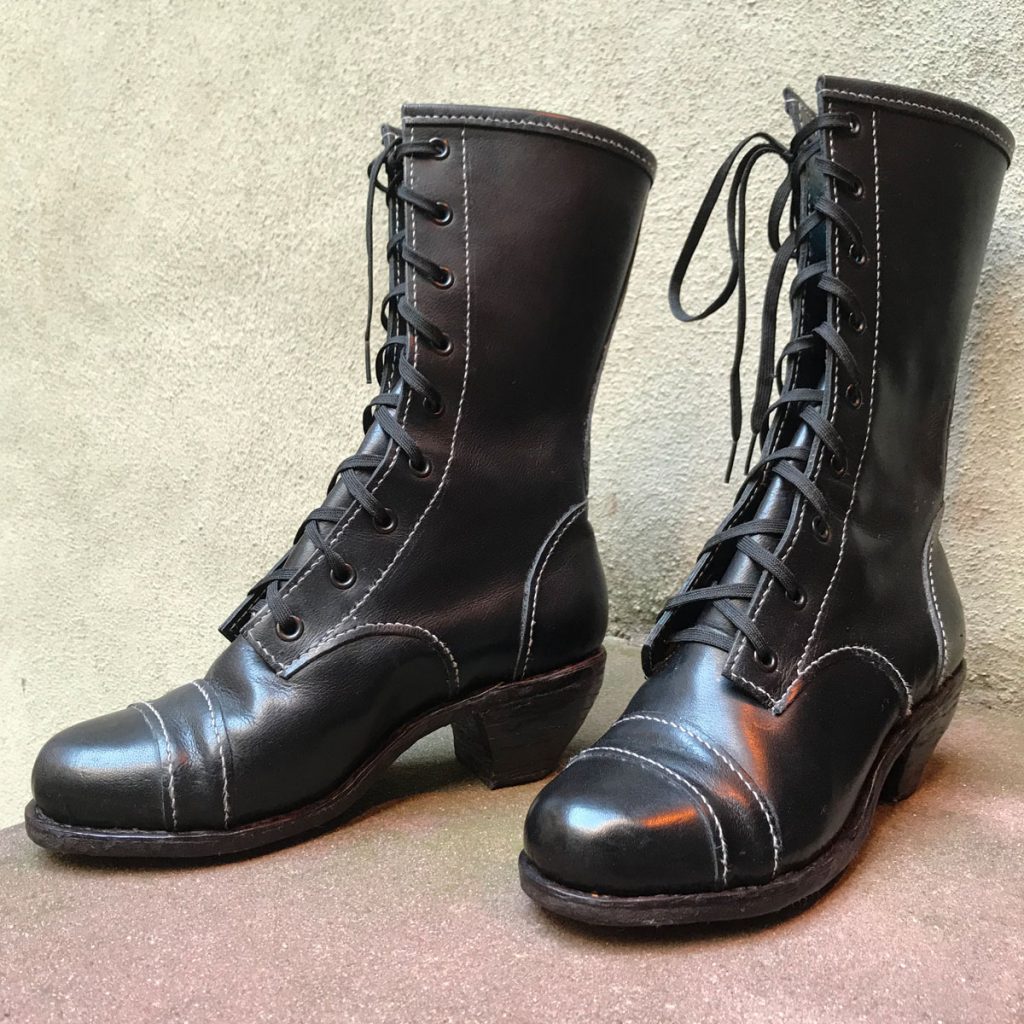
Jumping ahead a bit in the Ciri build diary to talk about the very last piece, because I just finished them and I WANT to. I decided early on that I wanted to try to make fully accurate boots to go with the rest of the costume, and the first couple steps here were actually accomplished way back around October of 2018. That said, I made a poor leather choice my first time around, and ended up with thin, floppy uppers that looked wrinkly and didn’t seem like they would hold up for long. So I restarted from the beginning about a month and a half ago, and after some 85 hours of intense and physically exhausting work I had a wearable pair of boots to show off at C2E2.
Let me say before I dig in here that I am not at all an expert, and I’m sure that at some point a real shoemaker is going to wander in and cringe at all the stuff I’m doing wrong. Someday maybe I’ll be able to afford a real class, but in the meantime I’m learning and experimenting and breaking a lot of tools (rip at least four specialty awl blades, oops.) If you want to learn to do this yourself though, I highly recommend going straight to the experts at I Can Make Shoes, Brooklyn Shoe Space, Marcell Mrsan, Bespoke Shoes Unlaced, etc. That last blog in particular is a fantastic trove of information, and if you read back through the archive you’ll know about as much as I do about this whole business.
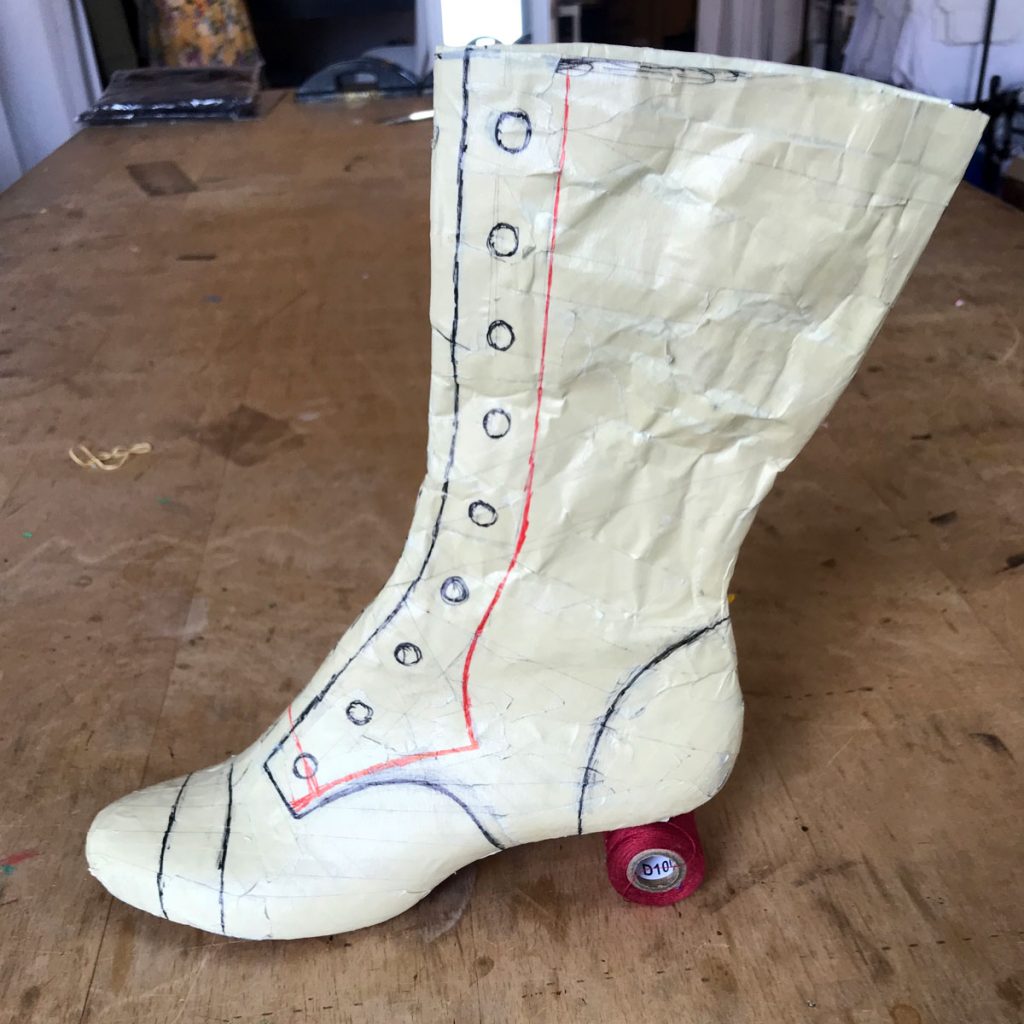
Now, on to the boots! The first step in most shoemaking projects is to find a suitable last, and I was very lucky to find a vintage pair in the right size, shape, and heel height on etsy. I created the pattern by taping over the boot, using tinfoil and more tape to extend the shape up to the appropriate boot height.
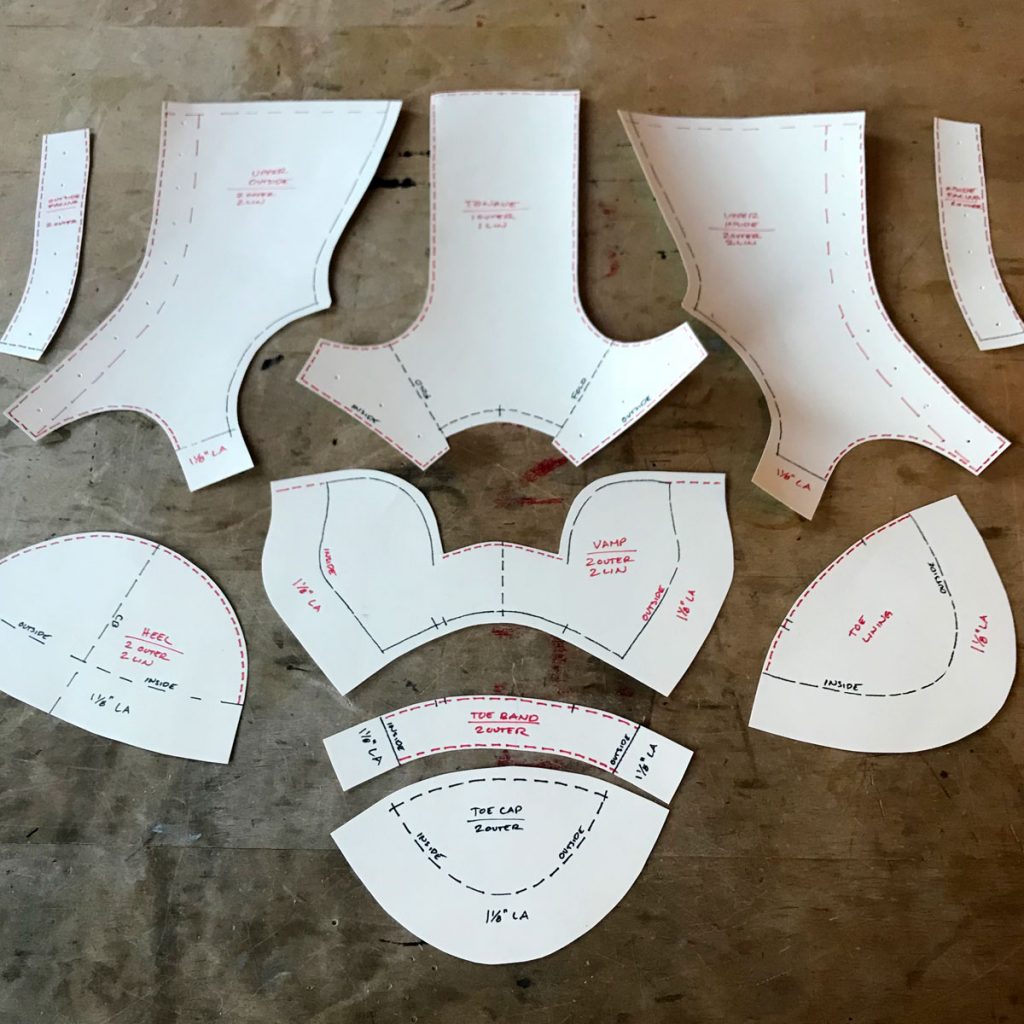
I drew in the seamlines as well as the outlines of the internal facings, cut along the lines to remove it all from the last, and copied it onto oaktag with appropriate seam allowances. I decided to use lapped seams for most of the construction, especially on my second time through when I was using a thicker leather that didn’t crease well. I also allowed about an inch and a half around the lower edge as a lasting allowance. (This allows the top of the shoe to wrap around to the underside of the insole and hold the shoe together.)
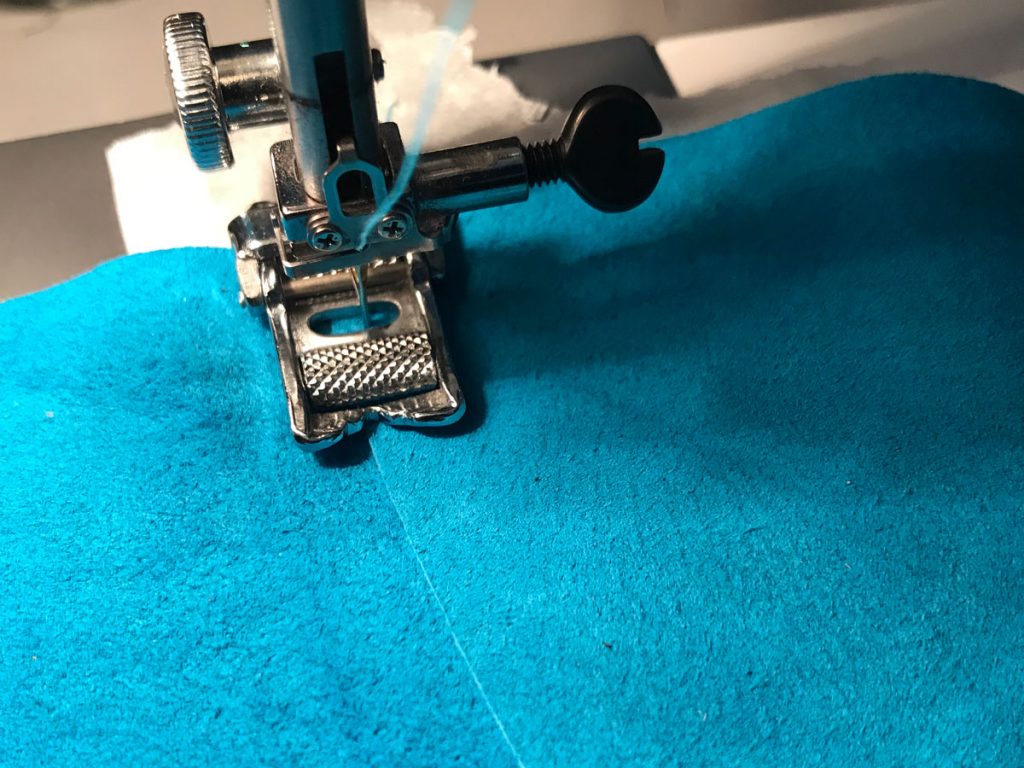
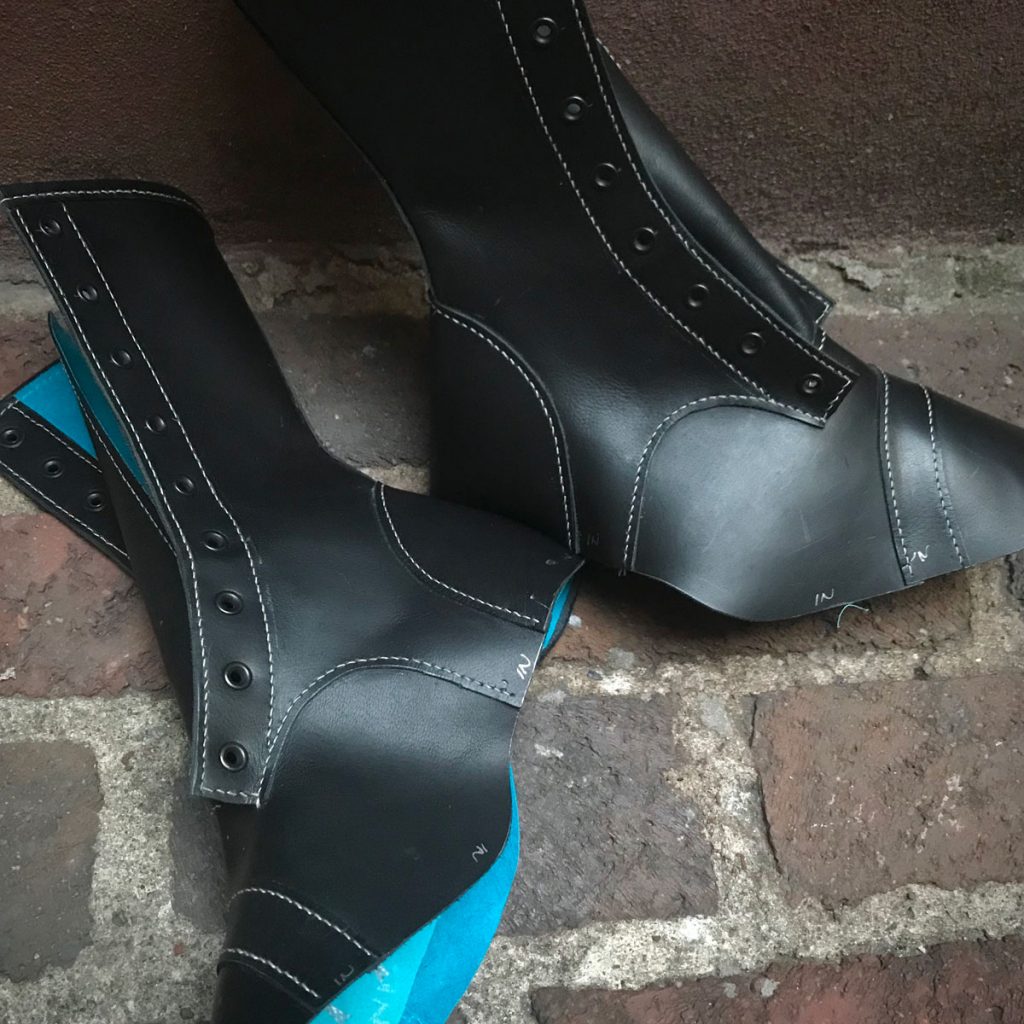
I cut my pieces out of a lightweight but stiff leather (I think I was told it was buffalo) and the same aqua pig suede that I’d already used elsewhere in the Ciri outfit. I planned to sew the outer layer by hand, but the suede wouldn’t be visible and wouldn’t really benefit from heavy thread so I sewed it by machine (after first gluing the lapped seams to hold them in place while I stitched.) Most sewing machines REALLY don’t like thin mushy sticky materials like this, and mine is no exception – I ended up using tracing tissue underneath the pieces and a roller foot on top to make it behave.
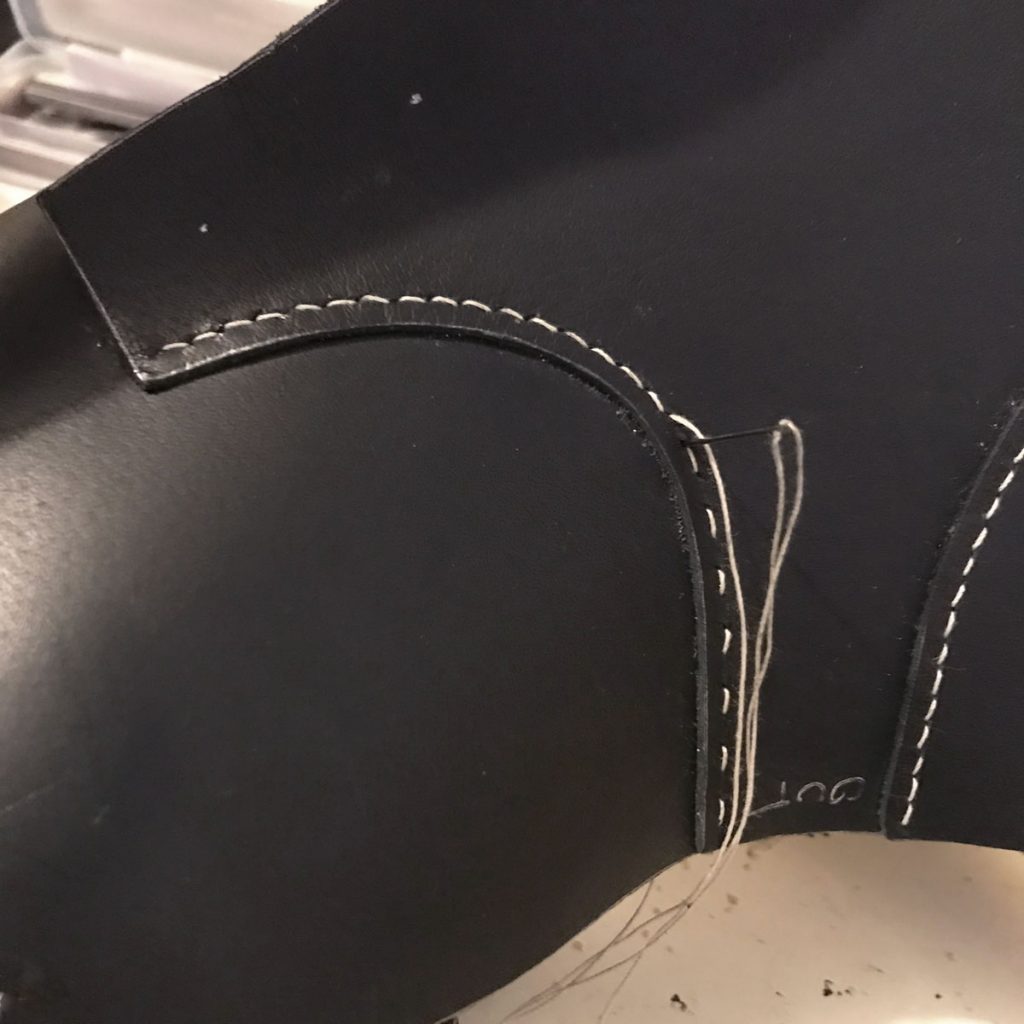
Because I hand sewed all the other visible stitching on Ciri, I wanted to use a hand saddle stitch for the main assembly of the uppers. I secured the overlaps with a water-based leather glue, used a set of 4mm stitching punches to create evenly spaced angled holes, and stitched up and back with light warm gray topstitching thread. I’d done samples with white thread the first time around, but felt that it was a little too harsh against the black and didn’t make much sense in the setting anyway. It’s more conventional to use two needles at once for saddle stitching, but I found it was faster for me to get into the rhythm this way and it ends up looking the same as long as you keep the thread crossings consistent.
I spent some time studying my favorite purchased boots, and one of the details I noticed was a kind of mock binding at the upper edge. It wraps around the edge of the outer layer of boot leather, but it’s shaved thin on the inside and passes underneath the lining, I assume because it helps to reduce rubbing at the ankle and maybe makes the lining a little easier to insert. So I glued on the binding first, before inserting the lining, and left it clipped to dry in shape.
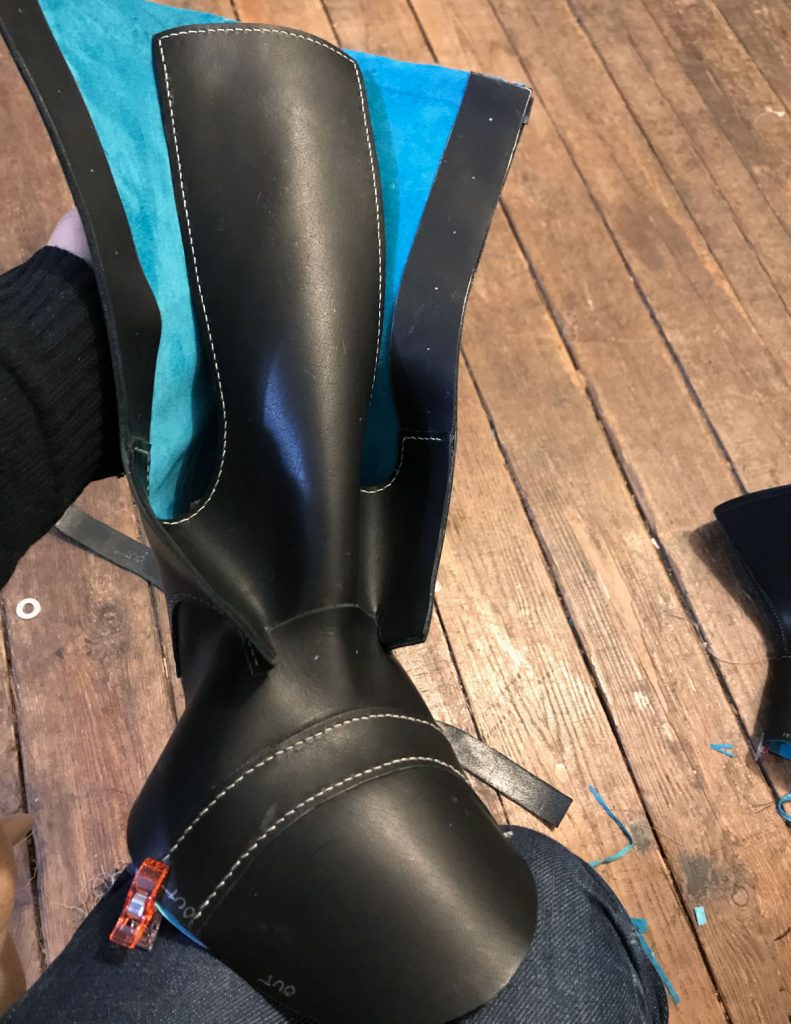
The lining is cut nearly the same as the outer layer, but with a plain toe cap seam instead of the band across the toe. It’s glued to the upper along the lacing edge, but trimmed back slightly to keep it from showing between the layers. The tongue, which extends at the sides to join into the front facings, is lined separately and then inserted between the outer layer and the lining with a little bit of glue and stitching at the base. Then the facings are turned back and glued on top of the lining at the lacing edge, and everything is secured together with topstitching around the top and front opening. Grommets are the last thing, and I would have liked to get longer ones to get through the thick layers but after some strategic hammering these seem to have mostly done the trick.
All of this so far would be more or less the same for various boot construction methods, but here I diverge from the techniques that would be conventional for most shoes you can find in stores today. Commercial shoes are made using a cemented process, which basically means they’ve got a shitload of nasty solvent-based contact adhesives holding them together. I work in a small apartment with no meaningful ventilation, so solvents are a big nope for me unless I can use the fume hood at work (though I don’t love them even then.) That leaves a much older and more difficult method, hand welting, which today is used mostly on very high-end and custom work but would be perfectly normal in the kind of fantasy-medieval villages Ciri tromps through. I am Not Good At This Yet but I sure learned a lot from struggling through it!
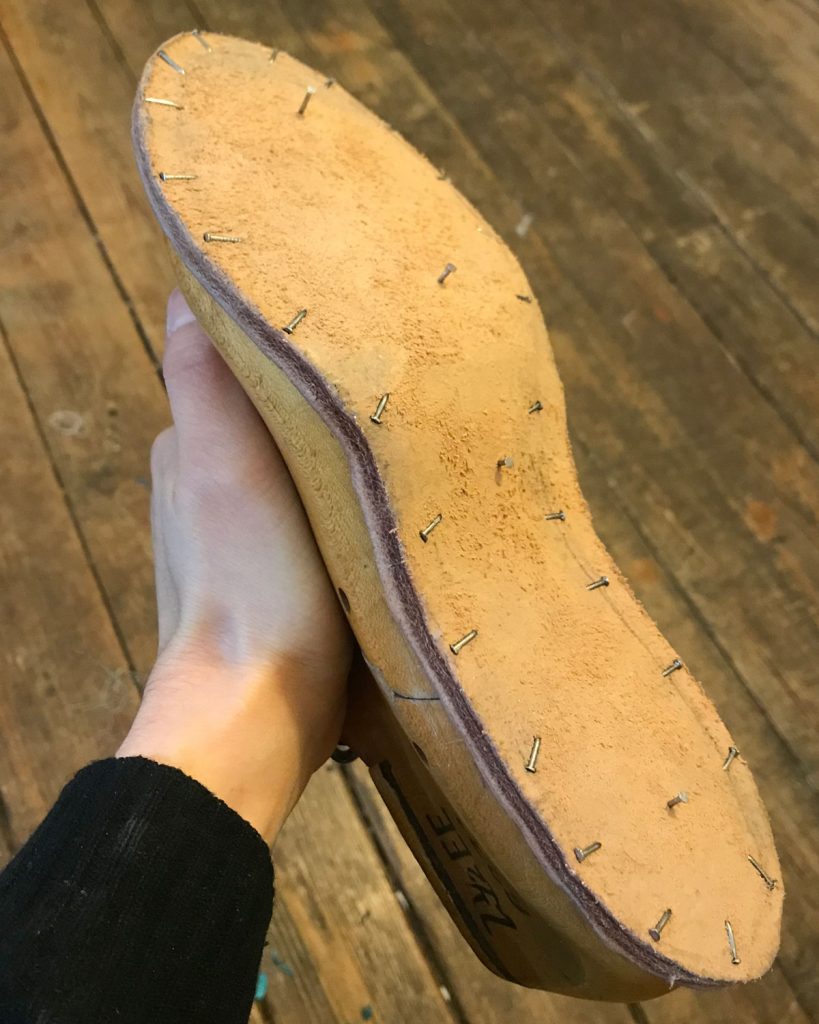
The first step is to soak the massive thick insole leather, then let it dry until it’s workable but not soggy and nail it to the bottom of the last to dry fully. This basically forms the backbone of the shoe, and everything else will be sewn to it. After drying the nails around the edge are removed so it can be trimmed to size, and then the real fun begins.
First I carved a little step into the edge of the leather. This doesn’t go all the way through, just part of the way, and it’s less than a quarter inch wide. It basically makes a little shelf for the welt to sit in. It also doesn’t always go all the way around the heel; sometimes only the front is sewn to a welt and the heel is just held on with nails. This method gives a slightly chunkier result but it seemed appropriate for these particular boots.
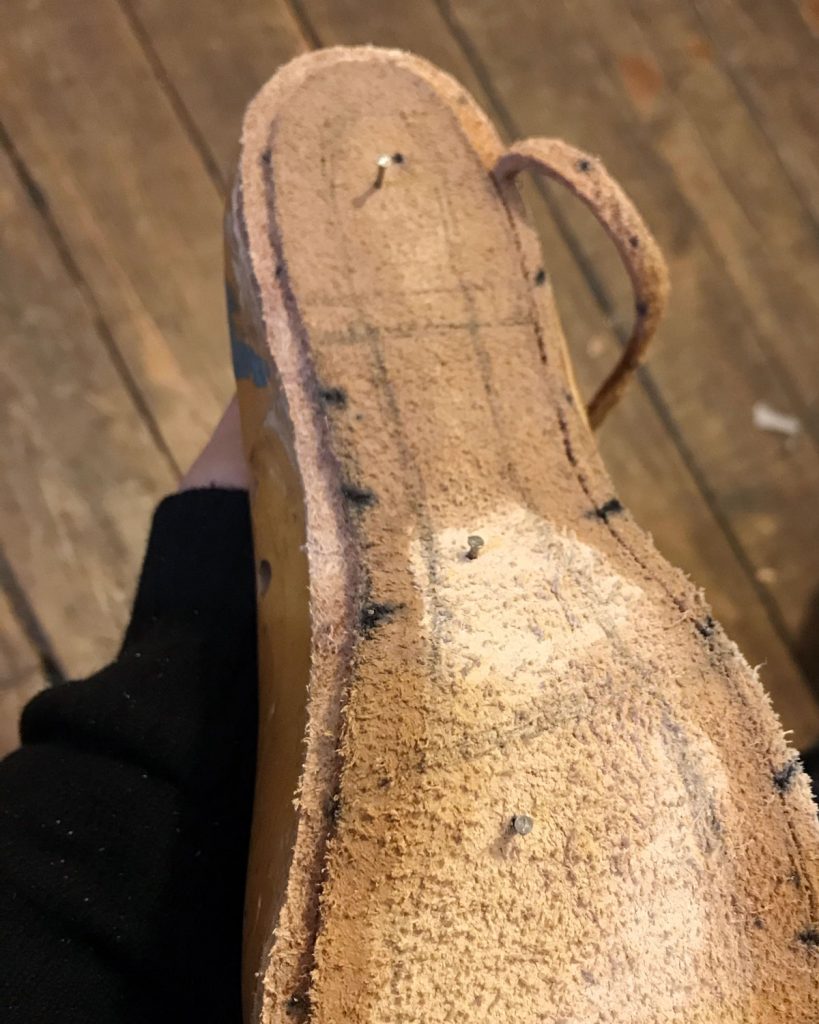
Next step is to carve a groove around the inner part of the insole, leaving this sandcastle-looking ridge of leather that the stitching holes are poked through. This bit is a little trickier, because the cuts are at angles so it’s harder to tell how deep you’re going and if you cut all the way through by accident you basically have to start the insole over. Also, these last couple steps took me about three hours and I’ve seen dudes on youtube do it in like a minute flat, so that’s a thing.
The REALLY fun part is poking these sideways holes with a curved awl. Yes, that’s me shoving a curved awl through about a half inch of rock-hard leather, over and over again. Big ol’ awl bruises in the palm of my hand. I had to do this over a couple times on my first time through this process, either because I tore through or because I’d discover the earlier channel cuts had weakened the insole too much, and I broke at least two awls before I got my technique mostly figured out. It helped a lot to hit the awl with a lump of beeswax between each hole, sometimes more than once per hole if I hit a dense spot in the leather.
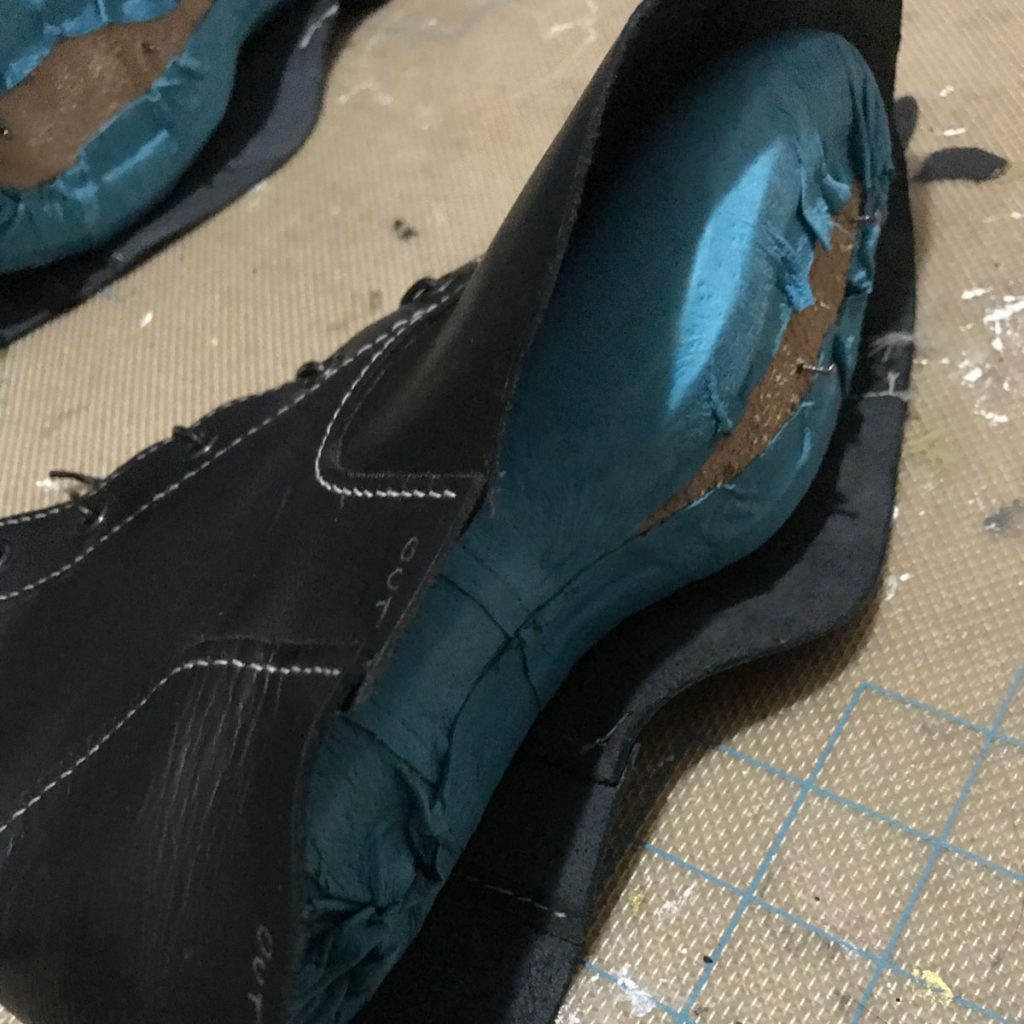
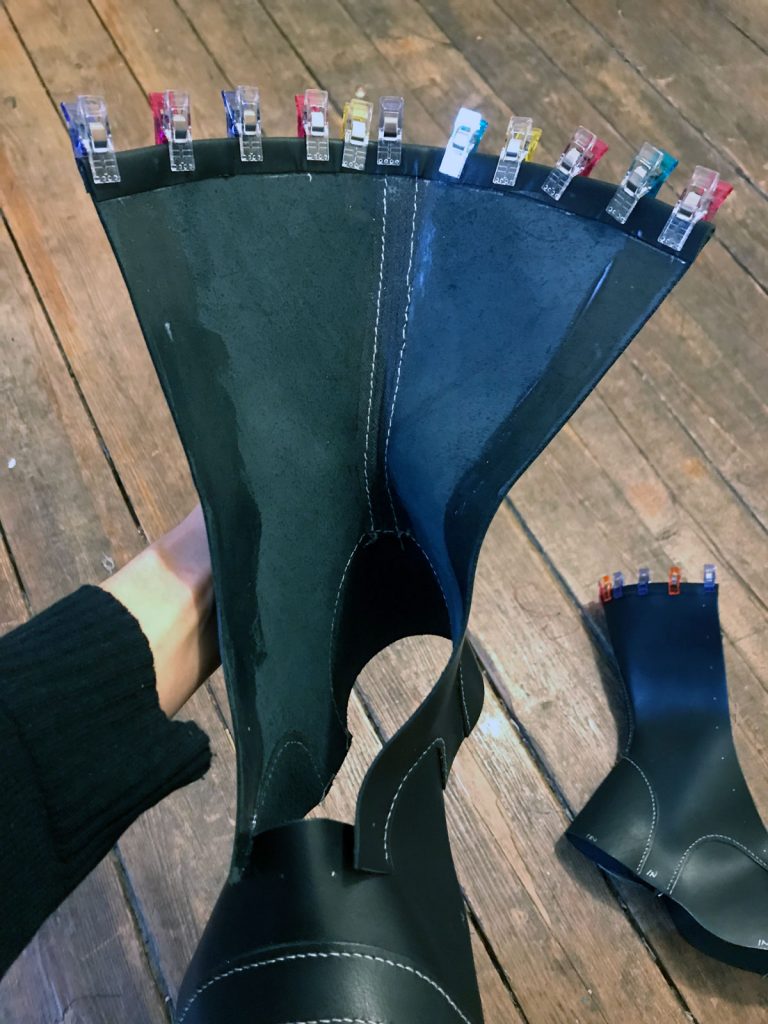
Now here’s where the thin, squishy lining suede worked to my benefit. I laced up the uppers and placed them over the last and insole, making sure to get them lined up as straight as possible. Then I stretched the lining layer around to the inside, making it as smooth as possible and sticking it in place with some of this fabulous stuff – a fume-free water-based contact adhesive that’s maybe not quite as secure as the nastier stuff but definitely works to hold these leather layers together temporarily. (I recently found out it also works on foam.)

The next step was to apply stiffeners to the toe and heel to preserve their shape. I used a thermoplastic toe puff, which is basically the same as the thermoplastics cosplayers are familiar with but made with very thin edges to avoid showing through the outer layer. For the heel I used a shaped leather heel counter, which is basically the same thing but without the malleability or self-adhesive properties of thermoplastics. I don’t know enough about how they behave over time to give pros and cons, but both seemed to work fine.
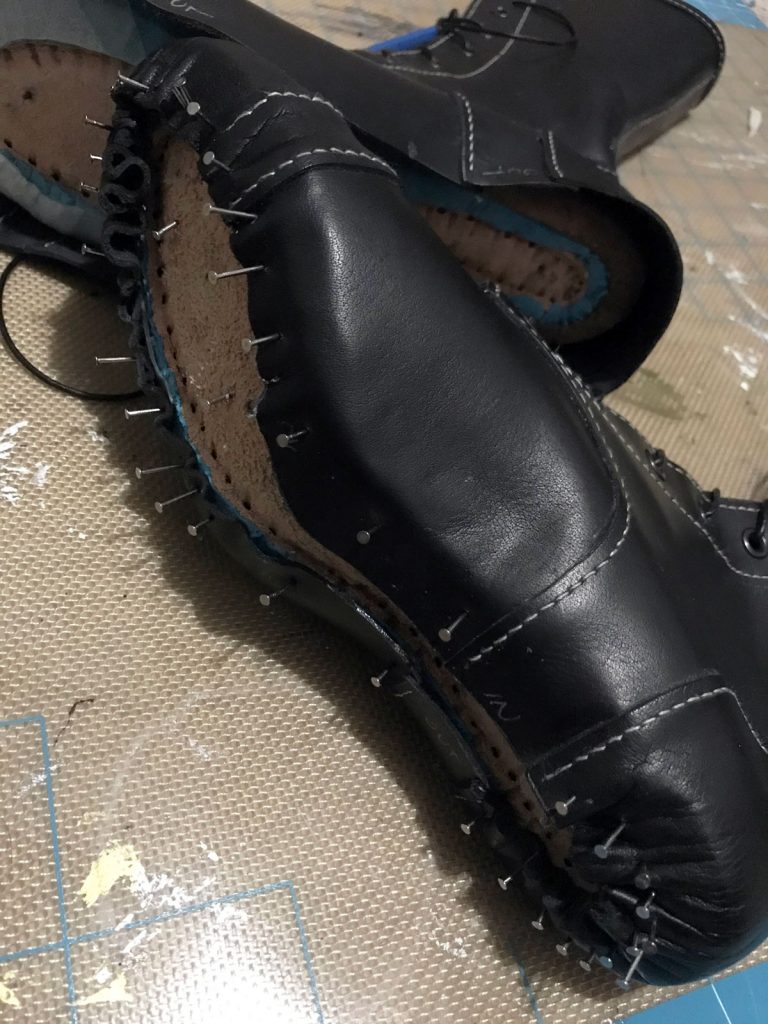
Next up was lasting the uppers. The important thing here is to make sure all the wrinkles are pulled all the way to the underside, so that once it’s stitched the edge of the shoe will be nice and smooth. First time around in the thin leather this went fine with hand pulling and a bit of glue, but it was quite beastly in the stiff leather.
I eventually pretty much pulled it off through a combination of wetting the leather to make it more malleable, pliers to pull it tight, and both glue and nails for a secure hold while it dried. I also ran out of nails, and since it was crunch time I had to make a 10pm run to the creepy empty home depot so that I could keep working.

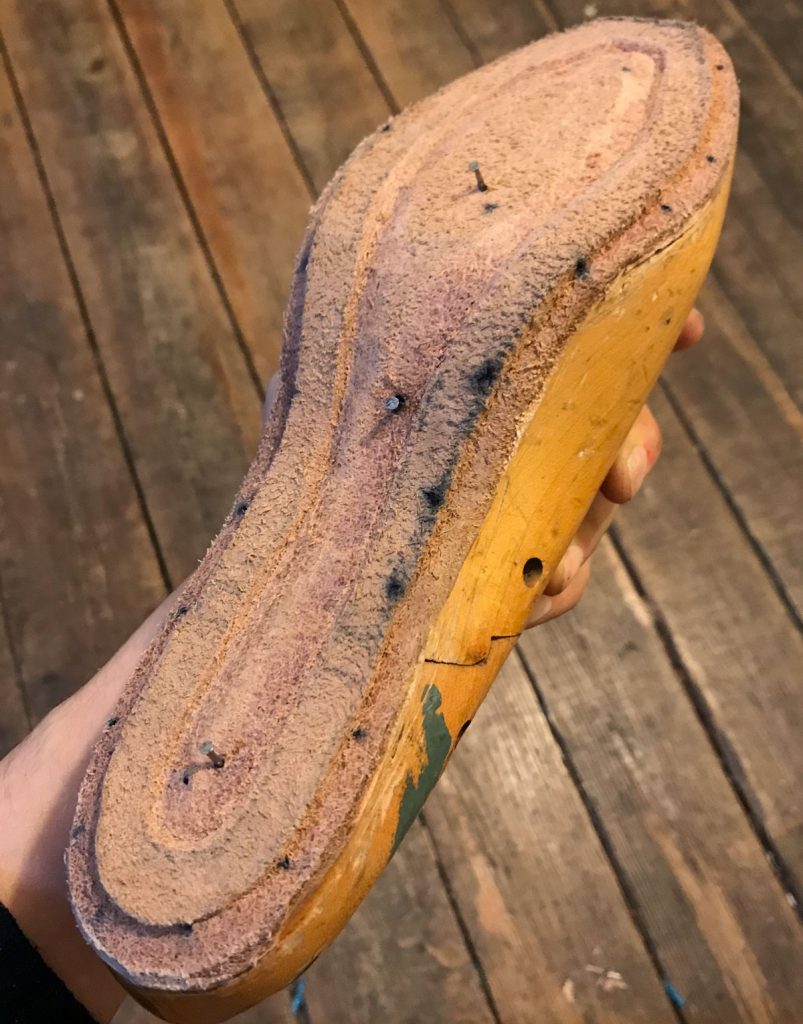
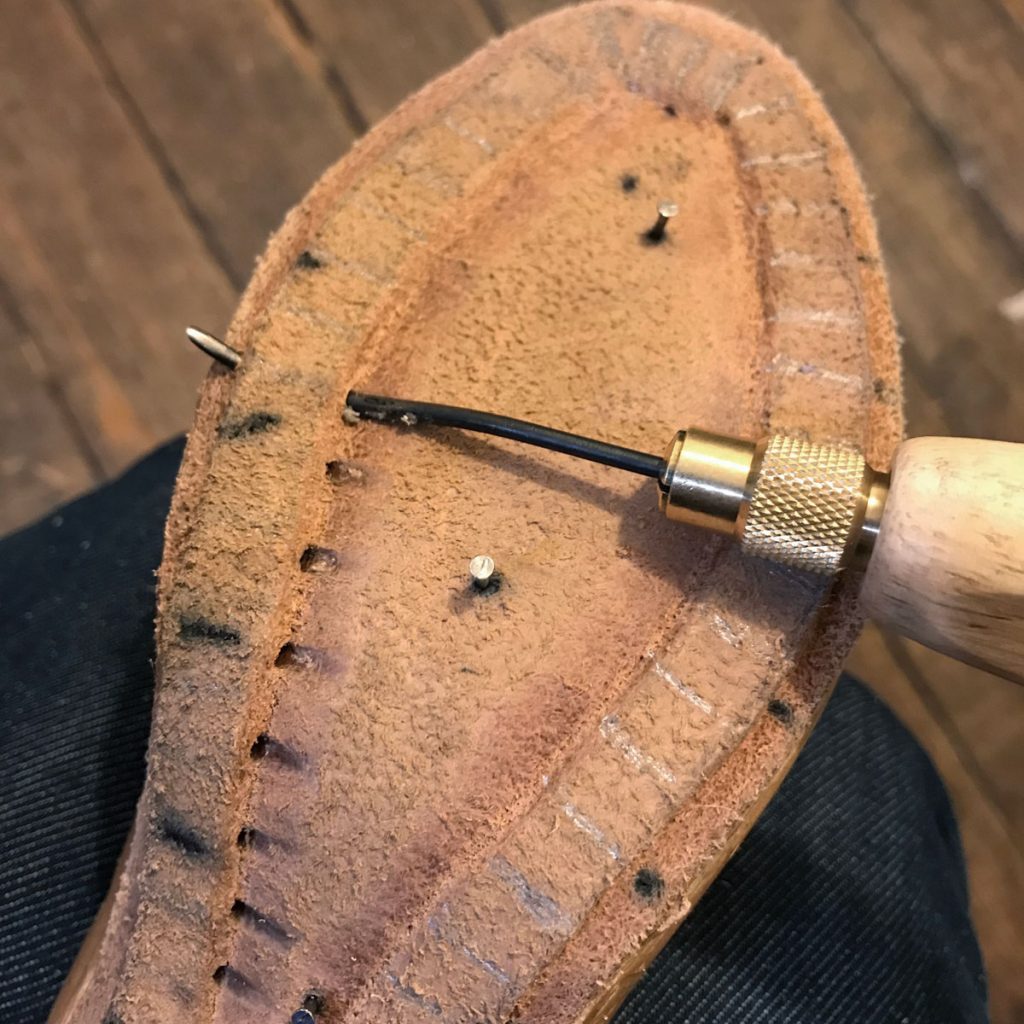
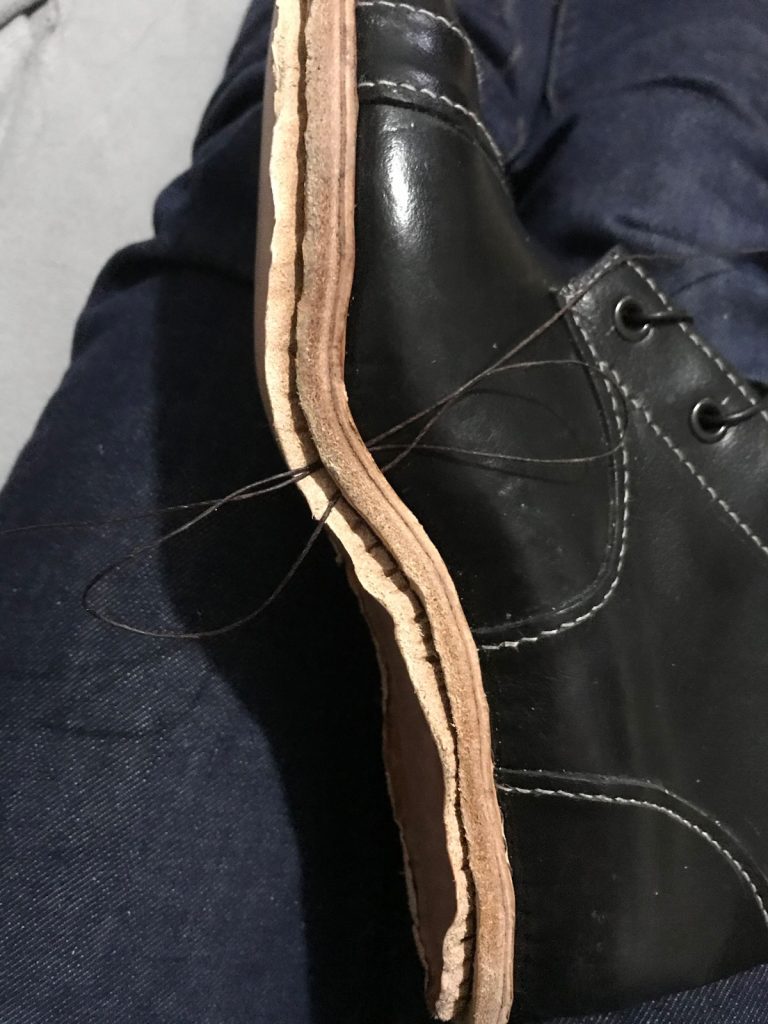
The welt is a strip of leather that bridges the insole and the sole of the shoe. It’s sewn to the insole first, and the stitching passes through the upper, lining, and stiffeners as well, so it pretty much holds the whole business together. This is what makes this type of construction so convenient if the shoes ever need resoling – the welt stitching holds everything together even after the sole is removed. It’s also QUITE DIFFICULT. I don’t have any needles that would both accommodate the heavy linen thread and fit through the stitching holes without tearing anything, so instead I used 6-inch loops of floral wire to pull the thread through. These were flexible enough to scoop through the curved stitching holes, and they passed pretty smoothly if I threaded them in loop-end-first to avoid catching on all the layers. But at two loops per stitch it was slow going, and it took me 15-16 hours to do both boots.

The other thing that goes in during this step is the shank, which is a shaped piece of steel that supports the arch of the shoe. I ordered these online, and although they were already slightly curved when they arrived they really need to match the shape of the last as closely as possible. They’re quite difficult to bend, since they need to support body weight, and the internet seemed to think I should just hammer on them until they fit. However, I work in a costume crafts department and we have TOOLS for this. I made a cardboard template from the bottom of the last, took the shanks in to work, and fussed over them for about a half hour until they were perfectly matched. Easiest part of the whole process! (And now I want to save up for a metal bender of my own.)
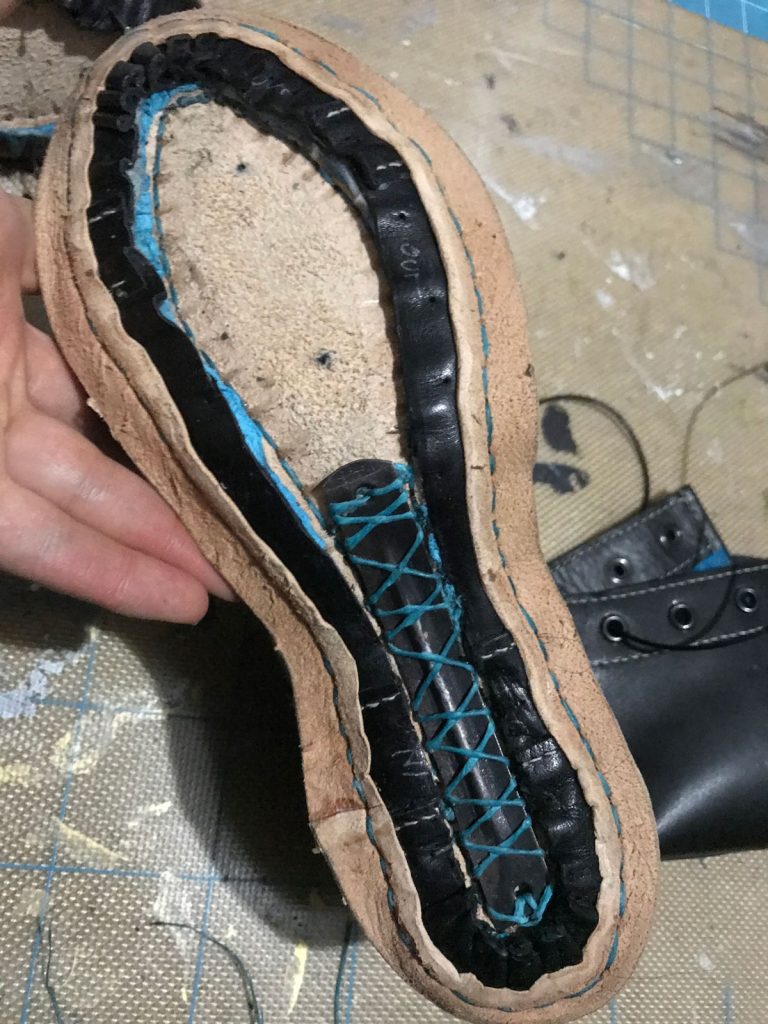
I used my same curved awl to punch eight holes in the center of each insole, then prethreaded each with a loop of wire going in each direction. This made it easy to sew the shank in without having to fish around underneath it for the stitching holes. Then I filled the remainder of the insole cavity with a sheet of cork cut and shaved to size.
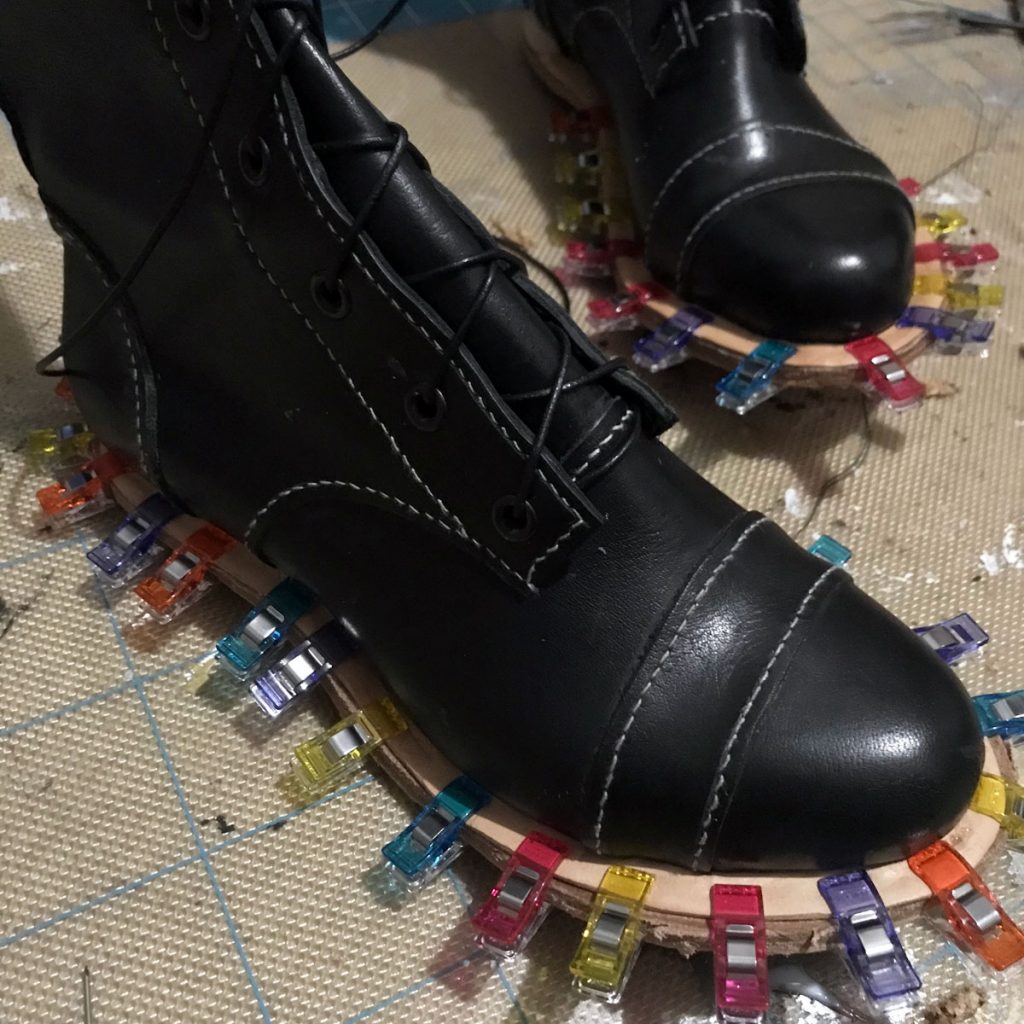
Next I had to soak the soles, glue them to the bottom of the shoe, and trim to size. This was a bit tricky because the water-based glues don’t hold very well on wet leather, but it needs to be damp enough to conform to the bottom of the shoe or else it won’t stick anyway. A bit of hammering, my entire box of wonder clips, and an overnight rest did the trick.
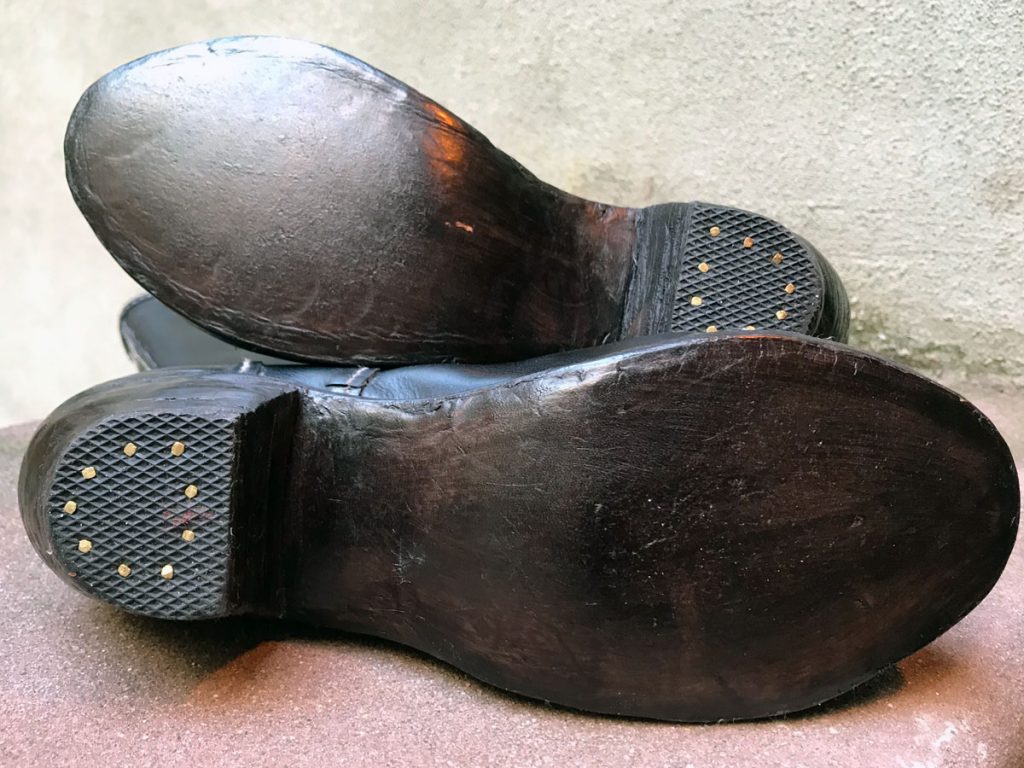
I really wanted to try the soling method used by the fancy bespoke dudes, where you cut a channel in the bottom of the shoe and then stitch into the base of the groove. This way there’s no exposed stitching on the sole of the shoe, and they can take a lot more wear before you start grinding through the thread. It’s complete overkill for a pair of costume shoes that will mostly see infrequent indoor wear, but maybe this way I’ll be good at it by the time I actually need it. The tricky bit is not cutting the channel too shallow or too deep, so it protects the stitching without excessively weakening the sole itself. I goofed up one sole doing this and had to recut, but managed some kind of approximation after that.
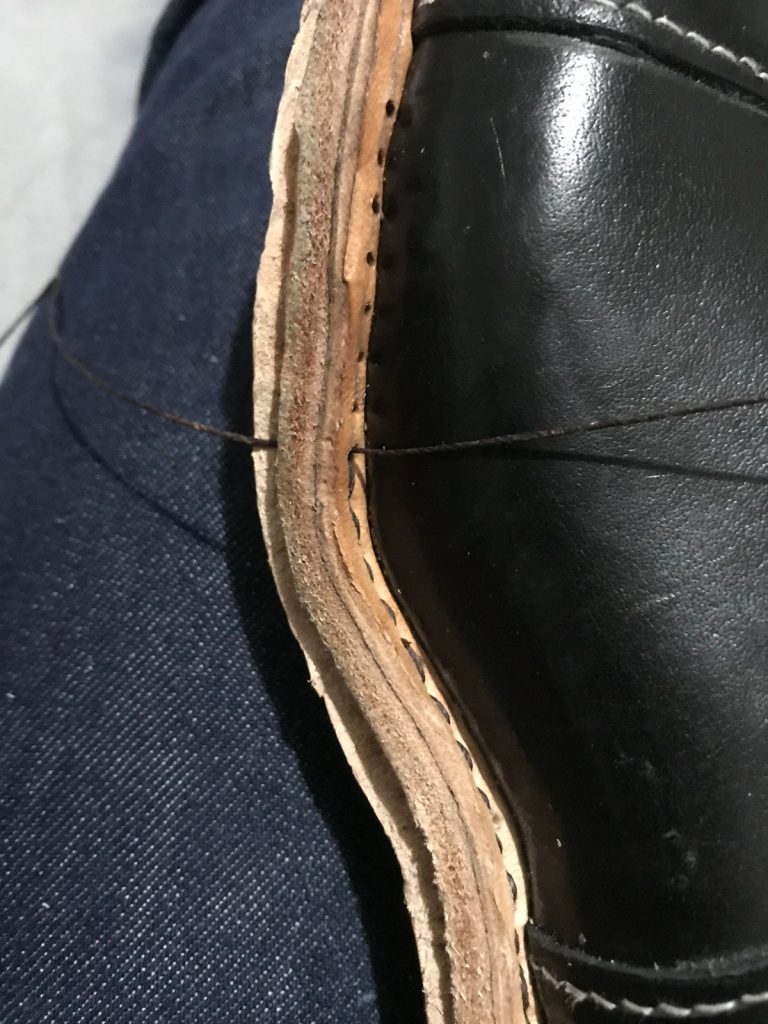
There’s a different curved awl used for this step, even smaller and thinner than the other one, so naturally I made it most of the way around the first shoe and then broke it with two inches to go. I had no time to order a new one, so after a day of panic I took the sad remains over to Westpfal and they were able to put enough of a point on it that I could go back and finish. Yikes!
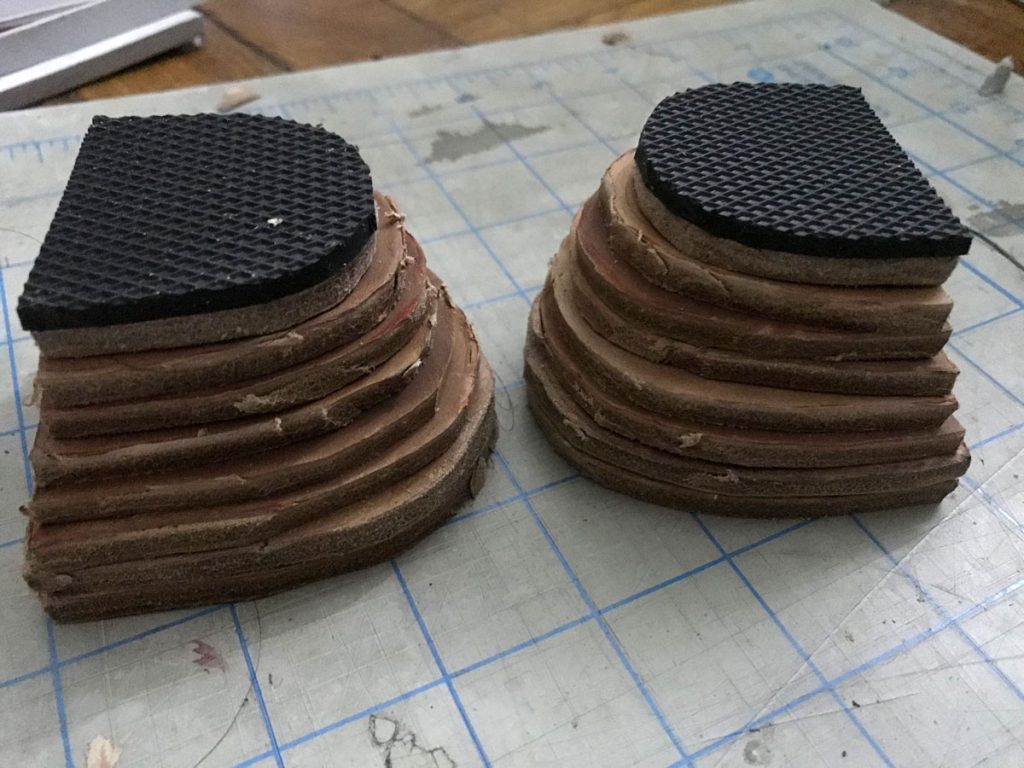
A stacked heel, as it turns out, is just a big ol’ sandwich of leather, held together with a lot of glue and nails. I soaked a chunk of leftover sole leather in the sink and cut out little heel cookies in graduated sizes. For the last layer I made a cap with a small scrap of sole rubber, which I had pre-glued to a scrap of leather at work so I could use a stronger glue in the fume hood.
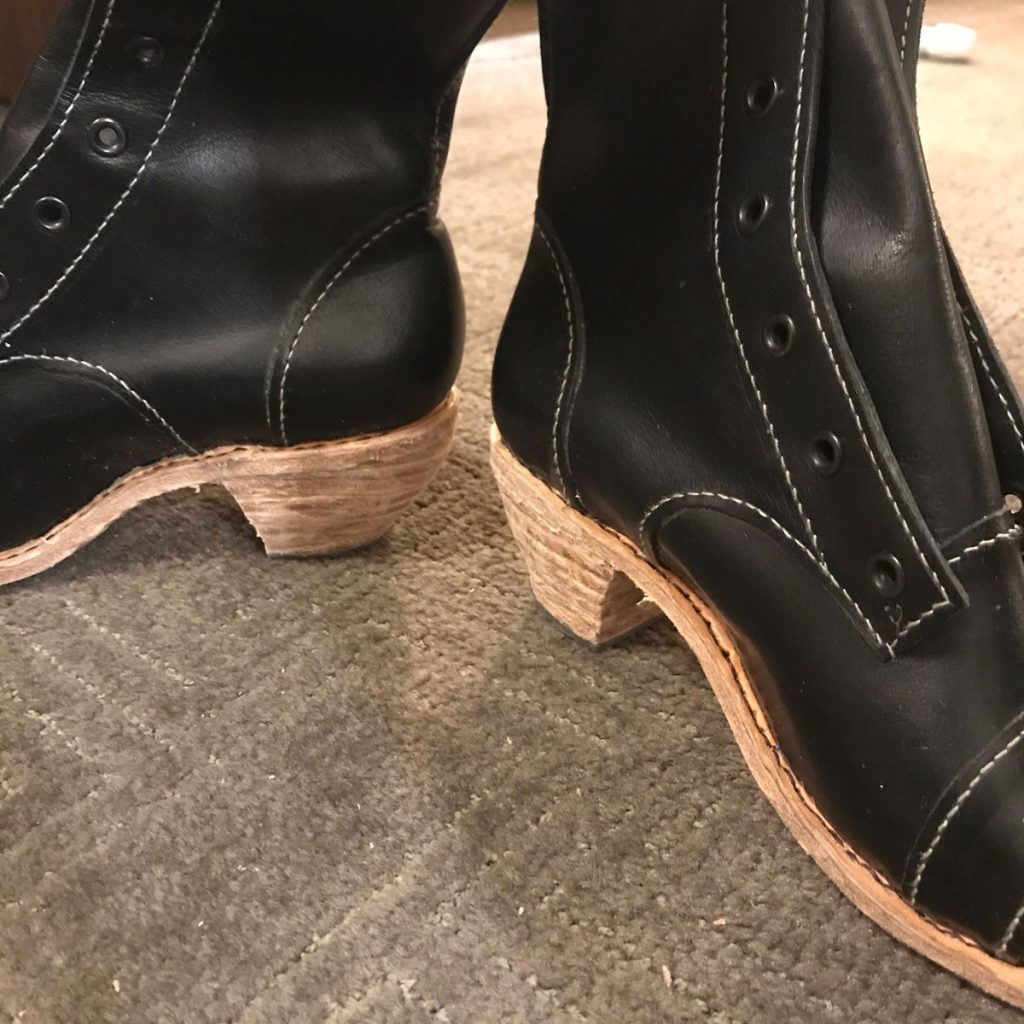
The stack is built directly on the shoe, layer by layer, with nails pointing up into the solid half inch of leather that is the insole and sole. The tricky bit is carving the heels into shape, because you have to bevel and smooth the stepped layers into one graceful block. I basically whittled the stack down into the final shape, working carefully with a fresh, sharp utility knife blade. The results are…rustic. I think it works just fine for that village cobbler feel, but I’ll have to do a lot more smoothing if I do anything that needs more refinement. And yes, that picture was on hotel room carpet because at this point I was completely out of time!
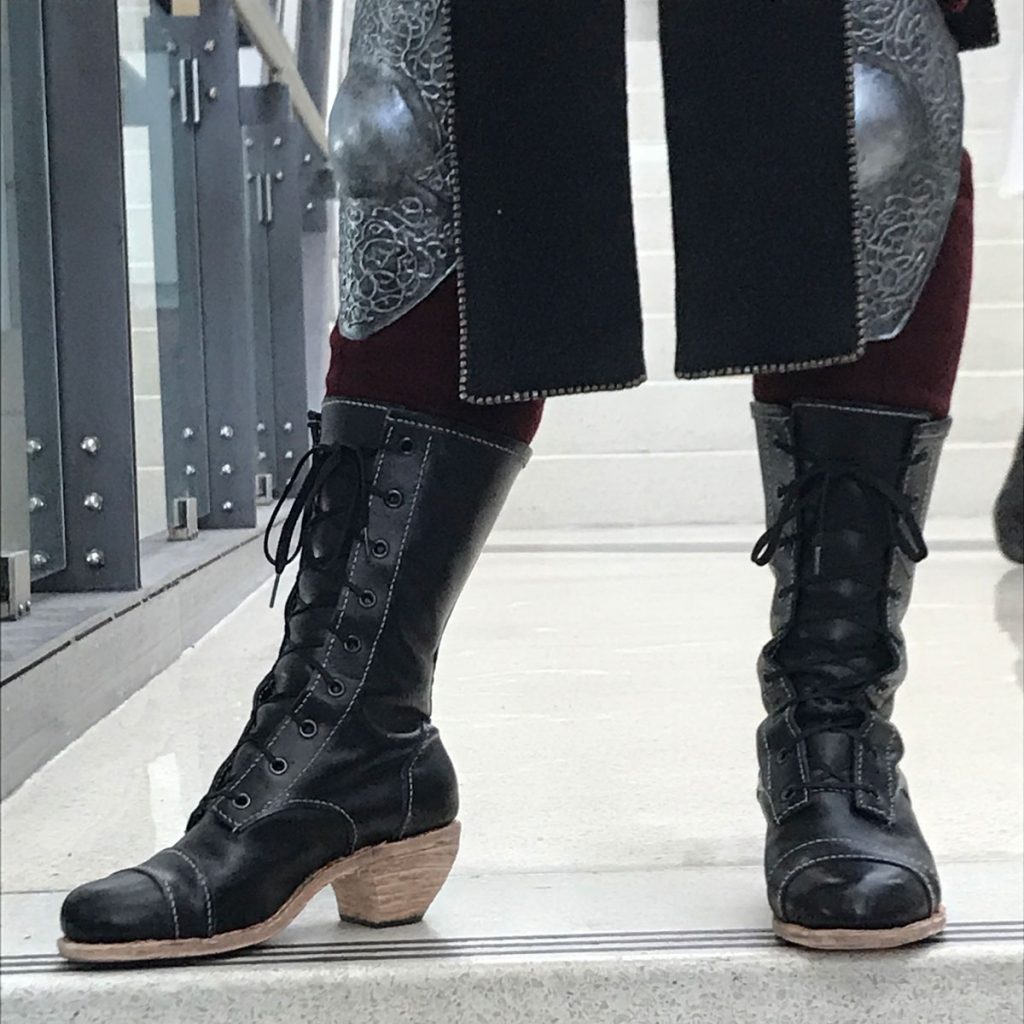
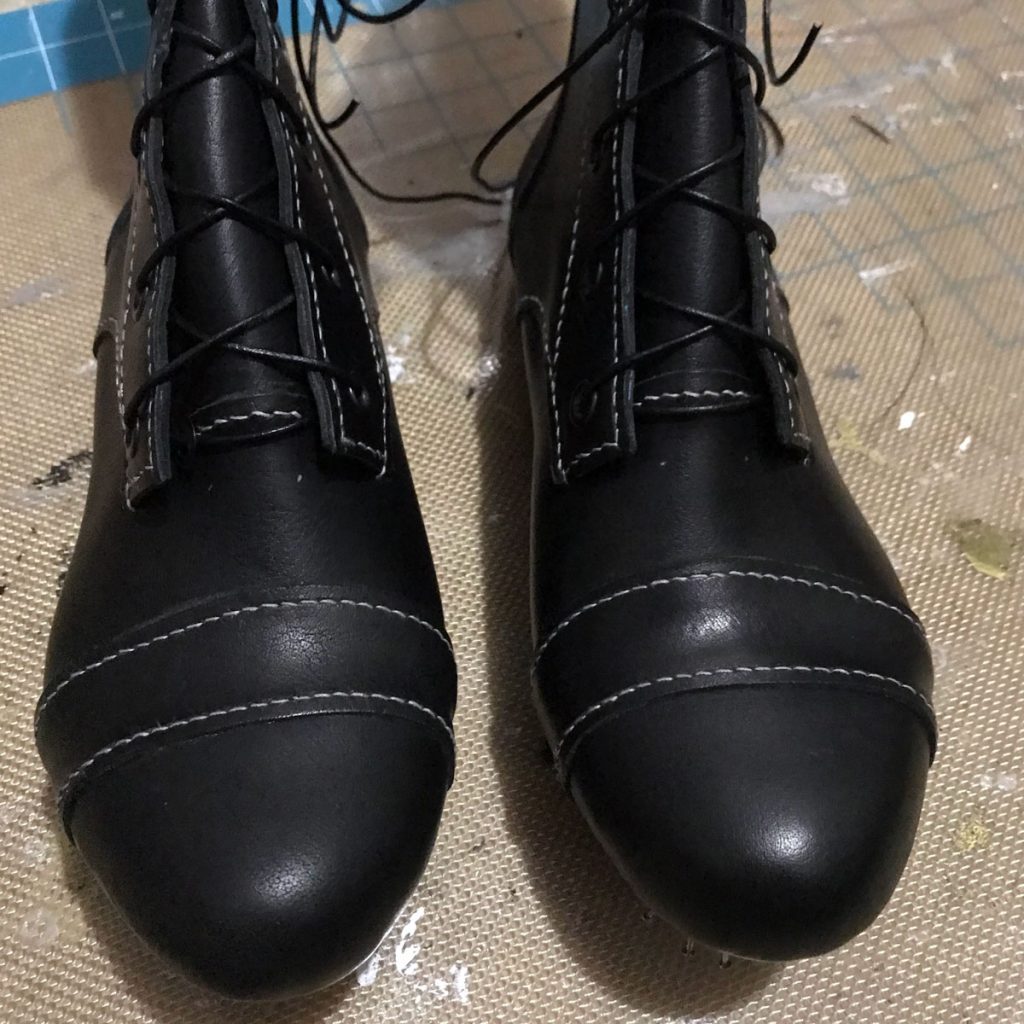
I hit the all-important ‘wearable’ mark and finally got the lasts out at 9pm the night before the crown championships. The boots got a full workout the next day, and I’m happy to report that I wore them for a good ten hours with no discomfort beyond a bit of stiffness at the ankles (and I do think the wrinkles there will relax a bit once they’ve stretched and conformed to my ankles a bit more.)

When I got home, I did a bit more sanding and smoothing and dyed the soles with my favorite water-based leather dye in chocolate brown. A bit of polishing and they were finished!
So impressed!!