
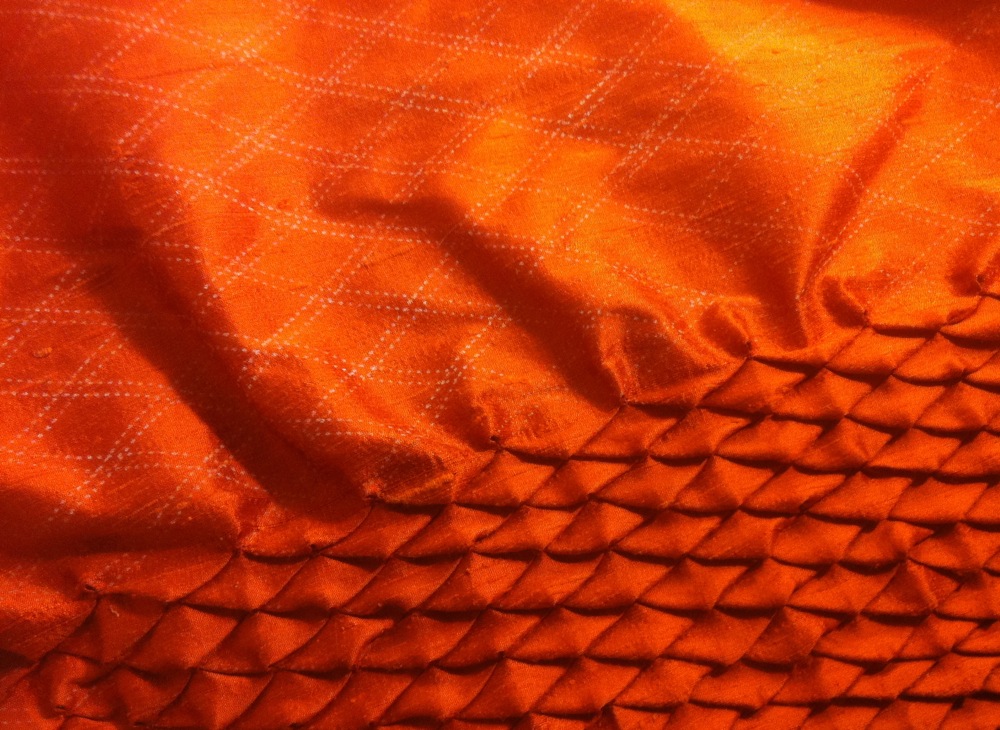
 The project associated with those piles of silk is eating up most of my time, but I thought I’d take a minute to share a decorative technique I’ve been experimenting with for a bodice detail. I wanted some kind of fabric manipulation to contrast with the other embellishments I have planned for this piece, ideally with a feathery or scaly feel. I experimented with arrow smocking, which was one of the techniques Michele Carragher used to create the gorgeous dragonscale effect in her embroidery for Game of Thrones. It wasn’t quite what I was going for, though, so I kept looking.
The technique I ended up settling on was inspired by a project in Shadowfolds, by Jeffrey Rutzky and Chris K. Palmer, but I arrived at it by a different method. The Shadowfolds method uses a smocking stitch that goes through to the top of each “scale,” whereas I wanted the scales in my project to be a little more dimensional with no visible stitching on the surface.
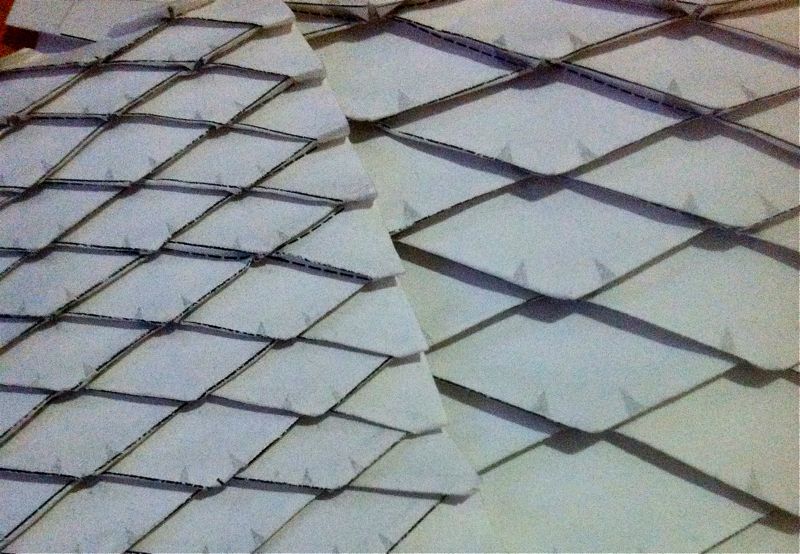 I used my best guess to recreate the folding diagram as if it was an origami design, since the smocking technique doesn’t work on paper. This took a little bit of expermentation, but eventually I got something workable and mocked it up at two different scales. (Though I dearly hoped I could get away with the larger size, the piece I intended to use it for is way too narrow for that. So instead I’m doing the small version, which is roughly four times the work. Never fails.)
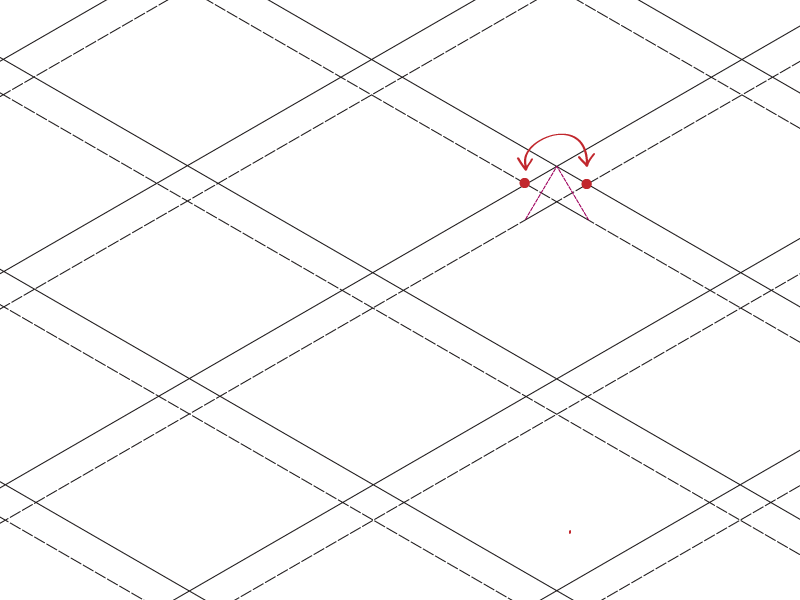 The basic folding pattern is two sets of parallel lines, separated by 120º. The separation between each pair of lines is about 1/5 the separation between the pairs, so the smaller-scale version above has pairs 1/8″ apart, separated by 5/8″. When folded, this produces scales that are about 1/2″ tall and 3/4″ wide.
In the paper version, the long diagonal creases are folded first – the solid lines above are “mountain” folds in origami parlance, the dotted lines “valleys” – and then they’re collapsed in on themselves to form the scales. For each scale, the two points marked in red in the image above are brought together, and diagonal folds form along the dotted purple lines. I found it easiest to start at the corners and work toward the center, pinching the point of each scale to flatten it. It’s a little tricky at the smaller size, but you just kind of have to fuss with it until it works.
Once I had a workable paper model, it was time to translate it back into fabric.
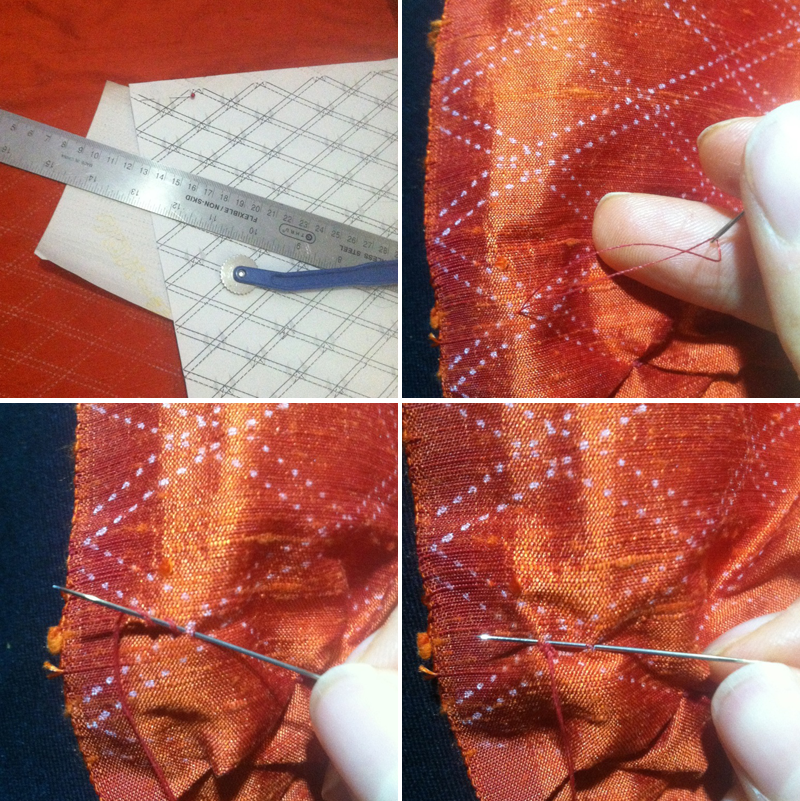 This is basically a smocking technique, worked on the right side of the fabric. I printed out a copy of my folding diagram, and used tracing paper and a tracing wheel to transfer it to the silk. You could also create the pattern directly on the fabric using a ruler and protractor, though. Knot the thread underneath, then bring it up through one of the two points marked above. I like to knot it again on the top of the fabric to make sure it’ll hold. Then bring the needle over to the other dot and pick up a small stitch through the point where the lines intersect, working back toward the first dot. Pick up another stitch across the first dot, and pull the thread through.
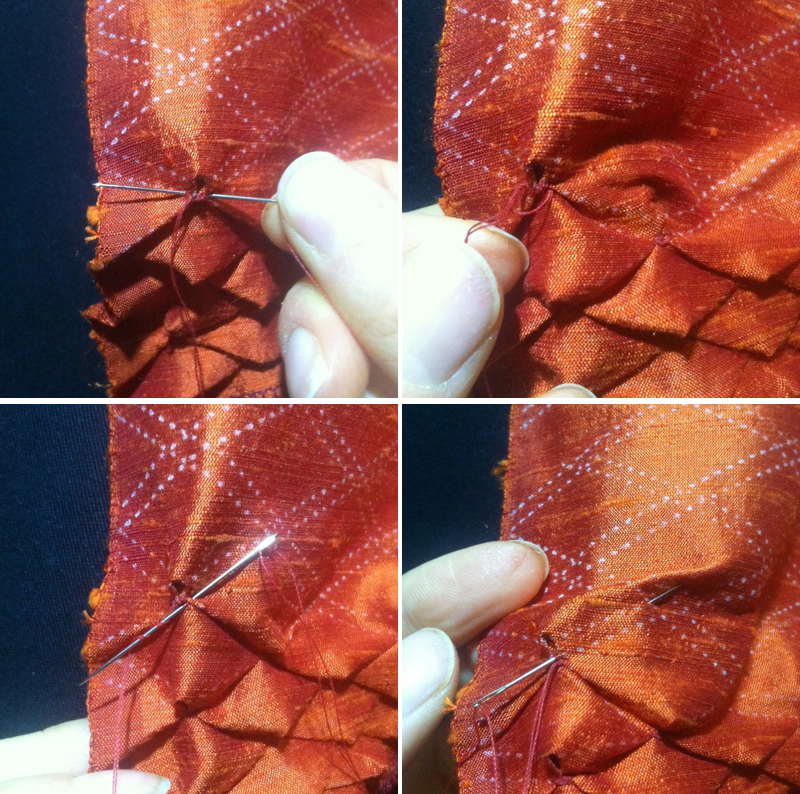 Take a second stitch through the same layers to help pull them together, and wrap the thread around the needle to form a knot. Pull the knot tight. Make sure the creases have formed correctly for the pleats on each side of the stitch, then take a stitch through the pleat and the layer below to hold them in place. I like to knot the thread once more at this point, to make extra sure the scale is secure. Stick the needle through to the underside of the fabric and come up at the first dot for the next scale. This is a “slack” stitch that doesn’t get pulled tight, so do another knot stitch before starting the next scale to prevent it from puckering.
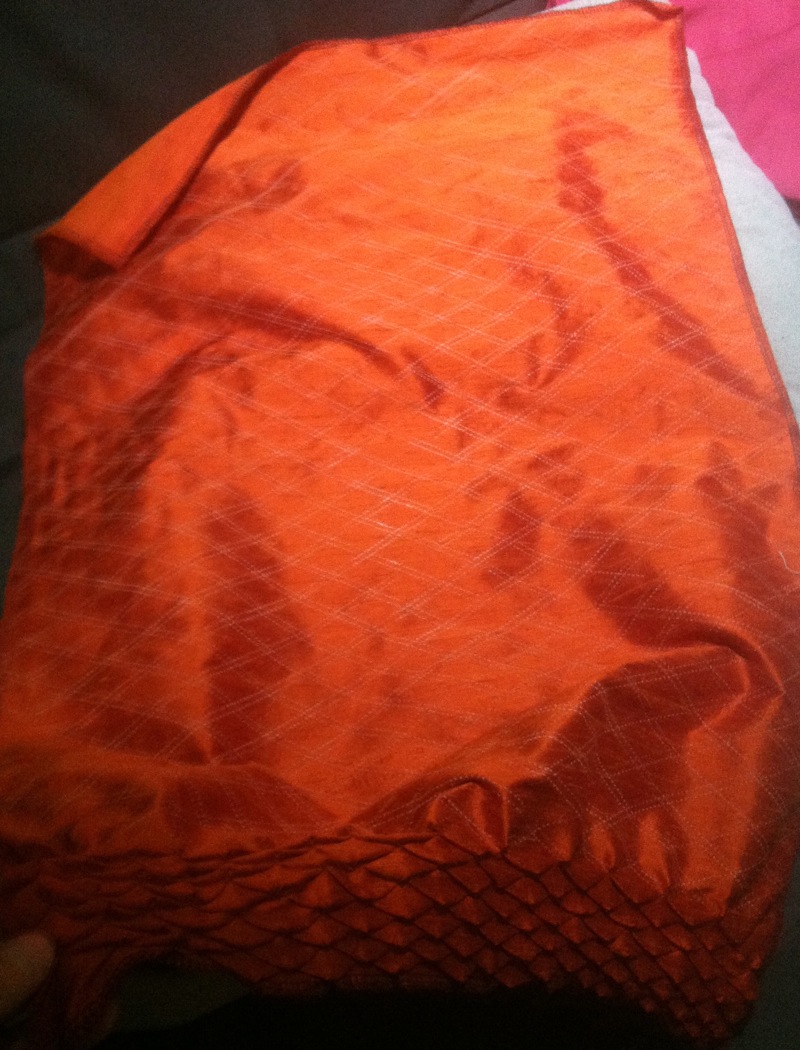
I like to work the scales across the fabric from left to right, bottom to top. I measured my paper samples to determine how big I needed to cut my fabric panel, and once I’ve smocked the full panel I’ll cut out my pattern pieces from that. I’ve got some long nights of stitching ahead of me before I get to that point, though. Yikes.
Thank you for sharing your project. This picture makes me want to give it a try.
Would love to see the finished product! Thanks for the tutorial.
This is an amazing technique and seems really straight forward but i feel like there is something tangible that I am missing and I also feel like that tangible thing – is the key to the entire project. Despite your clear directions and many images of the process I simply do not see how this is possible and the idea that it could leave me howling and shrieking in angry/sad miserable frustration all through the night is preventing me from even thinking about even attempting it. It would really help I feel… if I could see you actually perform the process preferably from the very beginning and not 5 rows in already. Just a short video or a gif even. Nothing fancy. I simply do not see how these two stitch points, over and over again are going to form this amazing scale pattern. I would really love to see it done live so that I feel more capable of attempting it. Thanks for considering.
I’m afraid I don’t have time to revisit this project right now but the easiest way to see how the folds work is to try it with a paper copy of the diagram as I’ve described in the post. The stitches are necessary when you move to a fabric version because fabric doesn’t hold a crease the way paper does, but the structure will be the same.
Please make a youtube video for this because the written instructions are really difficult to follow.
this tutorial makes NO sense!!!!!!!!! Please make a video!!!! These are the WORST written instructions I have ever seen in my life!! First of all the thread is the same color as the fabric, and second the steps are EXTREMELY difficult to follow. PLEASE fix this ASAP!!
Thank you.
You are being rude, Emily! These instructions are very clear! Just DO it….you’ll se it works!
Hi Gillian! I’m five year late to the party but while reading the comments, I saw this person’s extremely rude comment and I just thought I didn’t cost me anything to write a word here to tell you that I can’t believe somebody would be this rude to a person like yourself who is volunteering precious info and photos for free on the internet. I hope it didn’t affect you — you don’t owe any of us anything! Thanks for sharing your knowledge and experience. Peace :D
That’s very kind of you! Thanks for stopping in, and I hope you found the post useful!
I am struggling as well…. No matter what I do, the fabric does not come to a clean point. It’s very messy and looks nothing like the pointed scales. I would really appreciate if you could clear up the process
I agree. But I’m using a different technique, now so I dont really need this anymore. No matter how many times I followed these instructions, I still came out with smocking that looked nothing like your picture. Meg Try arrow smocking and flatten them out with a hot iron to make a scale effect, that is what I did when I got too frustrated with this method.
Do you think I could make the diamonds longer rather than wider (essentially rotate your template 90 degrees) to make long scale and have it be just as successful?
Your folds would be a lot narrower, so it might be harder to get the points nice and crisp. I’d definitely recommend trying it with a paper template first, and if that works okay try it at a large scale with a fabric that takes creases really well. I haven’t played with this technique for a couple years now, so I can’t remember if there are other pitfalls you might run into. If it doesn’t work maybe the arrow smocking patttern would do the trick for you?
I am late but I hope you still see my comment. First of all: Thank you for this tutorial! It is EXACTLY the smoking pattern that I need. I have browsed the internet for hours now, I found many similar ones but nothing like this. Thank you so much!
Second of all: How much does the original piece of fabric shrink in size when smoked? And how long did it take you to finish it?