
By far the longest part of the Ciri build was the hand embroidery on the skirt panels, which used about 500 yards of embroidery thread and took more than 250 hours to complete. It was also one of the main things that drew me to this particular project, so I pretty much got what I came for with that.
The base fabric for the skirt is wool-blend melton I’d had sitting around for years. I did pretty well at using fabrics I already had lying around for this project, although the leather, embroidery thread, and worbla more than made up for any sensible, economical choices I might have made here.
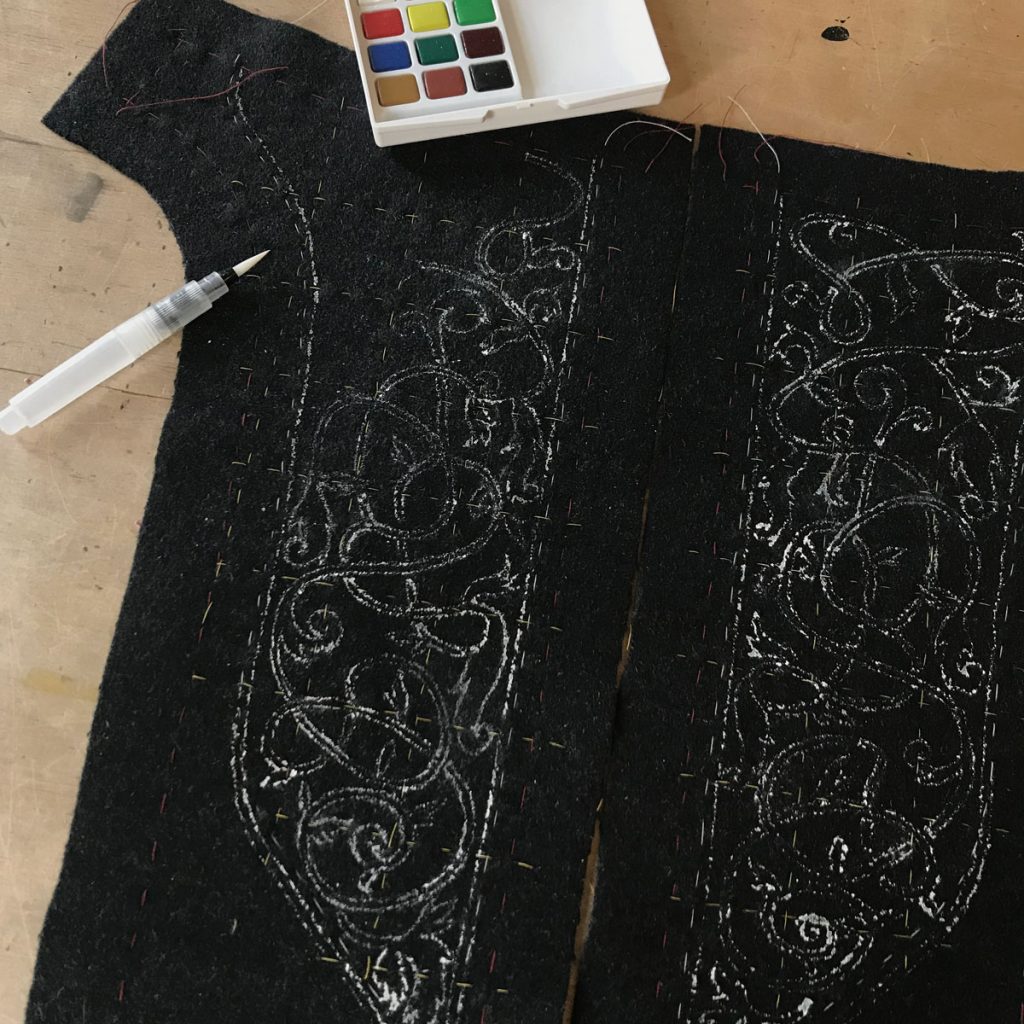
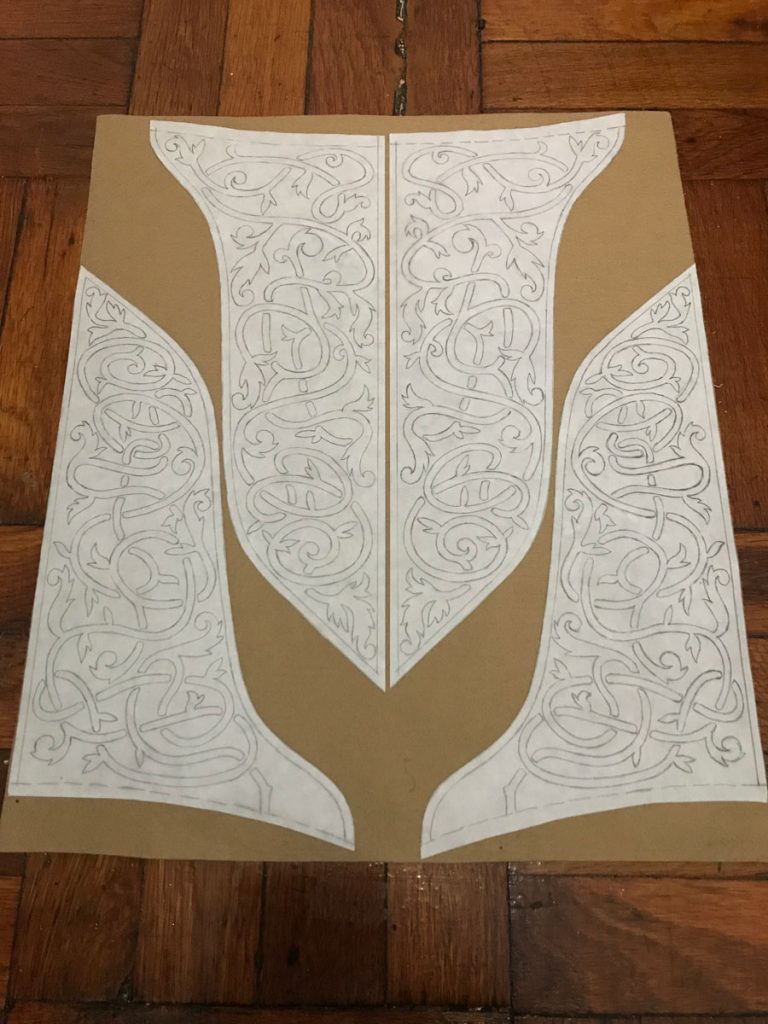
The napped surface of the fabric proved difficult to mark – too dark for ink or pencil, didn’t like gel pens, and shook off colored pencil and chalk like they’d never been. So finally I basted in a reference grid and freehanded the design with watercolor (a tip I picked up from embroiderer Mary Corbet.) This turned out to be an ideal method: it floated on the surface of the nap and didn’t soak in too much, didn’t budge with handling, but wiped away beautifully with a little water (I did most of my cleanup with a wet brush or cotton swab and a tissue to absorb the excess).
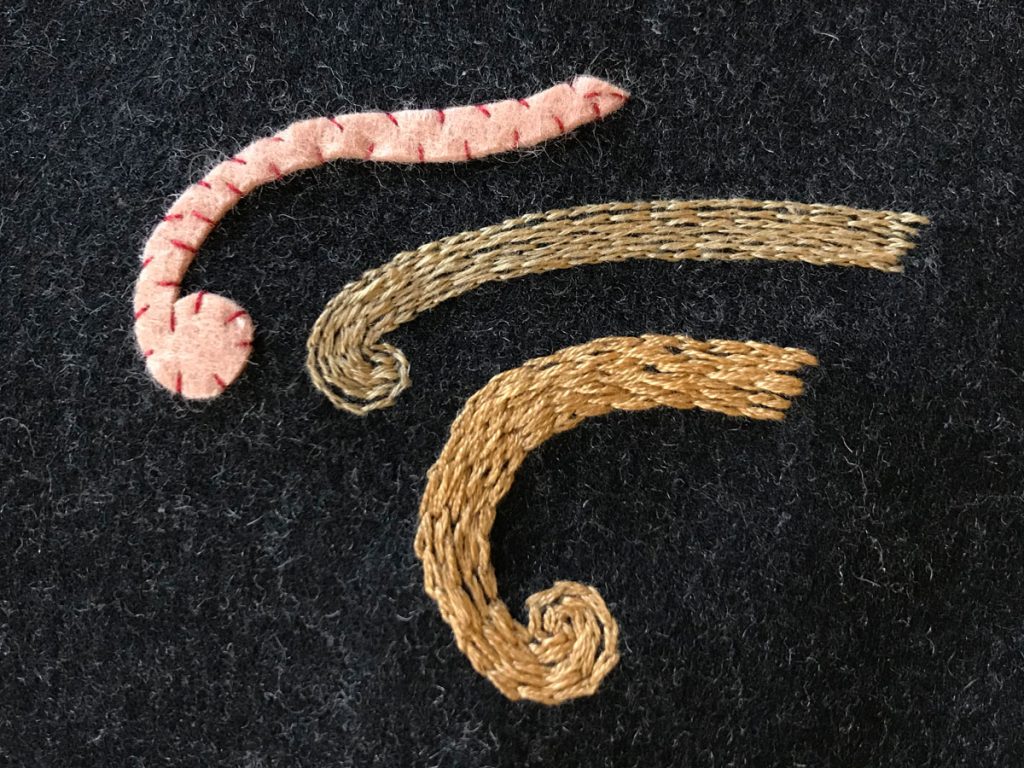
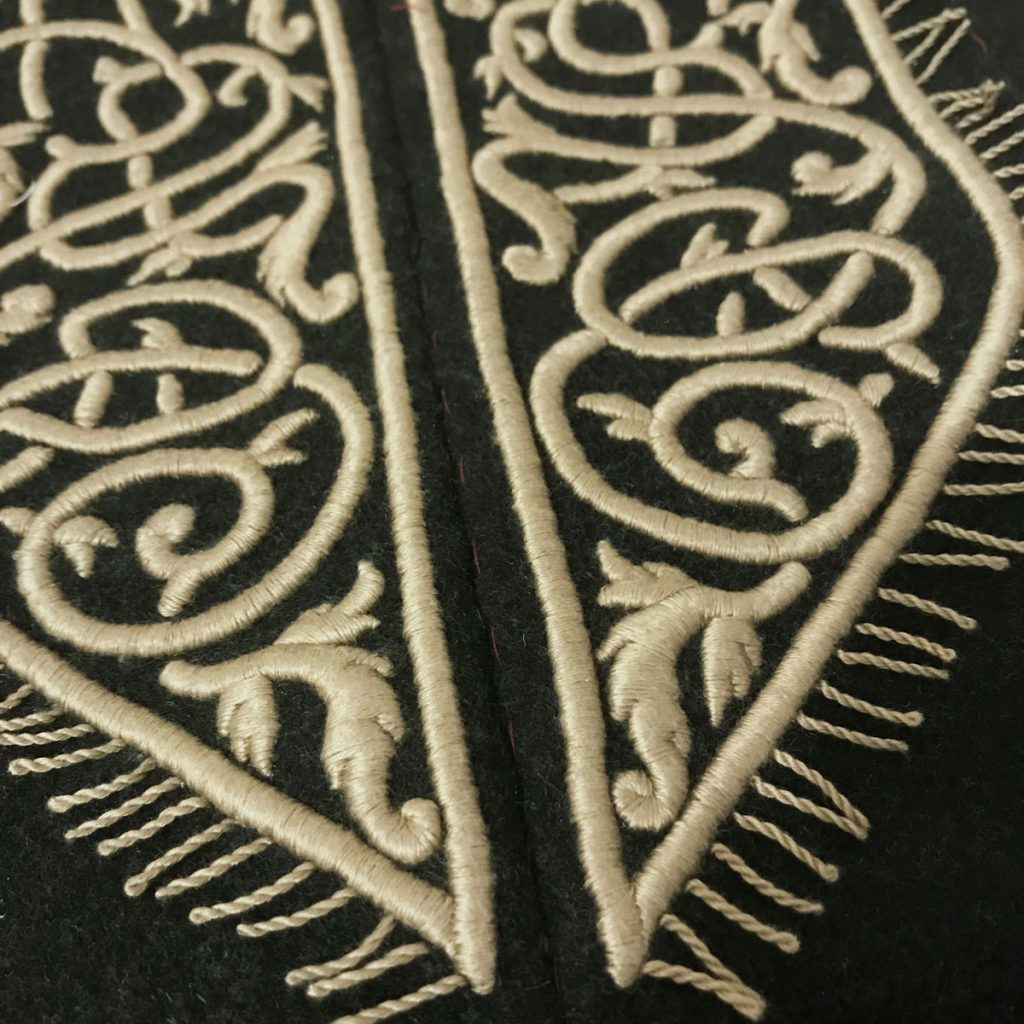
I tested a couple of different padding methods, but I liked the extra loft I got from wool felt. This is a more conventional padding method for goldwork than for regular satin stitching, but given the chunky base fabric I liked the way it rounded out with the stitches over it. It was also much faster than the stitched padding methods I tried, even though each individual piece had to be cut and whipstitched down by hand. The only drawback was that I had to be a little careful about the rounded ends of the padding pieces, so that the stitches wouldn’t slip off and leave gaps.
I also tested several threads for the satin stitch and chose cotton floche for the subtle sheen, fine weight, and stitch quality. It comes in gigantic 150-yard hanks, quite economical for a giant project like this one, and the smaller strand doesn’t need to be split before using. I wish it came in more colors, but it’s definitely going to be a favorite going forward.
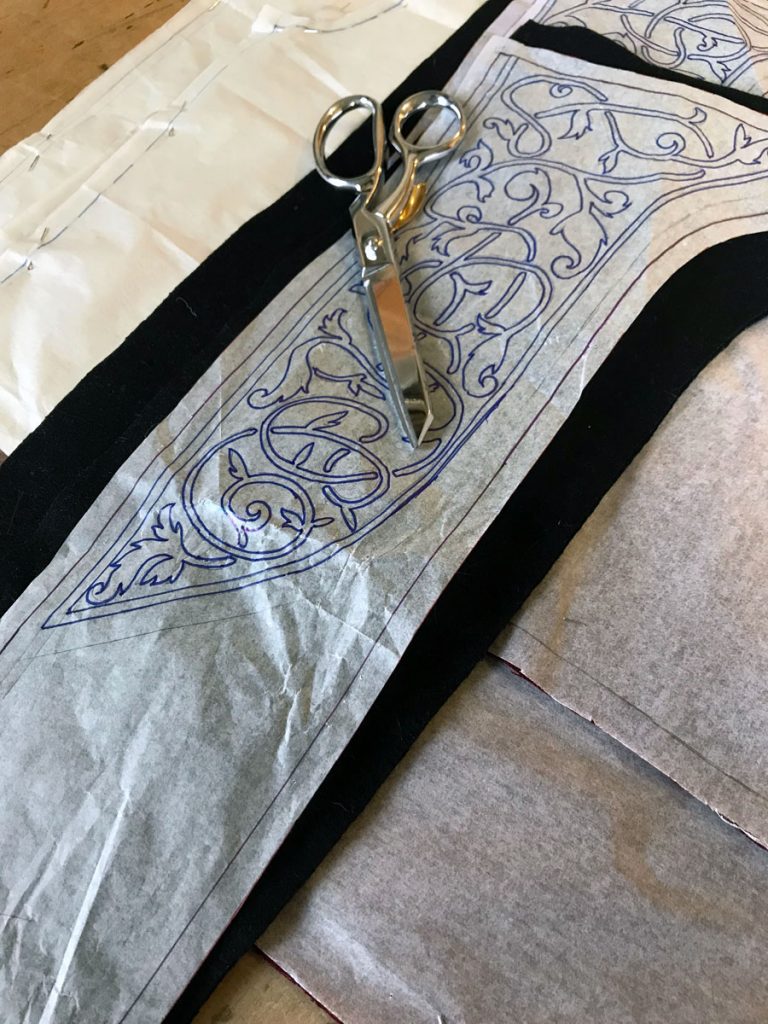
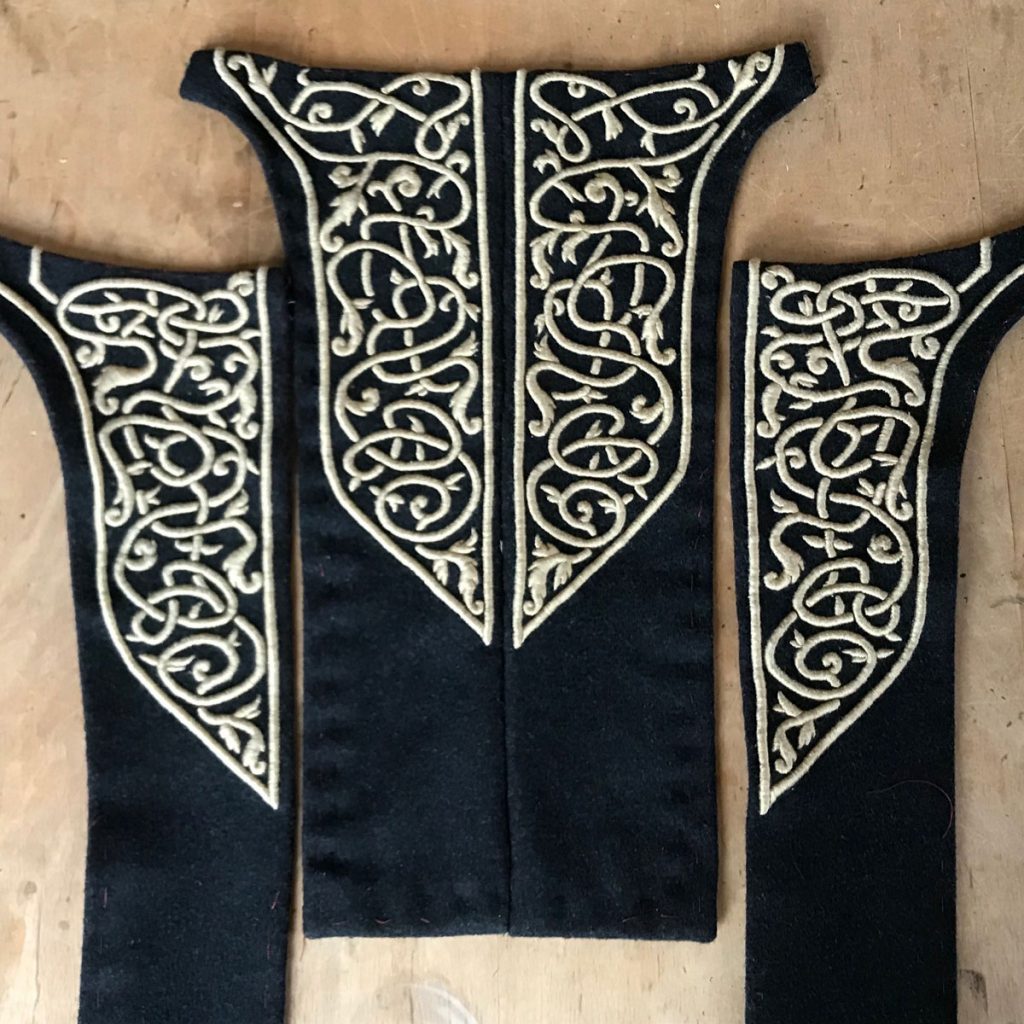
I traced my embroidery pattern onto freezer paper and stuck it to the felt with a warm iron, then cut out the pieces with the paper still attached. Not great for my scissors, but much easier than trying to pin all those fiddly bits and it also made it easier to keep track of which piece went where.
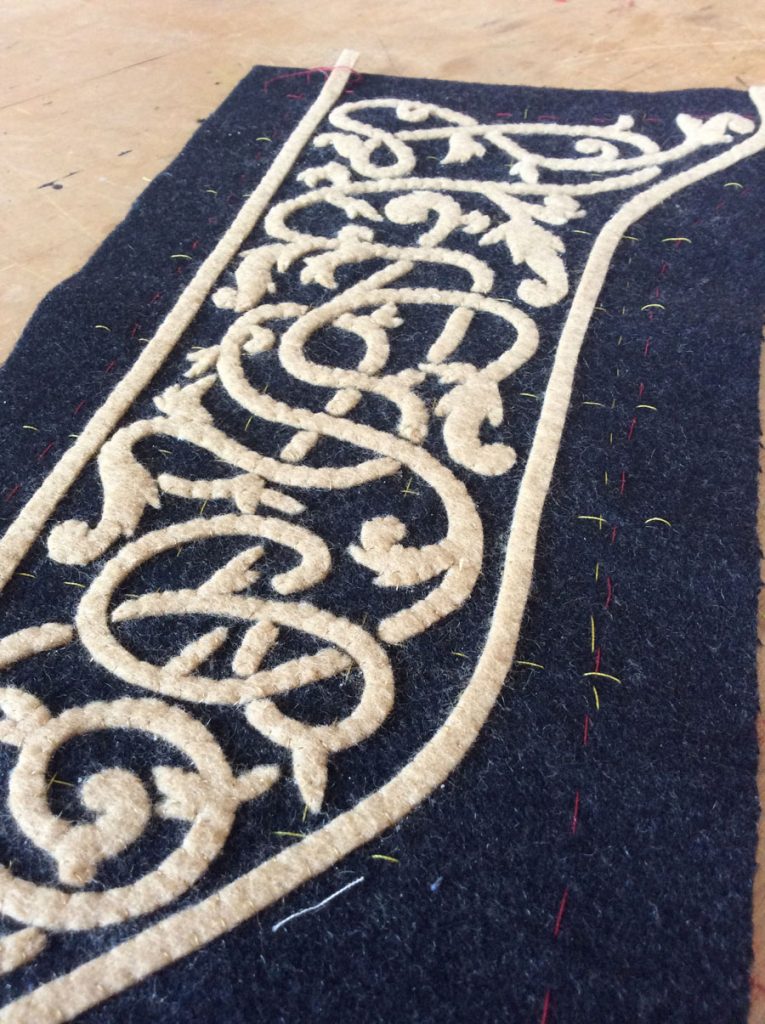
I sewed each piece down with a small whipstitch in fine thread. This was the point where it started to look like a real thing, which was exciting, but of course I still had a couple hundred hours of satin stitching to go.
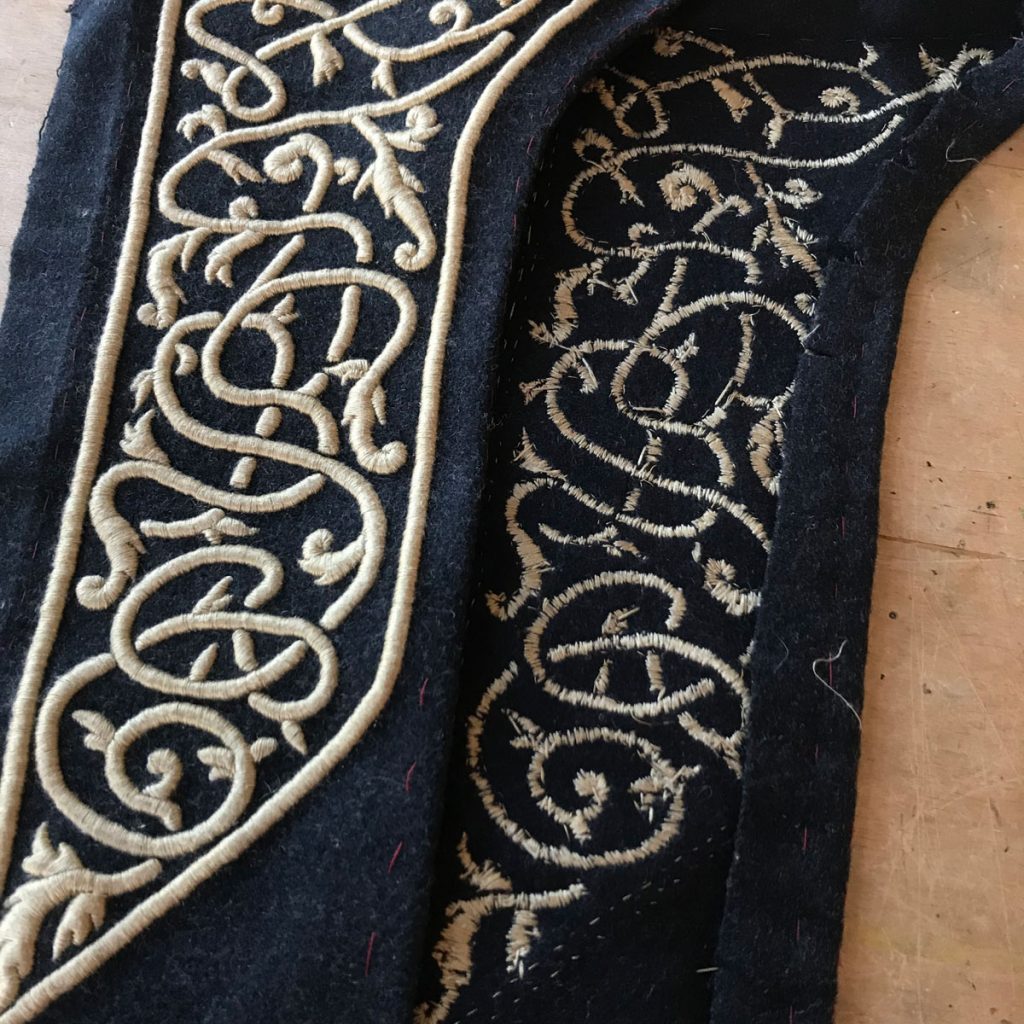
I started the satin stitching on the back of the skirt, which was both good and bad. It let me figure out the technique and stitching rhythm on a less visible part of the costume, but it also meant that the front and most visible part of the skirt was still unfinished as of the costume’s debut at NYCC 2018.
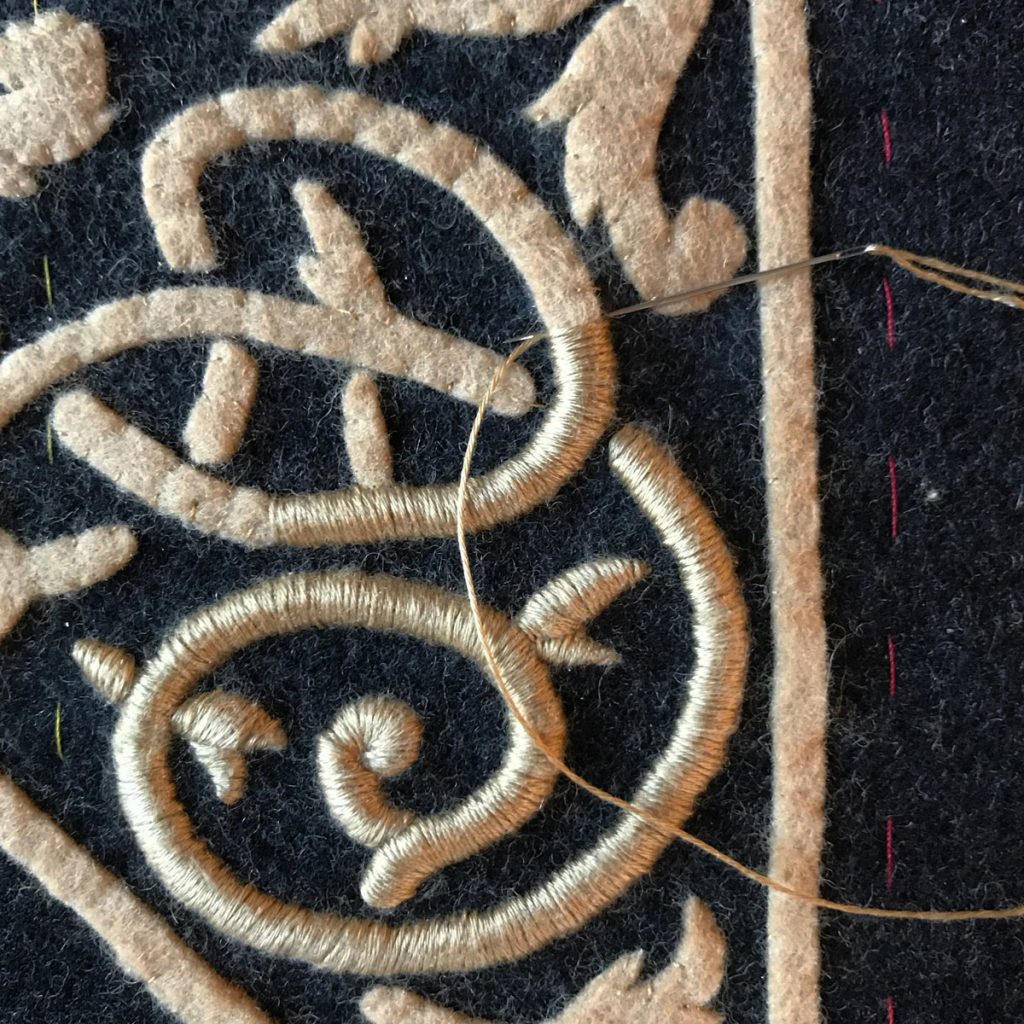
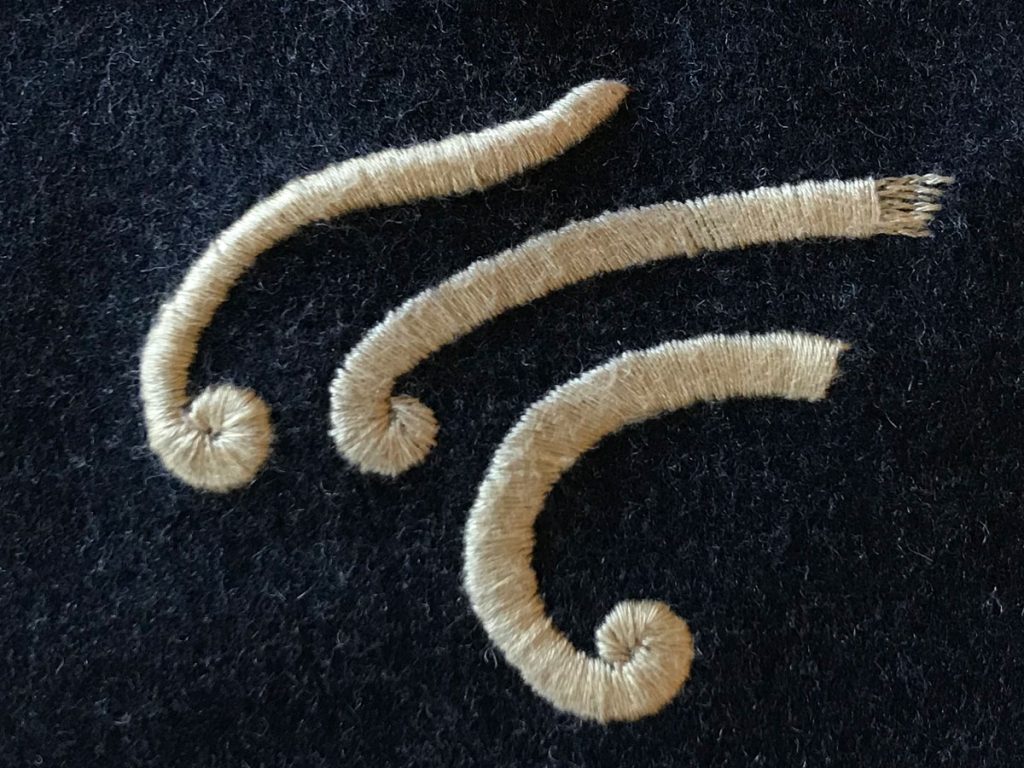
After the costume’s first outing, I took the skirt apart again to finish off the embroidery. The skirt in the art has a curious curly border design that didn’t match any stitch I’m familiar with. Given the amount of padding on the satin stitching, I knew I wanted something substantial so that the border wouldn’t look spindly in comparison.
What I came up with was a twisted fringe stitch, using a quadruple strand of the same embroidery thread twisted until it doubled back on itself. I stitched the fringe at roughly 1/4″ intervals around the border, then couched each strand down in the curl shape with fine thread.
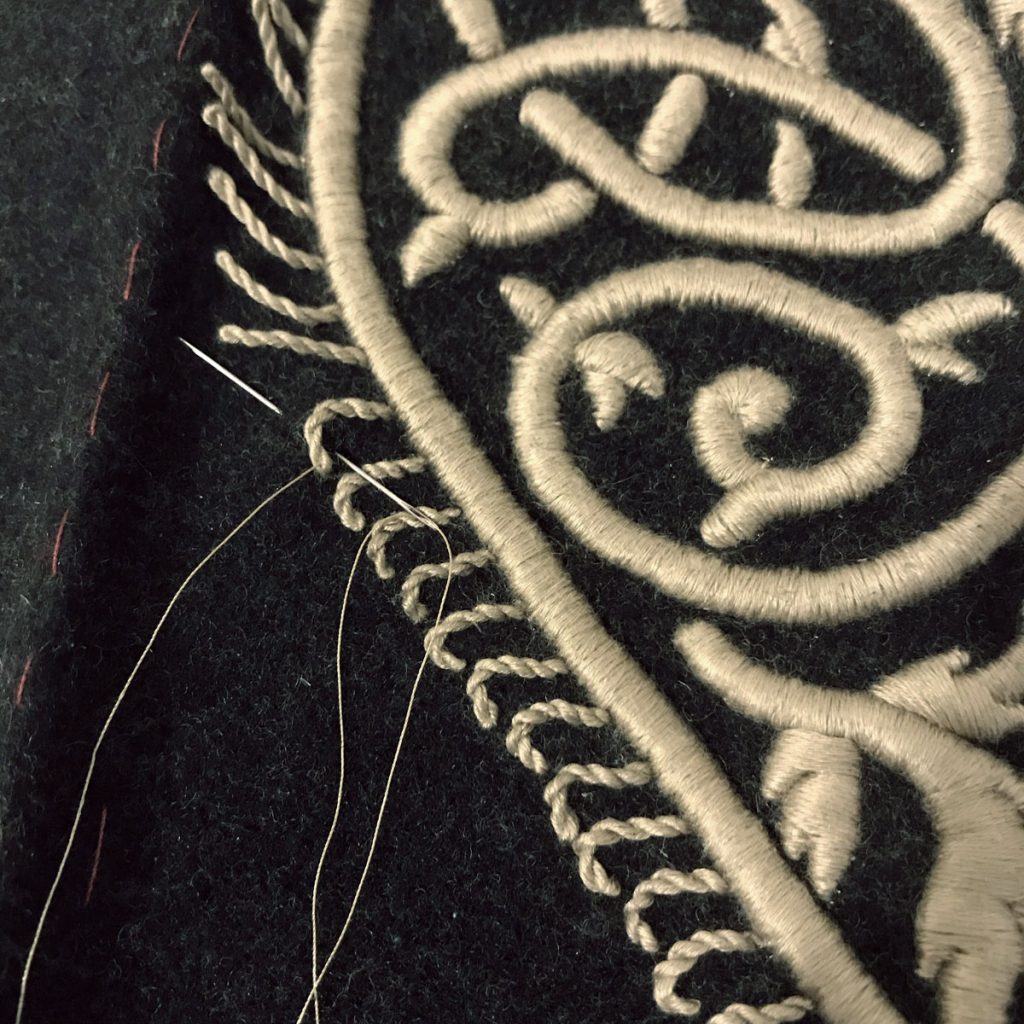
This may not be my sole invention, but it was not a technique I’d seen before employing it here! So there’s my gift to future Ciri cosplayers, I promise it goes faster than the satin stitching did.
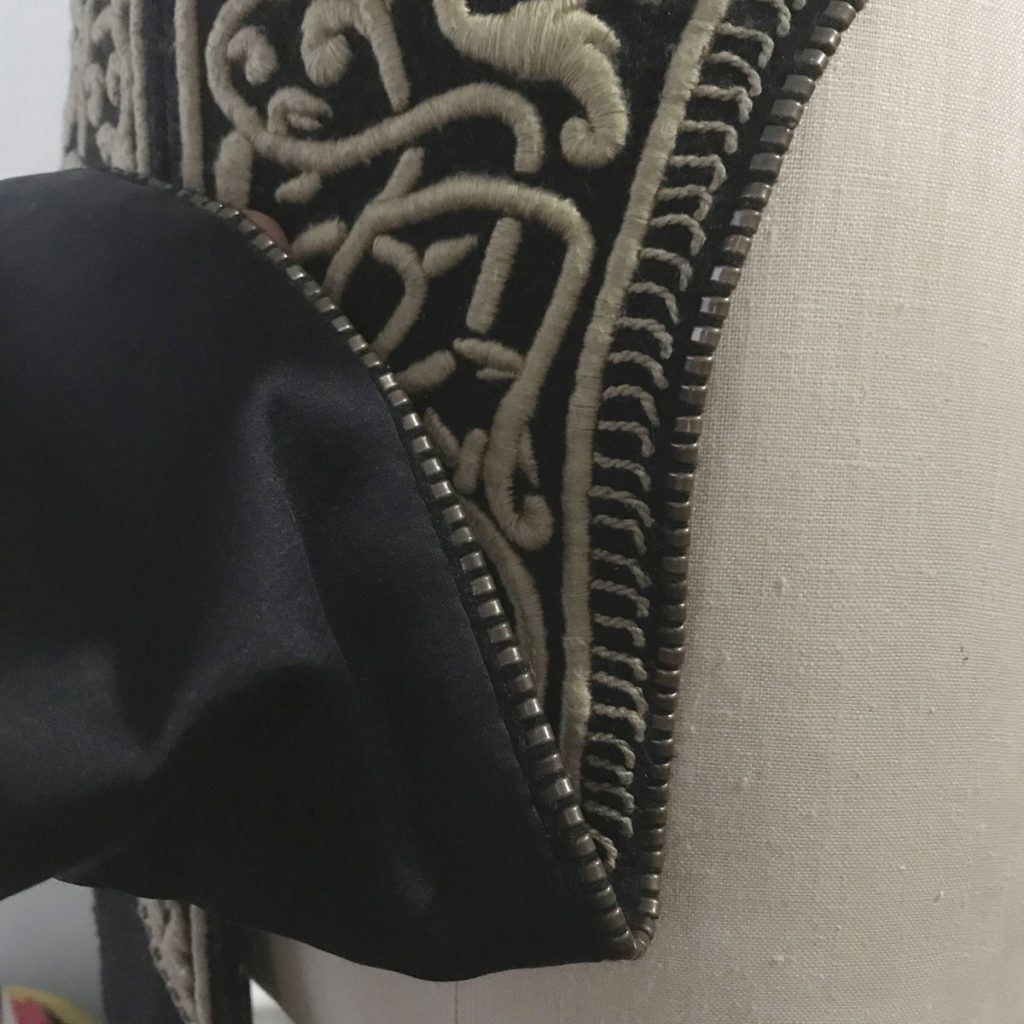
When all embroidery was complete, I assembled the panels and basted in the hem around the edges, then sewed in the cotton/rayon satin lining by hand. Finally, the outer edge was finished with several hundred individually applied size 7 zipper stops. (With thanks to Rachel Tobin, whose gift of 500 stops got me out of a jam when my usual supplier was out of stock at the last minute.)
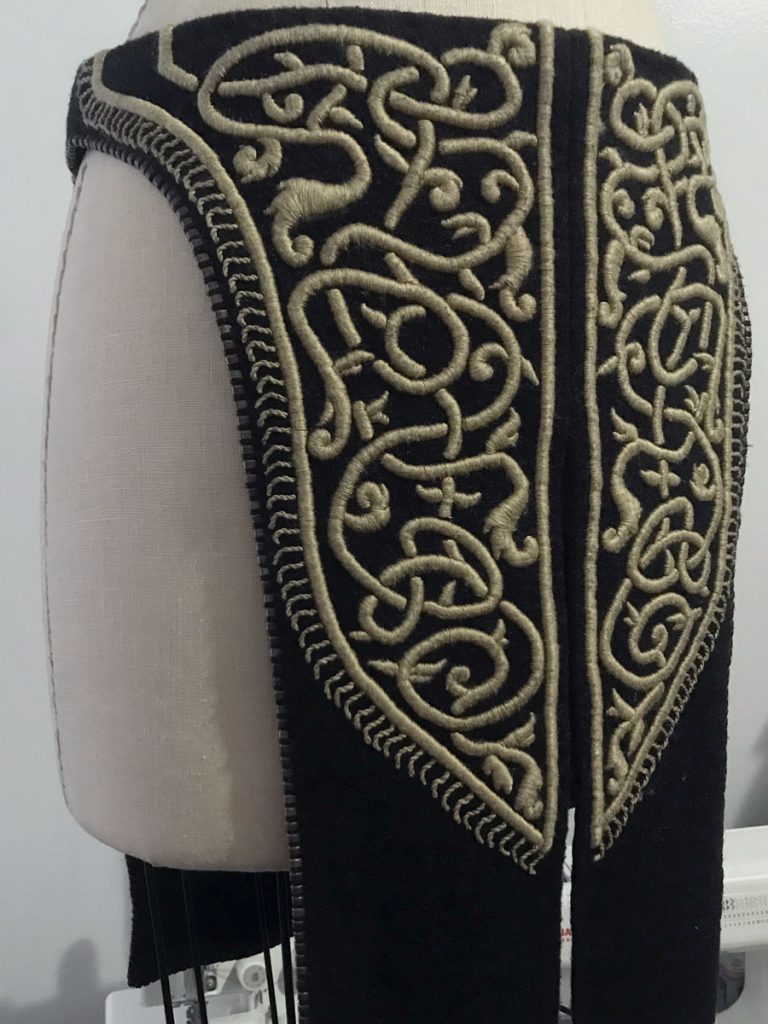
To prevent the stops from rippling the edge as they were applied, I sewed a hand gathering stitch along the folded edge of the fabric and pulled it up as I worked. I realized a bit too late that it would have been clever to do a piped edge, as it would have given the stops a little more meat to hold onto while preventing any distortion, but this worked well enough. Almost exactly a full year after I first started the embroidery, the skirt was done.