 One of the reasons I was drawn to cosplay Ezio is the amount of detail packed into his costume. For example: the embroidered border motif on the outside of the costume is echoed on the lining, and repeated on the collar of the inner jacket. Unfortunately, given the amount of time I had to pull this thing together, I didn’t fancy doubling my embroidery workload. Fortunately, the art suggested an interesting alternative.
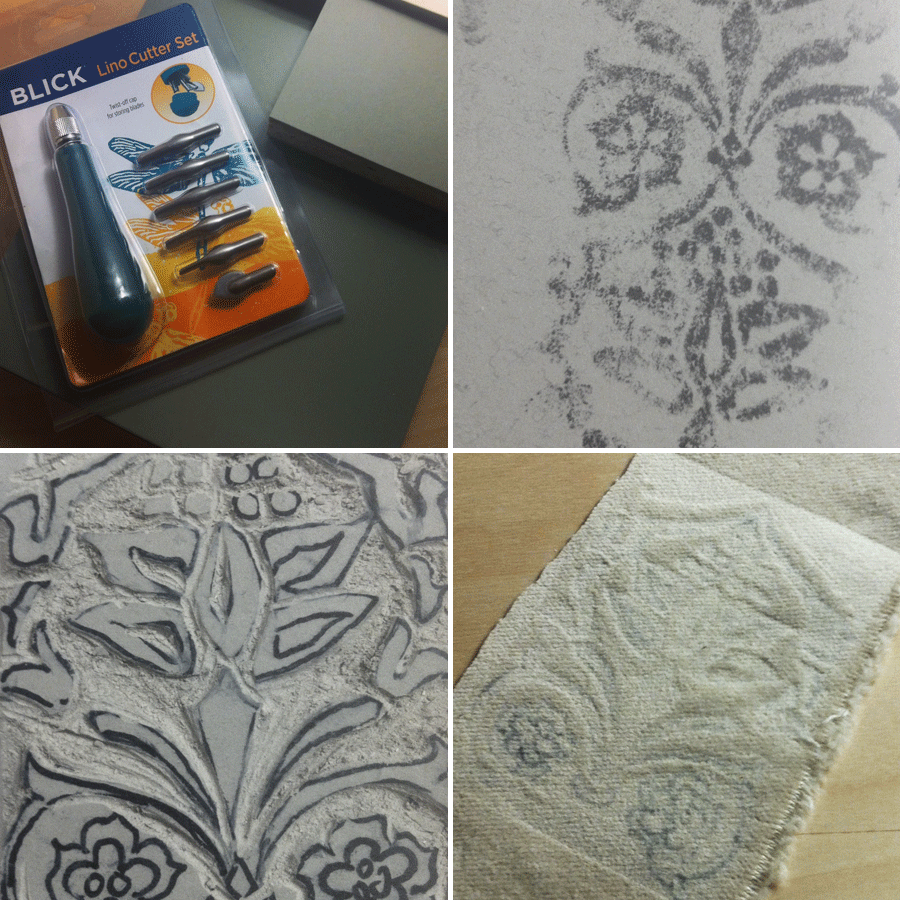
Some time ago, I’d stumbled across this Threads magazine article about embossing velvet. It’s a remarkably simple surface embellishment technique: all you do is place your velvet face down on a rubber stamp, moisten the back, and hit it with the iron for a few seconds. The stamp impression ends up flattened, shiny, and lighter in color, and if you use the right material the impression is more or less permanent. This technique has probably been around for as long as velvet has—if you’ve ever worked with the stuff you know that it takes some doing to avoid marking it up with the iron, so using this usually-annoying trait for decorative effect is almost a no-brainer. So it didn’t take much to convince me that this was exactly what I was seeing on Ezio’s costume.
I found lots of information about rubber-stamp embossing online, but not much at all about creating custom stamp designs. I probably could have had a stamp made for me, but being an adventurous sort my preferred option was to carve the stamp myself. This posed a bit of a dilemma. The tutorials I found took pains to note that red rubber stamps are safe to use with this technique because the vulcanization process used to create them is a lot hotter than the iron was likely to get. Unfortunately, that meant that the soft rubber blocks sold for printmaking probably weren’t (and the poor Blick employees I quizzed about it were very alarmed by the prospect.) I briefly contemplated a wood block, but concluded that I didn’t have time for that kind of learning curve.
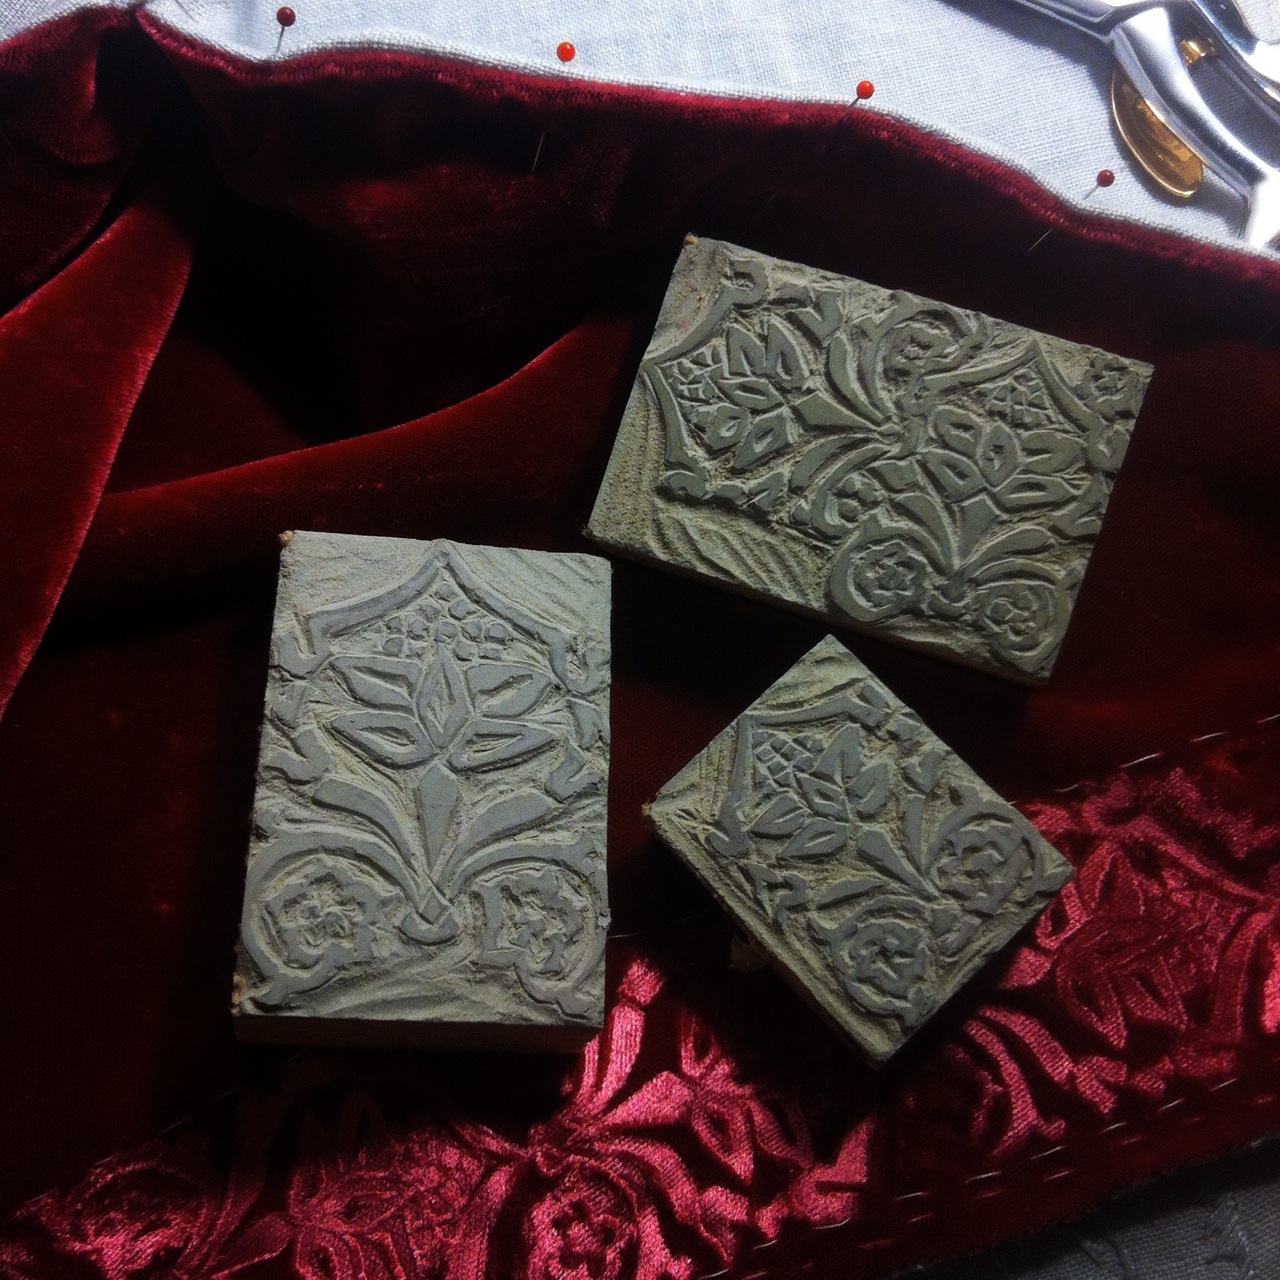
More research was in order. I chatted with a few artist friends, and was informed that it’s common practice to heat linoleum blocks to make them less brittle and easier to work. Given that it only needed to stand up to my crappy domestic iron, with a layer of velvet in between, I decided that linoleum was worth a shot. As a bonus, it was cheap: $15 in tools and $5 in materials later, I was in business.
 The next challenge was to transfer my design to the block. I tried regular waxed tracing paper, but it didn’t seem inclined to play nicely with the linoleum surface. Ironing the laser printed design face-down on the block produced a partial transfer, and got me close enough that I could touch it up with a pen. (This was my test run; I used a pencil for subsequent efforts to avoid transferring the ink to my fabric.)
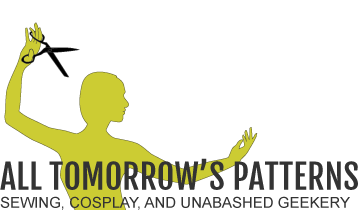
Carving the block itself was mostly a matter of tool acclimation and practice. It’s fiddly work and I ruined a block or two by gouging out chunks that needed to stay put, but it only took me an evening or two to produce something usable. I ended up carving three different stamps. I did the one at full size first, and it worked just fine for the lining on the tails. For the collar I made a version of the design at about 2/3 scale, and since the design needed to transition smoothly around the corner of the collar I also created a corner piece. I tested as I went with a chunk of cotton velveteen I had in the stash. Cotton doesn’t take or retain the impressions very well, but it was enough for a proof of concept before I went out and spent $$$ on silk or rayon.
For the actual velvet, I lucked out a bit. Rayon or rayon/acetate velvet is supposed to be the best for embossing, but hoboy is that stuff expensive. I planned to order some white rayon velvet from Dharma and dye it myself, but then I spotted a hint of raspberry-colored pile on a top shelf at Paron. There was barely a yard on the roll, but it was 50% off and I figured that at the very least I could use it for testing. As it happened, it was just enough to squeak out the pieces I needed. (Swallowtail lining, facings, and the collar four or five times over because I kept screwing up the stamp placement. That evening involved a lot of wails and gnashing of teeth. But that’s another story.)