
 When I hit the two-weeks-to-showtime mark on the Ezio project, I had exactly one piece (the shirt) assembled. I had a lot of bits and pieces cut, embroidery just about complete, embossing technique mostly sorted. Ten days out, I finally got around to basting up the waistcoat.
Fortunately it didn’t require substantial alterations, and I got to make fun of myself for wasting time basting shit by hand instead of tearing it to pieces and doing a slew of frantic adjustments. The bodice assembly was about as straightforward as it gets: staystitching, princess seams, set-in sleeves, etc. I used a slippery mystery synthetic lining in the sleeves so it wouldn’t catch too much on the shirt, and planned to line the rest of the bodice with muslin to keep it as breathable and easy to wear as possible.
 I used a line of basting to mark out the embossed band on the velvet for the lower tails, then stamped it out one motif at a time as described in this post. It’s a speedy process, but I can’t overstate my relief when it turned out looking decent—there’s no way to undo the embossing once it’s done, and if I’d screwed up the placement I would have been shit out of luck. I had barely a yard of the velvet to begin with, so there was no room to recut such a large piece (and at this point, basically no time to order more if it came to that.)
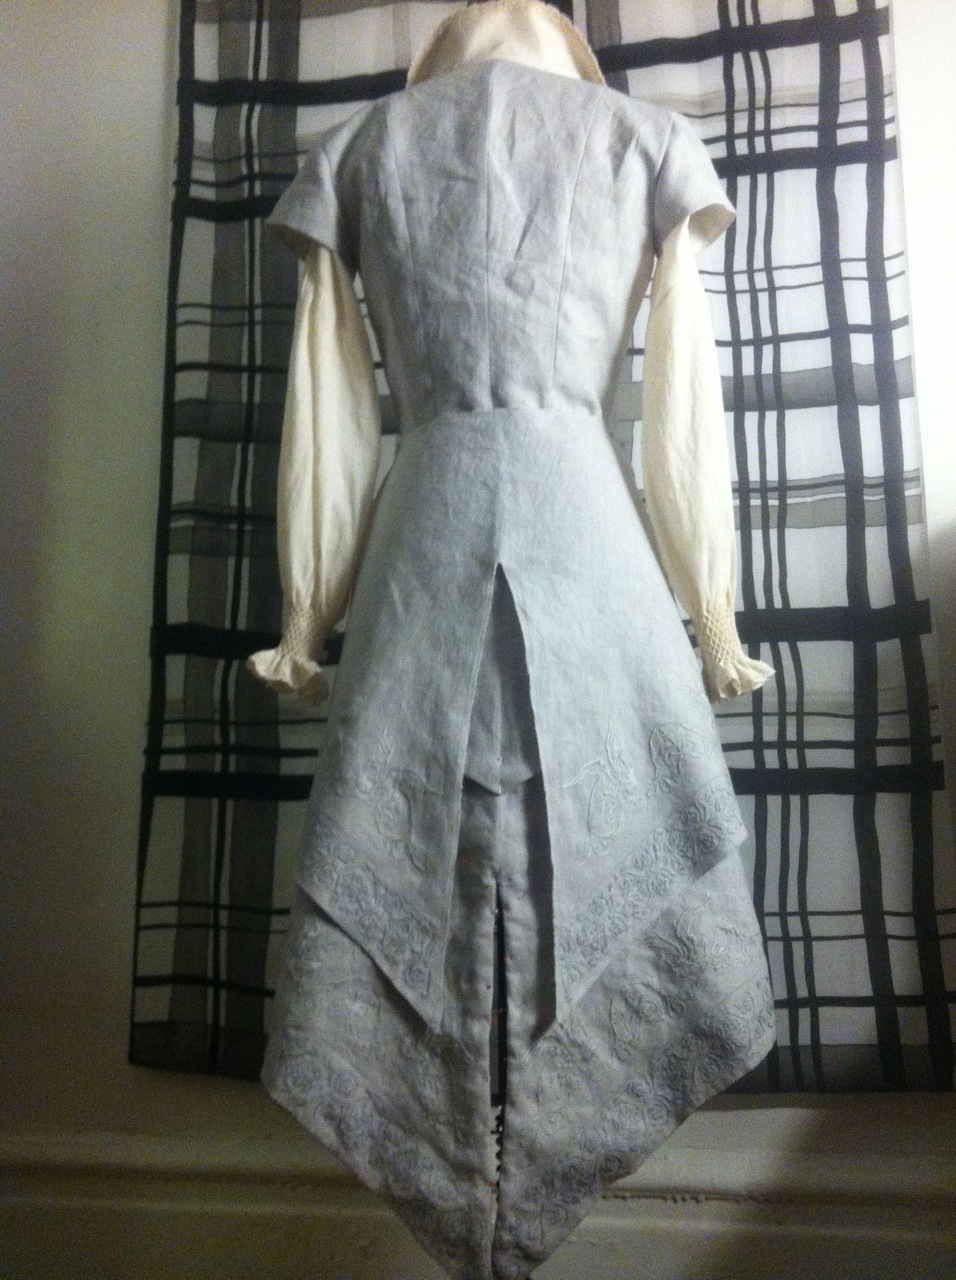
 I sewed the back vent first, placing velvet and linen with right sides together, then turned it right side out and machine basted around the outside edge to hold the layers together. After some waffling, I ended up understitching both sides of the vent by hand to make it lie flat.
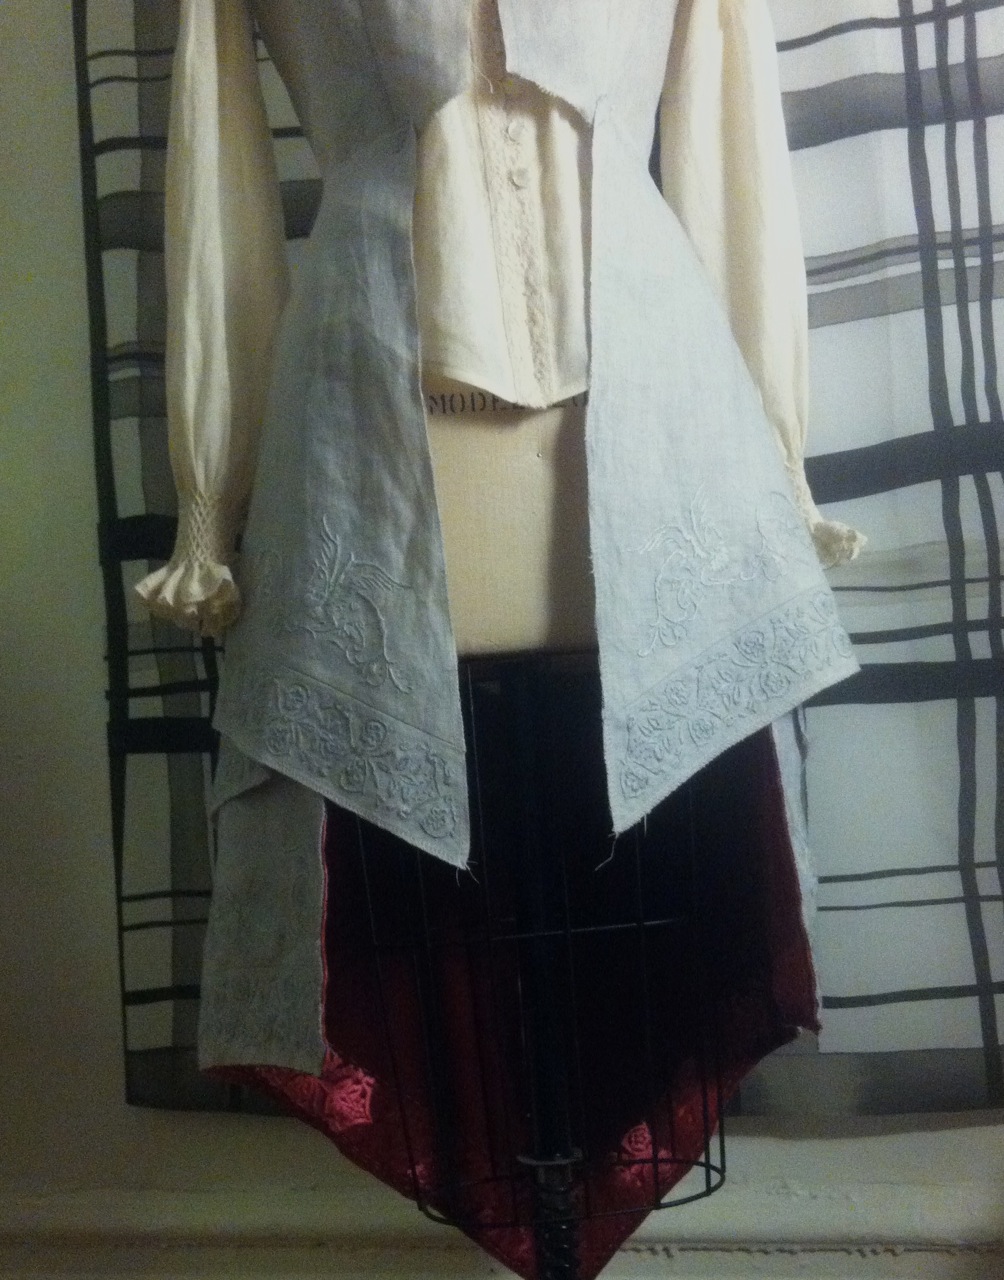
 To assemble the lower layer, I attached the tails to the upper edge of the chevron-shaped facing and the upper flap to the lower edge of the facing. Then I attached a cotton muslin stay to the inside of the facing to prevent it from sagging, and anchored the upper flap and facing together with a curved line of topstitching (backstitched by hand.)
Then I slapped it up on the dress form with all the layers pinned in place, for a brief gloating break.
 Looks like an assassin coat, right?
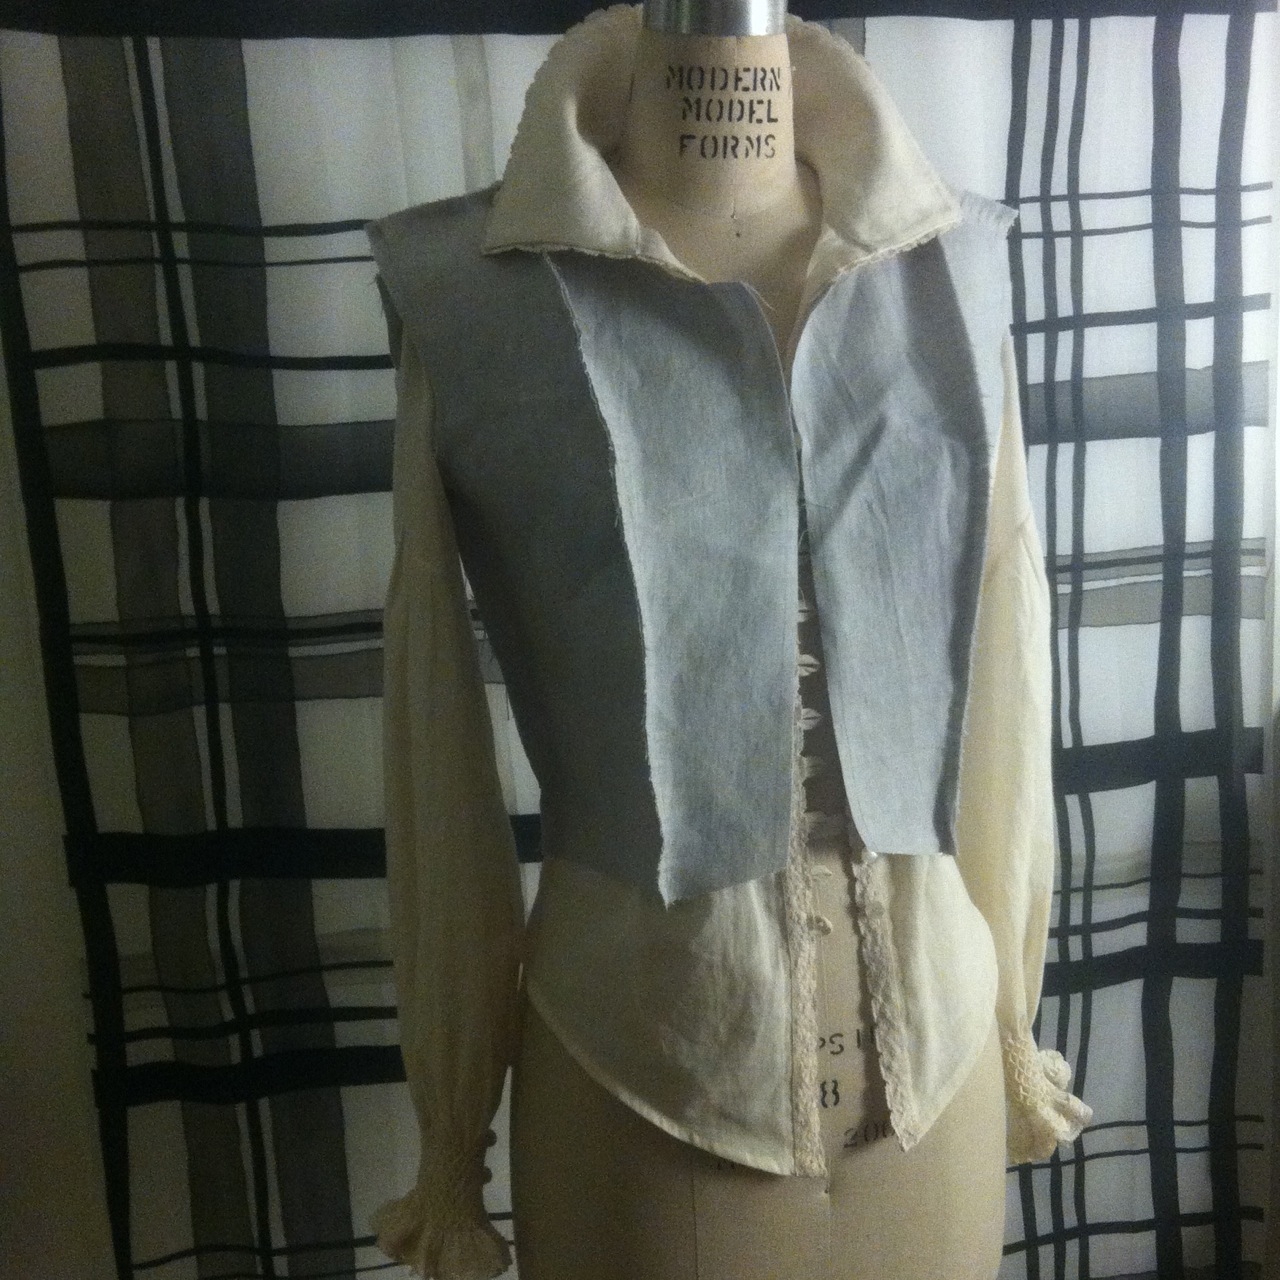
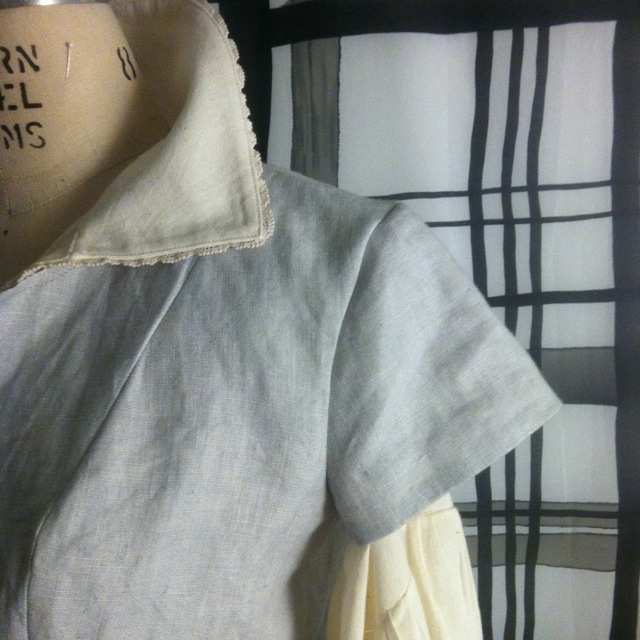
 The next step was to line the bodice. I cut the side fronts and all the back pieces from lightweight muslin, and the fronts from my velvet since they’d be partially visible. I went back and forth on how to do the embossing, because I wanted the design around the collar and down the facings to be continuous, and settled on doing it after I sewed the facings onto the fronts. Unfortunately the moisture and pressure of the embossing process ended up causing some dye transfer, so the linen is stained faintly pink along the front. This means I’ll have to be extraordinarily careful when it comes to cleaning this beast, but it’s never going to be worn without an underlayer so I shouldn’t have to do it very often. (And it was always going to be a handle-with-kid-gloves kind of piece given the amount of hand embroidery and delicate, crushable velvet involved.)
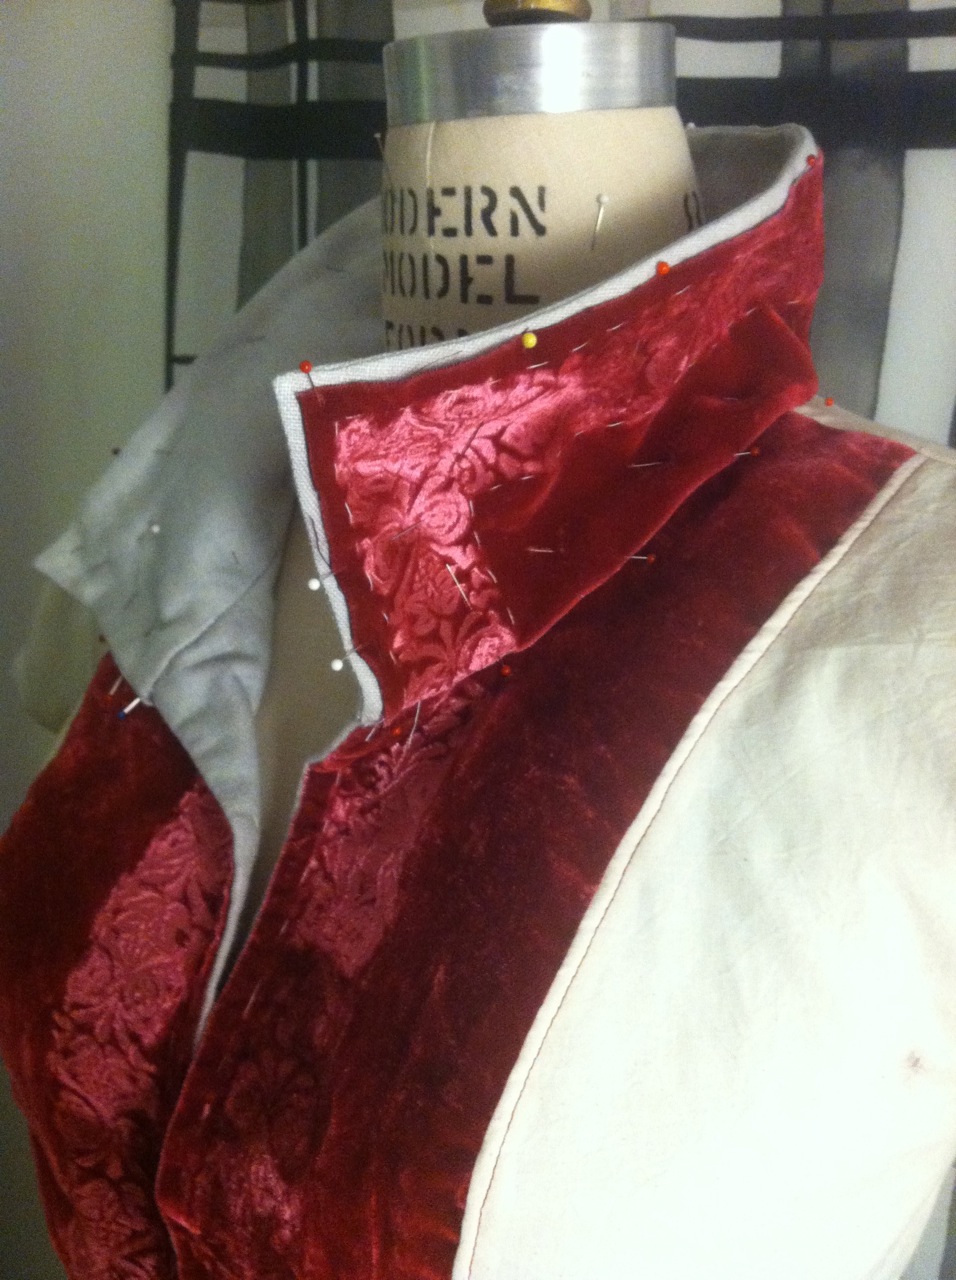
All my wonderful embossing-things-correctly luck must have run out, because embossing the collar was an epic slog. I carefully basted out my placement, lined the stamps up, stamped just as I had for all the other pieces, and the stamps kept landing crooked or overlapping awkwardly or wandering out of line. I must have recut the damn thing five or six times, and ended up running out of velvet and having to salvage half of one of my early, unsatisfactory attempts because I didn’t have enough left to cut the entire thing in one piece anymore. But given the highly visible location, I felt justified in indulging a little perfectionism.
I hand-sewed the collar lining in place around the edges, pulled out the basting, and set it aside until I could find and apply trim.