
I knew from the beginning that I wanted to do all the embroidery in Ezio’s outfit by hand. I’ve seen some quite good interpretations that used machine embroidery, and certainly that’s the sane and sensible way to tackle a large repeating motif like this project demands, but I’m a resolved Luddite where sewing machines are concerned and have never wished to own anything but a plain mechanical. Between that and the feeling that hand embroidery was more in the spirit of this historically-flavored costume, my fate was sealed.
I admit, this section was a big part of my motivation for taking on this whole project. Apparently a really intimidating amount of handwork is what it takes to spark my interest these days.
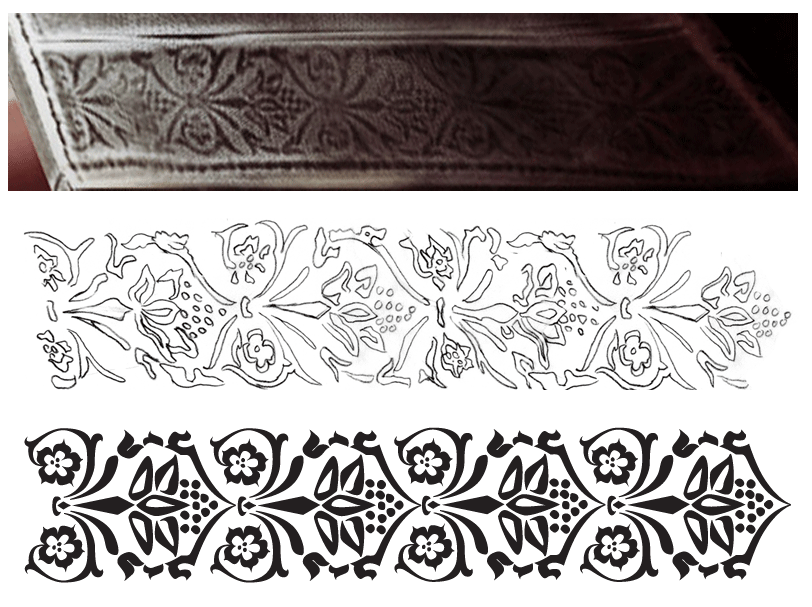 The first challenge was to come up with a good embroidery pattern and figure out how to transfer it to my fabric. The cosplay.com message boards directed me to a truly colossal reference image, but even this wasn’t quite enough to fully resolve the embroidery design. I ended up using Photoshop to blow the image up to the correct scale, then printing it out and refining the details by hand. Then I scanned it in and drew over it in Illustrator to get a crisp, symmetrical, easy-to-trace pattern that I could print out and position on my pattern pieces. Later, I repeated this same process for the gryphon and scroll motifs that appear above the border.
 Here I had to pause and do a bit more fiddling with the pattern pieces. The art shows a line along the top edge of the border embroidery, which I interpreted as a seam, so I slashed the bottom couple inches off of each panel and added seam allowances along the cut line. I copied the motif to fit several on a page, printed them out, and arranged them on the border pattern pieces to map out the embroidery placement. This required a little fiddling to make it work out to an orderly number of repeats on each panel, and where the hem curved I snipped into the motifs to make them curve as well. (And yes, my pattern is a crazy patchwork mess at this point. I could have avoided this by doing everything digitally, and probably will in the future to avoid this clunky hybrid approach, but I’m the only one who needs to understand them so it worked out okay.)
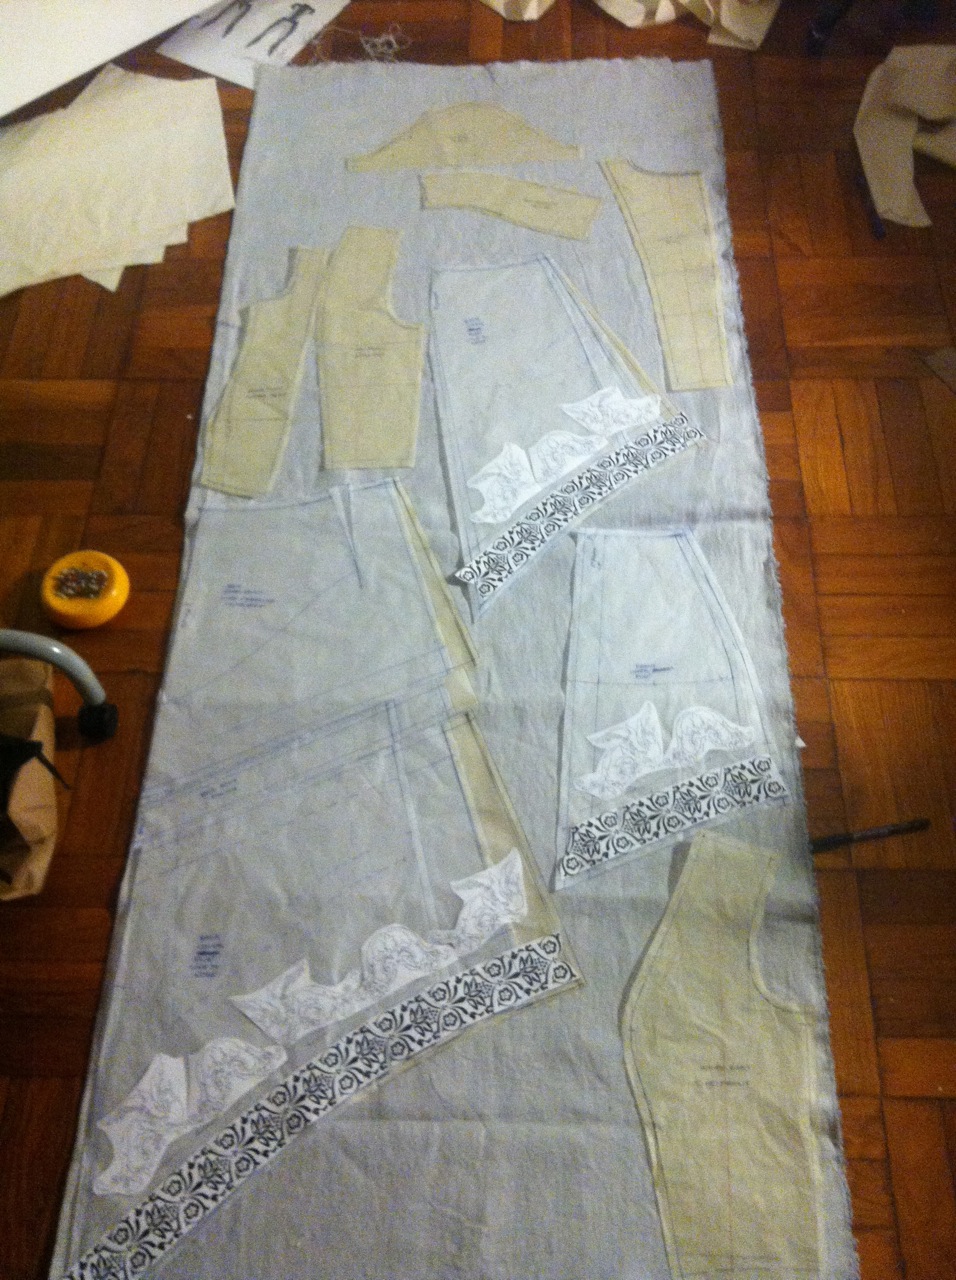
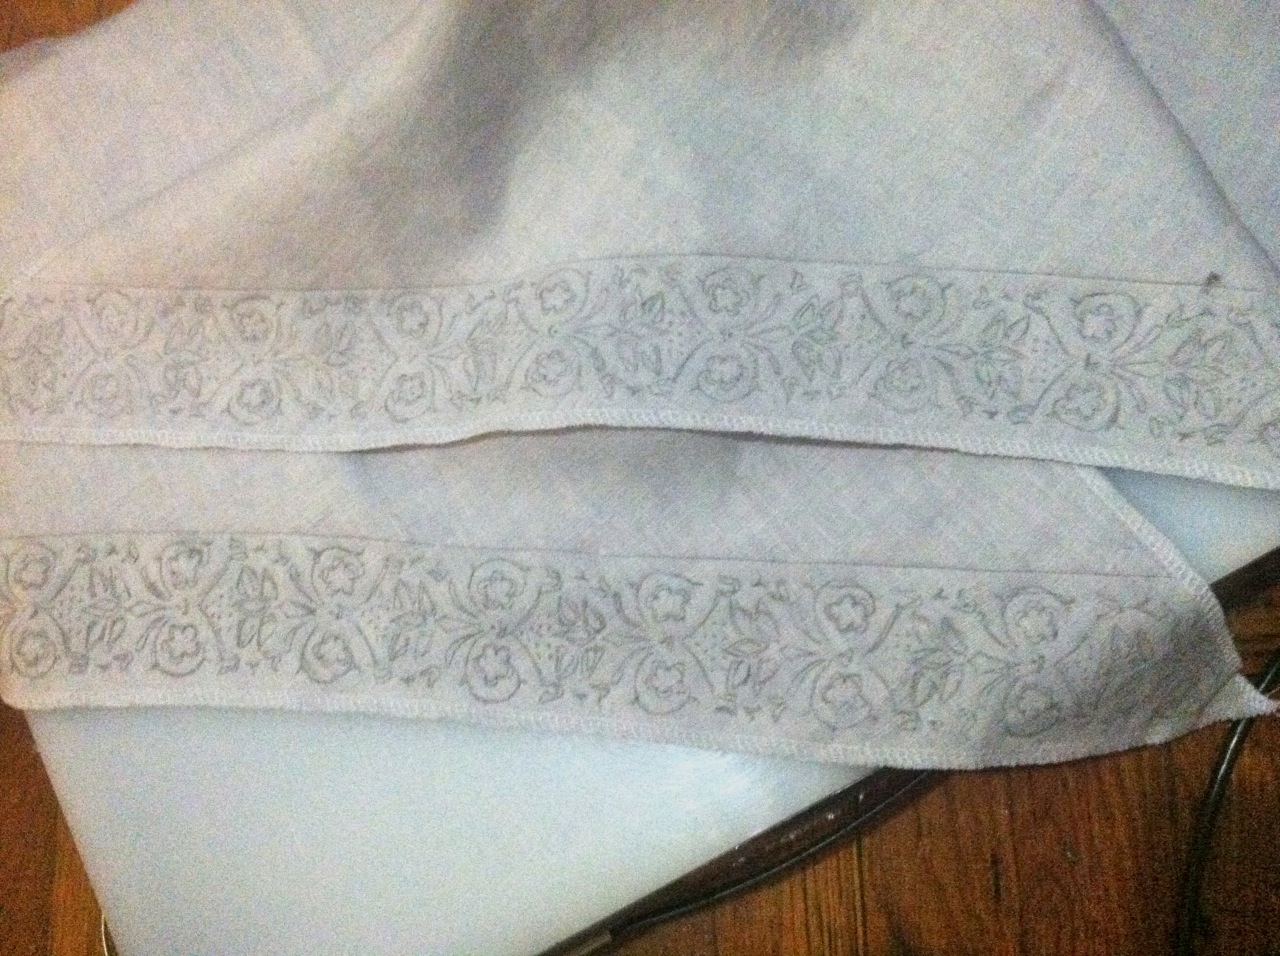
I had two pieces of my precious hand-dyed linen, each about two yards in length. I did a rough layout of my jacket and swallowtail pieces on one of them to make sure everything would fit, then took a deep breath and cut out the tails. I immediately sewed the hem bands onto their respective panels, because I was afraid the bias edges would distort otherwise. Then I serged all the way around the panels to control fraying while I worked on them.
I tried a couple techniques for transferring the design to the linen, and settled on a plain old lightbox and pencil. A soft 6B drawing pencil worked best; anything harder than that tended to drag the linen threads around instead of producing a smooth line. It wasn’t the speediest method, but it produced a sharp, unambiguous image that made my life a lot easier later. Since both the fabric and my embroidery thread were in shades of gray, a little bit of stray graphite wasn’t going to hurt anything either.
Next up: two weeks, six audiobooks, and ten skeins of embroidery floss.